
J - How to Make, Print, and Bind Your Own Books. Bookbinding 101: Your First Book. Last week I gave you a fast and dirty introduction to binding your own books.
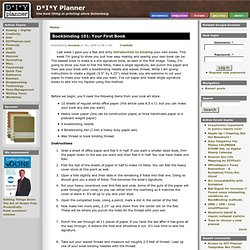
This week I'm going to show you just how easy making and sewing your own book can be. The easiest book to make is a one signature book, as seen in the first image. Today, I'm going to show you how to fold the folios, make a single signature, awl punch the paper and then sew your book with a bookbinding needle and waxed thread. While I am giving instructions to create a digest (5.5" by 4.25") sized book, you are welcome to cut your paper to make your book any size you want.
I've cut paper and made single signature books to add into my Hipster using this method. Before we begin, you'll need the following items from your local art store: Instructions Grab a sheet of office paper and fold it in half. And that's it. Rip the edges of each folio so it has a "rough edge" to it. Next, week I will step things up a bit more and show you how to make another, more intermediate, book that you can make.
Douglas W. Jones on Bookbinding. Index If books had been invented after the computer, they would have been considered a big breakthrough.
Books have several hundred simultaneous paper-thin, flexible displays. They boot instantly. They run on very low power at a very low cost. Make Your Own Moleskine-Like-Notebook. What we'll make: Your very own Moleskine-like-notebook/journal/sketchbook. The one we'll be making is 3.5 x 5.5 x .5 inches. I use this size because it fits nicely into my back or front pants pocket. Strangely enough it is also the same size as the Moleskine notebook. For the pages we'll be using 20# bond paper (the same paper you use in your copier and inkjet printer). Don't be put off by the many steps involved.
This particular notebook was developed over many years of feeble attempts to organize my thoughts, appointments and small sketches. I hope you enjoy making and using them as much as I have. Table of Contents: Page 1. Materials Needed: 24 sheets of paper 8.5 x 11 inches (use 20# bond at first then you can try other types of paper) One 8.5 x 11 inch sheet of a "special" paper . Tools Needed: A bookbinders needle . Step 1. Take a sheet of your paper, t-square, triangle and pencil and mark your cut lines as shown. Step 2. Making your own book! Screw Post Binding. Conservation Book Repair. Conservation Book Repair: A training manual by Artemis BonaDea Illustrated by Alexandria Prentiss Alaska State Library, Alaska Department of Education, 1995 Download Files Many conservation book repair programs in Alaska owe much to the author of this work.
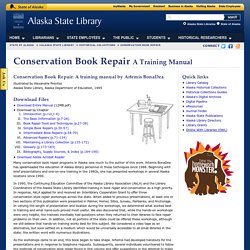
Artemis BonaDea has spearheaded the education of Alaska library personnel in these techniques since 1988. Beginning with brief presentations and one-on-one training in the 198Os, she has presented workshops in several Alaska locations since 1990. In 1990, the Continuing Education Committee of the Alaska Library Association (AkLA) and the Library Coordinators of the Alaska State Library identified training in book repair and conservation as a high priority. As the workshops came to an end, this book began to take shape. The Alaska State Library and the Alaska Library Association collaborated in producing this publication, but primary credit must go to Artemis BonaDea who has worked very hard to make this a successful publication.