

16 Headband Tutorials. As a busy mom of three little boys, I don’t always have time to do my hair.
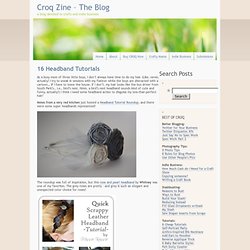
(Like, never, actually! I try to sneak in sessions with my flatiron while the boys are distracted with a cartoon… IF I have to leave the house. If I don’t, my hair looks like the bus driver from South Park’s… i.e., bird’s nest. Summer bracelets DIY. When M. came home from her camp with school, she showed me this yellow bracelet she made with 'scoubidoo' strings.

One of her friends taught her how to make these and of course I wanted to have a go at it too. Instead of scoubidou string I used strips of fabric for one and leather - what did you think?! - shoelaces in offsetting colors for another one. I believe both resulting bracelets look really nice. The possibilities in terms of material to braid with are endless.
So, in case you 're in need of a fun summer project here's a how-to in 16 pictures with a short description below. This is what you'll need for an adult size leather bracelet. Steps: 1. This is the kind of craft you could easily do with kids - have them cut strips of fabric, no need to worry about the strips being straight and regular, and teach them how to braid. With special thanks to my little girl M. for teaching me how to make these... Flax & twine: Day 2: A Bow Bracelet - a diy ribbon jewelry tutorial. Ohh, I love this one.
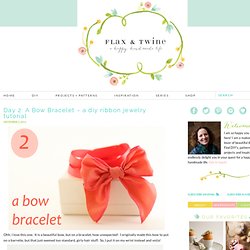
It is a beautiful bow, but on a bracelet, how unexpected! I originally made this bow to put on a barrette, but that just seemed too standard, girly hair stuff. Flax & twine: Day 6: A Pearl Cuff - a diy pearl and felt bracelet. This is one of my favorites of the entire collection.
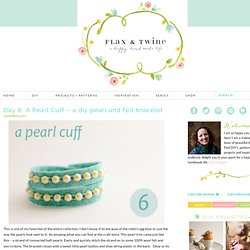
I don’t know if its because of the robin’s egg blue or just the way the pearls look next to it. Its amazing what you can find at the craft store. This pearl trim came just like this – a strand of connected half-pearls. Easily and quickly stitch the strand on to some 100% wool felt and you’re done. The bracelet closes with a sweet little pearl button and shoe string elastic in the back. For a menu of all the other glammy, fun, jewelry tutorials, check out this page. Materials: 100% wool felt Corded elastic DMC 25 embroidery floss Flat pearl trim Pearl button Needle Scissors Ruler Time: 30 minutes Cut a half inch strip of felt. I like to sew on the trim first and then measure the wrist later.
Start by securing your embroidery floss Sew the trim to the felt, keeping the string of pearls oriented in the middle of the strip. Following that pattern of bottom strand, top strand, consistently will make the back nice to look at too. Finis! Flax & twine: Day 3: Sparkle Headbands - a diy headband tutorial. Theses headbands I want to keep for myself.
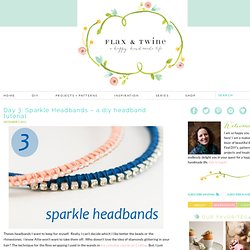
Really, I can’t decide which I like better the beads or the rhinestones. I know Allie won’t want to take them off. Who doesn’t love the idea of diamonds glittering in your hair? Flax & twine. Flax & twine: Day 1: A Strand of Pearls - a diy ribbon and pearl necklace. Yippee–here it is–Day number 1.
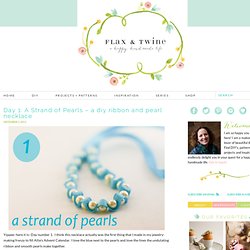
I think this necklace actually was the first thing that I made in my jewelry-making frenzy to fill Allie’s Advent Calendar. I love the blue next to the pearls and love the lines the undulating ribbon and smooth pearls make together. This ribbon strand ties in a bow in the back to whatever length your little girl desires. The overall length on this one is 28″, but with the bow, she can shorten it to whatever length she likes. The necklace is super easy to make. I thought I couldn’t get better than the blue until I made the sample for the easy diy tutorial below – I just ADORE the green.
Materials: -1/4″ ribbon -faux pearl beads -needle -embroidery floss/thread Time: Approximately 30 minutes Cut your ribbon to desired length, adding enough length to flow in and out between the pearls. Pierce the ribbon in the middle of its width approximately 9″ along your piece of ribbon. DIY: Hand Painted Mug. October 17th, 2011 I’ve been wanting to try porcelain paint for a while, and it’s just as amazing as I anticipated.
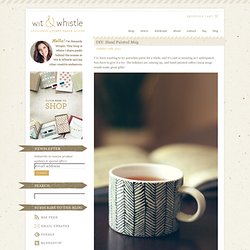
You have to give it a try. The holidays are coming up, and hand painted coffee/cocoa mugs would make great gifts! Supplies: porcelain mug (mine is from CB2) Pebeo Porcelaine 150 outliner (available at Dick Blick) There are transparent porcelain paints that you apply with a brush and outliners which are thicker and opaque. If you want to achieve the ink-like look that I did, go with an outliner.