
World War Machine — Mouhsine Adnani - Senior 3D Environment Artist - 3d Environment Artist. Church Game Environment UDK by amaterasu111 on deviantART. 3D Realistic Environment based on The Cartagena Colombia Chapter inUncharted 3. This was a 30 day, 3 person project to create a realistic 3D environment in UDK based on an existing game.
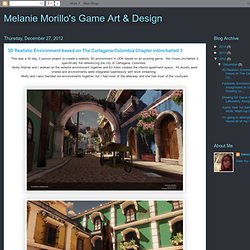
We chose Uncharted 3, specifically the referencing the city of Cartagena, Colombia. Molly Warner and I worked on the exterior environment together and Eli Allen created the interior apartment space. All assets were shared and environments were integrated seamlessly with level streaming. Molly and I also blended our environments together, but I had most of the alleyway and she had most of the courtyard.
THE FUSILIER'S ARCH (GATE A) The Fusilier's acrh is a personal project what I did in my free time.
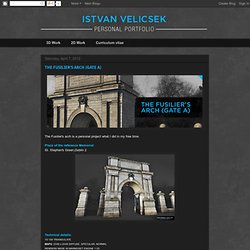
Place of the reference Memorial: St. Stephen's Green,Dublin 2 Technical details: MAPS: 2048 x 2048 DIFFUSE, SPECULAR, NORMAL. 3DS Max Basics Vray Displacement Mod tutorial. Displacement mapping within 3DS Max can rapidly increase poly counts because the more detail you require then the more polygons you will need.
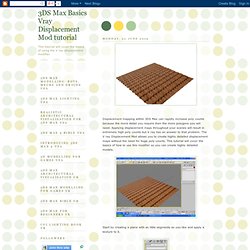
Applying displacement maps throughout your scenes will result in extremely high poly counts but V ray has an answer to that problem. The V ray Displacement Mod allows you to create highly detailed displacement maps without the need for huge poly counts. This tutorial will cover the basics of how to use this modifier so you can create highly detailed models. Start by creating a plane with as little segments as you like and apply a texture to it.
Apply the Vray Displacement Mod which can be found right near the bottom of the modifier list. Under parameters select 2D Mapping and then choose your displacement image in the empty Texmap box. The resolution parameter is the amount of detail you would like the displacement map. Once you have done that then hit render to see the results. Accurate Displacement Workflow. Intro This tutorial attempts to cover and clarify the process of generating and applying accurate displacement maps from either ZBrush or Mudbox, to V-Ray for Maya, V-Ray for 3ds Max, V-Ray for Cinema 4D, or Arnold for Maya (MtoA).
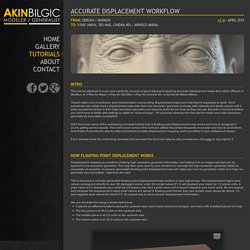
There's often a lot of confusion and misinformation surrounding displacement maps and how they're supposed to work. You'll sometimes see artists load a displacement map onto their low resolution geometry and play with intensity and depth values until it looks somewhat similar to their high resolution geometry and assume that's it's as close as they can get. 3D Modeling Portfolio.
LuxXeon's Journal. Car Modeling Using 3ds Max. 3DS MAX Mental Ray. Second Picture is devoted to original tutorials about 3D graphics, Photoshop, Photography and Web Design.
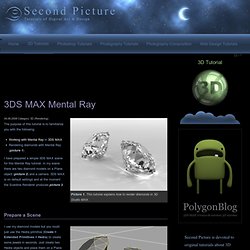
Picture 1. This tutorial explains how to render diamonds in 3D Studio MAX. 04.08.2008 Category: 3D (Rendering) The purpose of this tutorial is to familiarize you with the following: I have prepared a simple 3DS MAX scene for this Mental Ray tutorial. In my scene there are two diamond models on a Plane object (picture 2) and a camera. 3DS MAX is on default settings and at the moment the Scanline Renderer produces picture 3.
Prepare a Scene Picture 2. Night Interior Rendering Tutorial (using vray and 3d max) This is a follow-up of the Night Exterior Rendering Tutorial that I have written a while ago, so if you haven’t checked that one already, I advice you to read it before this one.
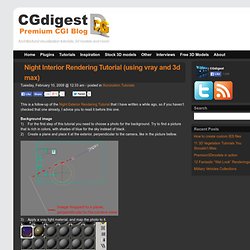
Background image 1) For the first step of this tutorial you need to choose a photo for the background. Try to find a picture that is rich in colors, with shades of blue for the sky instead of black. 2) Create a plane and place it at the exterior, perpendicular to the camera, like in the picture bellow. 3) Apply a vray light material, and map the photo to it. 3DSMAX Tutorials, Maya Tutorials, Cinema4D Tutorials, Photoshop Tutorials, ZBrush Tutorials, Blender Tutorials, Mudbox Tutorials. Hello.
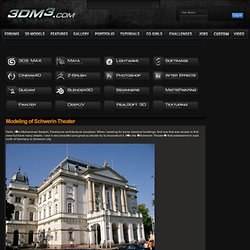
Im Mohammad Saatchi, Freelancer architectural visualizor. When I seeking for some classical buildings, find one that was simple in first view but have many details. I see it very beautiful and great so decide try to reconstruct it. Its the Schwerin Theater that established in east north of Germany in Schwerin city. The theater photo. Problems: Create a Hanging Lantern in 3D Studio Max: Part 3 - Tuts+ 3D & Motion Graphics Tutorial. 3Ds Max author Ben Tate is back once again with the final part of this exclusive 3-part tutorial series covering all of the processes involved in creating 'The Lantern'.
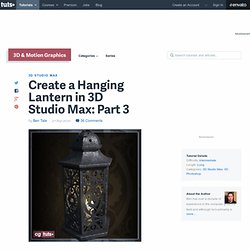
After modelling the lantern in the first part and UVing in part 2, today Ben sets about adding the final textures to the lantern model. Let's get started! In this tutorial we'll go through the entire process of modelling, uvmapping, texturing, lighting and rendering an old lantern in 3d Studio Max. Creating a Next-Gen Video Game Hot Rod: the Complete Workflow: Part 1 - Tuts+ 3D & Motion Graphics Tutorial. Ever wanted to know how the artists create those amazing cars for AAA video game titles?
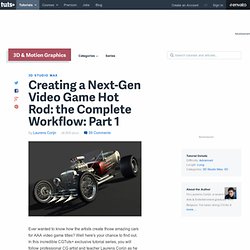
Well here's your chance to find out. In this incredible CGTuts+ exclusive tutorial series, you will follow professional CG artist and teacher Laurens Corijn as he creates a high quality, next-gen, normal mapped Hot Rod for realtime use. Republished Tutorial Every few weeks, we revisit some of our reader's favorite posts from throughout the history of the site. This tutorial was first published in January of 2010.
A New Collection of 3DS Max Tutorials. Tutorials : 3ds max: Lighting with standard max lights. Lighting with standard 3ds max lightsby Sin-D ( In this tutorial I'll show you how you can easily create good lighting without a expensive rendering system, just max and the default scanline renderer.
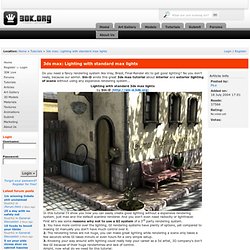
And you don't even need radiocity or lighttracer. First let's see some reasons why not to use a GI system of a 3rd party rendering system. 1. You have more control over the lighting, GI rendering systems have plenty of options, yet compared to making GI manually you don't have much control over it. 2.
UVW Unwrapping a Sofa - 3Ds Max Tutorial - VISCORBEL. Before we start this 3Ds Max UVW Unwrap Tutorial, I’m going to make a confession… I absolutely HATE doing UVW unwrapping – for me it’s the most boring part of 3D. If at all possible I just use simple UVW mapping options (planar,box,cylinder, etc) For 90% of the work its enough to throw on some box maps on faces or elements and call it finished, especially if it’s a rigid object like a wooden chair or cupboard.
But sometimes, when you need that extra level of detail and realism, there is now way around it – you simply have to use the Unwrap UVW modifier. Even though I’m not a very skilled unwrapper, I decided to make this tutorial as many of you asked for it, so take this video with a grain of salt. My most used tools will be Pelt Map and Relax tool. Model a Modern Spiral Staircase in 3ds Max - Tuts+ 3D & Motion Graphics Tutorial. 3DS Max Tutorial : Modeling Land Rover Freelander - Free Tutorial and Design Idea on tutorius.net. January 24, 2011 Filed Under: 3DS Max 3DS Max Tutorial : Modeling Land Rover Freelander. This is an old Evermotion tutorial by Pawel Gajlewicz, it’s a basic modeling tutorial that shows only few options, which allow you to model a 3d complex car. To start this model you will need some schematics or blueprints of vehicle in question, the 3d model Land Rover Freelander. A final touch is to connect appropirate parts together, just like shown with the hood at the beginning of the 3d modeling tutorial.
Copy the others with the mirror function. Download PDF 3DS Max Tutorial : Modeling Land Rover Freelander. An Introduction to 3ds Max: Polygonal Modeling - Part 1. Of all of the high-end 3d apps on the market, 3ds Max is by far one of the most powerful. It is, however, also one of the most complex and daunting 3d apps to learn. In this two part tutorial series, professional video game artist, Kaleb Aylsworth, will give you a detailed introduction to 3ds Max, as it pertains to polygonal modeling and the video game industry. In this, the first part of the series, Kaleb will spend an hour and a half walking you through many key skills such as: navigation, changing views and shading modes, menus and tabs, and most importantly, the polygonal modeling tools.
Four hour length tutorial on how to model a building for 3d interactive visualization. Among all the techniques used to create 3d models for visualization, the most used for architectural visualization is edge modeling followed by subdivision modeling. The edge modeling technique is the one that provides the highest level of control over precision and allows the artist to set measurements and divisions based on planes.
It’s quite easy to work only with the parts of the project that will be actually showed up on the rendering. Showthread.