
Hand Lighting Photography Tutorial: The White Feather. If you are into exciting light painting here is a great tutorial from Eric Pare, part of the team behind the 360º bullet time light paintings.

This tutorial is about creating a light painting tool that acts like a feather: Use paper and scissors to create the tool: LIVE Photoshoot - 3 light portrait & DIY GOBO background. Basic Photo Editing Tutorial by `TheTragicTruth-Of-Me on deviantART. Photography Tutorial: Night Photography with Continuous Lights. I spend quite a bit of time looking at cosplay photos and I’ve come to a conclusion that there are not enough nighttime cosplay photos, of which I think is a wonderful time that many cosplay photographers are missing out on to do photo shoots.

Having spoken to a number of cosplay photographers, I’ve heard a number of excuses: it’s too dark; my camera sucks at higher ISO; my shots are always blurry; I don’t know how to do night shoots; I don’t know how to use flash thus I can’t shoot at night; and more. Well, guess what folks, you’re in for a treat! For today’s Cosplay Photography Tutorial, I’ll be showing how you can easily do nighttime photo shoots. Equipment. Cosplay Photographers - Creating Beautiful Cosplay Photos. “What’s the best lens for cosplay photography?”

This is one of the most common questions that photographers ask early on during their quest to grow as an artist. The short answer is … it depends. Gorgeous Soft Light With One Speedlite. In this tutorial Andrea Cosentino shares his technique for getting a very distinct soft light look using a wall and one strobe.

This is Andrea’s submission for our How I Took It Contest, there are some awesome submissions so far, we’ll keep sharing them, you keep ‘em coming. I love placing my subjects in front of white backgrounds and focus on them to make photographs worth looking at. I knew I wanted a classic, ‘a la’ Zack Arias look but with a hint of a nostalgic feeling that people like Ryan Muirhead are able to get in their pictures. And I wanted to keep it as simple as possible. Mastering Photoshop With Paths. Anomalously residing within the pixel-gridded world of Photoshop are a series of tools waiting to break out of the canvas’ inherent squareness. Mastering these tools opens the stage for a higher level of flexibility, full of clean lines and non-destructive editing. Presented here is a guide to help you build proficiency, increase productivity and demystify the elusive world of Paths. Creation Pen Tool The Pen tool ( ) – simple to use but difficult to master.
Always use as few points as possible. Place an anchor at every acute or abrupt angle. Mid-curve anchors should be placed to comfortably accommodate curve transitions. To help set anchor points, you can turn on the ‘Rubber Band’ option – located in the drop-down next to the Custom Shape Tool button in the Pen’s property bar. Photoshop Light Effect Tutorials. I’ve selected various Photoshop tutorials that I’m liking at the moment for light effects, some have quite cool techniques on how to achieve the end result that can be applied to a million different designs (try and experiment with them), check them out below.
You might also enjoy: Design a Vista Styled Wallpaper Windows Vista Aurora Effect Design a Vibrant Blackberry Inspired Ad NoPattern “Jumper” Effect. Photoflex Lighting School. Basic Lighting A good place to start.

These lessons demonstrate professional lighting techniques using only basic lighting tools. Having good lighting equipment is important, but knowing how to use it well is paramount! Lessons with Video At PhotoflexLightingSchool™, we realize that people learn in different ways. Photography and Studio Lighting. The Feral Photographer: The Pocket Ringlight. Ever since Maxim magazine made ringflashes/ringlights popular again, photographers have been using and overusing them to get that "look".
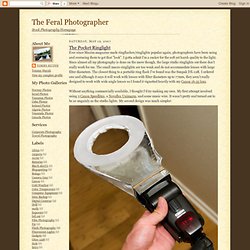
I gotta admit I'm a sucker for the soft yet harsh quality to the light. Since almost all my photography is done on the move though, the large studio ringlights out there don't really work for me. The small macro ringlights are too weak and do not accommodate lenses with large filter diameters. The closest thing to a portable ring flash I've found was the Sunpak DX-12R. 15 Best Photoshop Light Effect Tutorials. Digital Photography Tips and Techniques. Retouching Photo in Photoshop : 30 Tutorials. Lifehacker.
Image Editing Tutorials. Image Editing Tutorial HDR or High Dynamic Range is the ability to capture the full luminance spectrum of the real-world.

This is extremely difficult to achieve and is usually reserved for movies, special effects and some other specialty photography. What’s marvelous about Photoshop, is that you can photograph a subject (multiple times at varying exposures) and then merge the images to create a single HDR image. Here’s how you execute the process… How To Shoot A Water Splash With A Spectacular Bokeh. I am always keeping a close eye on Corrie White’s work.

She seems to always have a new trick up her sleeve. A few days ago I saw Corrie White’s amazing splash with bokeh photograph and was drawn to it. I asked Corrie how she took the image and she was kind enough to walk DIYP readers through it. If you want the more basic stuff, visit Corrie’s Comprehensive Water Drop Photography Guide The background for the bokeh in some of my water drop pictures is achieved by the light from the flash guns bouncing off the points on aluminum foil. General Setup & Lighting I use a sheet of foil about 38 cm. (15″) and carefully crumple this into a very loose ball. My Canon Speedlite 430EX is placed in front of the tray to light the splash as well as the foil. For some I may use a colored gel on the flash in front of the tray, but this may interfere with the effects of the food dye I use in the splash itself. Camera Settings Optional Post. Remodelling a Figure in Photoshop. Photo Retouching.
This tutorial will help you learn how to speed up skin retouching and polish photos in Photoshop using basic techniques.
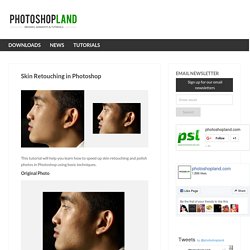
Original Photo Step 1 Duplicate the background image and rename it to Layer 1. Step 2 Go to Filter > Other > High Pass and set the Radius to around 4.5 pixels. Step 3 Change the Blending Options for Layer 1 from Normal to Soft Light and uncheck the eye to make Layer 1 invisible for the next step. Step 4 Duplicate the background image again and rename it to Layer 2. Martin Prihoda: 5 Light Beauty Setup. Dramatic Lighting Tutorial for Glamour Photography. How To Build A Beauty Dish.
A beauty dish provides a light pattern that is kinda between what you get from a bare flash and a softbox. Beauty dishes are an awesome modifier tool, but they have one caveat – price. While branded beauty dishes are kinda on the higher range of modifiers when it comes to costs, they are pretty easy to build for a few dollars if you have a pair of good hands and the time to drive to a close by home depot. What You’ll Need Metal Salad Bowl (I used a 50cm one)Electric box for plaster wallsA Round wall guard – 12 cm across.3 machine screws (8 cm long) and 6 bolts3 small springs – 8 cm longEpoxy glueVelcroWhite and black spay paint Tools DrillDremelSand paperprecision knife Do Not Panic!
Step 1 – Preparing The Bowl Sand the bowl on both side so the paint will stick and apply a thin layer of the white paint on both sides. Apply a second coat of white paint on the inside. In a similar manner paint the external side black. Step 2 – The Reflector. Martin Prihoda - Verve Global one light shoot.