
The Beauty Department: Your daily dose of pretty. - TIPPED OUT. All photos: Kristin Ess + thebeautydepartment.com post designed by kristin ess Lots of emails this week asking for a tutorial on Lauren’s temporary bright colors.

Here I’ve replicated the process for you in 7 steps on an extension. While I never recommend bleaching out the ends of your hair at home, if you want to do the fun colors yourself, maybe get the tips bleached out by a pro + then play with the temporary colors on your own. The best things about this color– you’re able to hide it in a bun for work if you need to, AND you’re only doing a couple of inches on the bottom so it won’t kill you to cut it off if you get over it quickly.
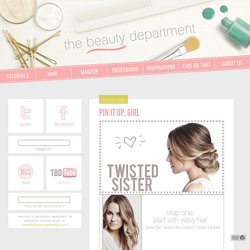
TOOLS: highlighting comb, clips, foils, color brush, hair bleach with the appropriate volume (always seek a professional when using bleach), light pink color, dark pink color, light blue, dark blue, clear gloss. Step 1 Highlight the tips of the hair using hair bleach with the correct volume. Step 3 Shampoo and lightly condition bleach out of the hair. The Beauty Department: Your daily dose of pretty. - PIN IT UP, GIRL. Our email box is literally flooded with requests for updos so here’s a fun one to get us all going!

This is always a favorite for attending an event. This updo looks gorgeous on any hair color but particularly amazing with hilighted hair because it gives the hair lots of depth and dimension. For lack of a better word, I love the way it becomes “swirly”. Best thing is; it’s easy to do, gorgeous and keeps your hair out of your way for the night. I made this a printable tutorial, so all of the steps are next to the photos.
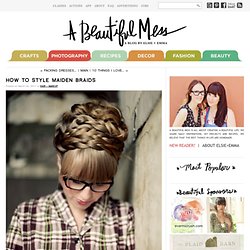
Tools you’ll need: curling iron (to prep the hair with waves), sectioning clips, teasing comb or brush, clear elastic rubber band, bobby pins, light to medium holding hairspray (to mist over at the end). Hairstyles, Haircuts and Hair Colors. How To Style Maiden Braids. Last month I did a makeover story with Kelsie and had many requests for a maiden braid tutorial.

Yesterday she came in and we photographed these simple step by steps. Kelsie has extremely long and thick hair, but anyone with shoulder length or longer can do these braids (see my photo below for an example). Steps 1-2: Braid two strands on each side of a center part. Steps 3-5: Wrap braids around the crown of your head and pin in place with one pin each. Step 6: Arrange braids so that they cover the front of your head like a headband. Steps 7-8: Pull the rest of the hair into a ponytail and pin it into a cute messy bun. Step 9: Add final pins and spray. Summer Hair Braid Trends. Braids, pleats, or plaits—whatever you call them, we're absolutely loving all things twisted in hair this season.

Beautylish brings you the three hottest braid trends this season and three easy braid DIY tutorials to replicate the look yourself. Who needs a headband when you can make one from your hair! We're loving this European, Heidi-inspired front braid that you can style into an updo or wear with your hair down. See how easy it is to give yourself a plait with Imogen's tutorial. It's easy to give your braids a little extra something with ribbons, flowers, bows, and any other accessories you can think of. The fishtail braid (or Herringbone braid) became a popular trend among celebrities and fashion mavens this year, and we too adore the sea-inspired style.