
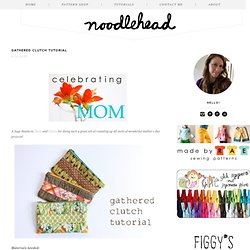
Gathered clutch tutorial. A huge thanks to Dana and Disney for doing such a great job of rounding up all sorts of wonderful mother's day projects!
Materials needed: 1/4 yard each of three coordinating fabrics (you'll definitely have scraps leftover)8" zipper (you can always purchase a longer zipper and shorten it, just follow the directions on the packagescraps of medium weight fusible interfacingCutting the pieces: For the main exterior, cut two pieces, one 5.5" tall by 9" wide, and one 5.5" tall by 13" wide (this will be the gathered front) Pieces of medium weight fusible interfacing for exterior pieces of clutch: (2) 5.5" tall by 9" wide For the front band, cut one piece 4" tall by 9" wide.
Seriously, the most time consuming part for me is always picking out my fabrics and cutting them, the rest goes together pretty easy, so let's go! Take the front band piece and fold it in half the long way (right sides together) and sew together using a 1/2" seam allowance. Basic Wallet Tutorial. Hi there!
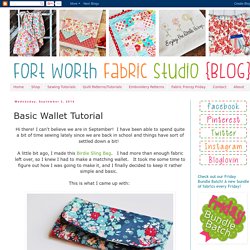
I can't believe we are in September! I have been able to spend quite a bit of time sewing lately since we are back in school and things have sort of settled down a bit! A little bit ago, I made this Birdie Sling Bag. I had more than enough fabric left over, so I knew I had to make a matching wallet. It took me some time to figure out how I was going to make it, and I finally decided to keep it rather simple and basic. This is what I came up with: This wallet includes: a small zipper pouch for change, 6 card holders, a cash/checkbook pocket, and a magnetic snap for the closure. Fabric Storage Basket…with handles. Oh, I’m so excited to have Crystal here again today from Stitched By Crystal.
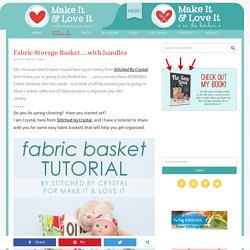
And I know you’re going to be thrilled too…..once you see these ADORABLE Fabric Baskets that she made. Just think of all the reasons you’re going to need a whole collection of these baskets to organize your life! -Ashley Do you do spring cleaning? Have you started yet? I am Crystal, here from Stitched by Crystal, and I have a tutorial to share with you for some easy fabric baskets that will help you get organized. With two toddlers in my house, baskets, bins, and boxes are my best friends when it comes to cleaning. These baskets measure 10 x 10 inches (at the opening) and are about 12 inches tall. The baskets are made with some fusible interfacing so they are sturdy enough to stand up on their own, but still can be easily folded up and stored when not in use. Want to make some fabric baskets? Great! To make one basket, you will need: **All seams are ½ inch unless otherwise noted. Basic zipper pouch tutorial.
Let’s make some zipper pouches!
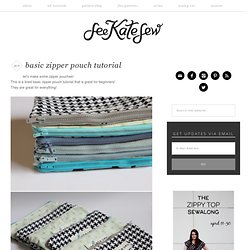
This is a lined basic zipper pouch tutorial that is great for beginners! They are great for everything! Let’s start: To begin you need four pieces each measuring 6.5″ tall by 8″ wide. A front, back and two lining pieces. Lay your zipper face down on the front piece. Sandwich it in with the lining piece. Stitch at 1/4″ with a straight stitch. This is what you’ll have. Press the front piece. Topstitch close to the edge. Repeat with the back and second lining pieces. When you’ve topstitched both pieces, your pouch will look like this: DIY: Back to School Pencil Pouch. This is the time of year when tote bags filled with towels, swimsuits and sunscreen are replaced with backpacks full of folders, books and brand new pencils.
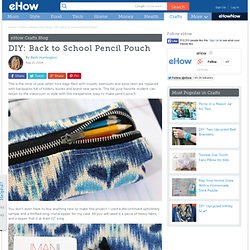
This fall your favorite student can return to the classroom in style with this inexpensive, easy to make pencil pouch. You don’t even have to buy anything new to make this project. I used a discontinued upholstery sample and a thrifted long, metal zipper for my case. All you will need is a piece of heavy fabric and a zipper that is at least 12″ long. Cut a 10″ x 7″ piece of heavy fabric. With right sides together, pin the zipper face down onto the long side of the fabric. Use the zipper foot on your machine and sew one side of the zipper to the long edge of the fabric. Now fold the rectangle in half, right sides together, so the other side of the zipper lines up with the other long rectangle edge.
Pin the zipper in place. Now sew along the other edge of the zipper. Topstitch the seams. DIY.. Color Pop Zipper Pouch. Last week I finally had a few spare moments to sit down and think.
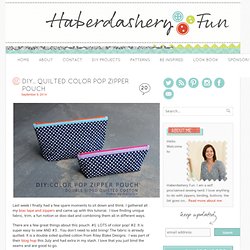
I gathered all my bias tape and zippers and came up with this tutorial. I love finding unique fabric, trim, a fun notion or doo-dad and combining them all in different ways. There are a few great things about this pouch. #1. LOTS of color pop! #2. Materials: Double sided quilted cotton fabric – check out Riley Blake DesignsZipperBias tape – I used Wrights 1/2″ double fold bias tapeSewing suppliesRotary cutter, mat and quilting ruler – check out Creative Grids Disappearing fabric pen or chalk pen – I love using the Clover Chaco LinerSewing machineIron and ironing board Before we get started, you need to cut your fabric. Sac.