
DIY: un banco ottico 20×25. Qualche anno fa ero a Milano, fuori dalla Triennale, c’era un fotografo ritrattista, usava un banco ottico 20×25 e flash.
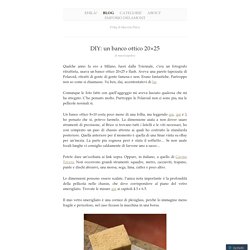
Aveva una parete tapezzata di Polaroid, ritratti di gente di gente famosa e non. Erano fantastiche. Purtroppo non so come si chiamasse. BELLOWS BUILDING. Andrey Donchev. Just finished this silver nitrate tank.

It is made out of 4 mm thick acrylic glued with Cyano-acrylate. The outer box is made of wood & plywood with brass hardware. Everything together, except the silver nitrate itself weights 2540 gr. An 8×10, lightweight, T-frame, prototype film camera made out of cherry, brass and aluminium. 3.4kg,95x345x305mm, including knobs, when closed,widest lens usable – 75mm(no movements),longest lens usable – 680mm,front movements LB,rear tilt – LB, rear swing ± 15°,lens board – 183/183mm,two tripod sockets 1/4 and 3/8,zero detents in front. The Light Wanderer. Répertoire soufflets.
Handicraft works. Making hot-air balloons Small, well-formed, flyable hot-air balloons can be made by hand.
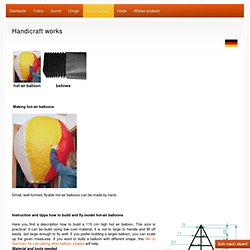
Instruction and tipps how to build and fly model hot-air balloons Work steps On the sheet of stiff paper you draw the pattern shown above in a size of 472 mm width and 1336 mm length and cut it. All measures are in millimetres. Lifting off In many areas there are restrictions concerning flying a hot air balloons (also called "sky lanterns"). A hot air balloon shoud be tested when it is cold outside and only when there is no risk of forsts to burn. If you made a hot air balloon using this instruction, I would be interessted in a feedback (email adress see impressum).
Annotation: Making bellows Bellows are used to connect objectiv lenses with a camera or to case moving parts of machines. You should make tests with cheap paper before making long bellows from expensive material. Bellows with square cross section. Répertoire soufflets. Sliding Box Camera Plans - Home. Large Format Photography: Calculating Bellows Extension Factor. How to make a ground glass for view camera. I’ve broken my ground glass on my Vageeswari camera and I’ve made a new one.
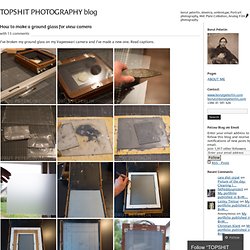
Read captions. cut 2 mm glass exact dimensions for Vageeswari format 10×12″ are 253mm x 304mm. grind edges so you will not cut yourself Buy on ebay silicon carbide grade #400 and #600. First start with F400 powder, mix it with some water and start. 5×7 film holders. Walnut 5×7 holders July 13-14 Saturday the 13th.
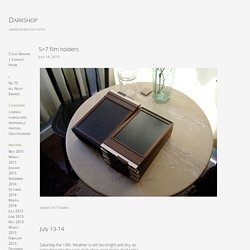
Weather is still too bright and dry, so retreating into the cool, dark shop once more. Large format camera film holder specifications. (NOTE!

The positioning of the ground glass is the most critical detail in the design. The focusing surface of the ground glass must be in the same position as the emulsion of the film when a film holder is inserted.) To obtain a copy of the complete ANSI specifications for film holders, visit the organizations home page and download file: ANSI/PIMA IT3.108-1998 by clicking on the icon below! (small fee required for downloads from the ANSI site) Tripod, pt 2. I like the new 5×7 so much it makes my current homemade tripod seem like some stone age assembly of driftwood and chicken bones.Instead of starting over*, I milled down my old ash tripod to pare off a little weight and girth.
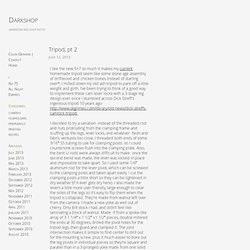
I’ve been trying to think of a good way to implement these cam lever locks with a 3-stage leg design ever since I stumbled across Dick Streff’s ingenious tripod 10 years ago- I decided to try a variation- instead of the threaded rod and nuts protruding from the clamping frame and scuffing up the legs, lever locks, and whatever flesh and fabric ventures too close, I threaded both ends of some 3/16″ SS tubing to use for clamping posts so I could countersink screws flush into the clamping plate. Also, the bent U-rods were always difficult to make- once the second bend was made, the lever was locked in place and impossible to take apart. So I used some 1/4″ aluminum rod for the lever pivot, which can be screwed to the clamping posts and taken apart easily. Until then: Assembly Day. (5×7 Diary, pt 2) OK, more than just a day, I actually started assembling this a few weekends ago.
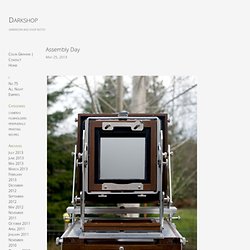
I always forget how much, how long, and how exasperating making a camera can be. 12 weekends, more or less. 1st look at the assembled camera. Never sure if I like the camera I’ve made once it’s all put together. I get so engrossed in the parts seeing it put together is a shock, almost a letdown. Pretty much total disarray. Finally had a decent day to spray the lacquer. Darkshop. Rear Standard box joints The creative slump continues.
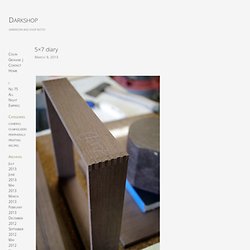
Rather than waste gas and film, I thought I would make some improvements on the 5×12>5×7 conversion I made last year. Except I’d really rather just start over. I like much about the 5×7 conversion. Well- no; it’s heavy, the back design is among the worst I’ve made or seen, and the movement hardware is bulky and heavy without being especially rigid.