

D.I.Y.: Bracelet tressé avec des perles et un noeud ajustable - Trop Top Tendance - Astuces et tendances mode, beauté, déco, et plus! Ce qui fait la différence entre un ensemble ordinaire et un ensemble qui a du punch, ce sont souvent les accessoires!
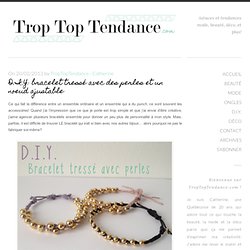
Quand j’ai l’impression que ce que je porte est trop simple et que j’ai envie d’être créative, j’aime agencer plusieurs bracelets ensemble pour donner un peu plus de personnalité à mon style. Mais, parfois, il est difficile de trouver LE bracelet qui irait si bien avec nos autres bijoux… alors pourquoi ne pas le fabriquer soi-même? Aujourd’hui, je vous montre donc comment réaliser ces jolis bracelets faits à partir de fils et de perles, qui sont idéals pour être «mixer» avec d’autres, et qui, en plus, sont ajustables. Comme d’habitude, vous comprendrez que vous pouvez choisir les couleurs de fils et de billes qui vous plaisent, ainsi que la grosseur des billes, ce qui peut totalement changer l’aspect du bracelet.
Laissez aller votre imagination! Commençons par le matériel nécessaire: Et voici les étapes pour réaliser le bracelet: Bracelets. Bracelet à clous. Bracelet chainette/fil coton. You should all know by now that we are all about stacking bracelets on our wrists.
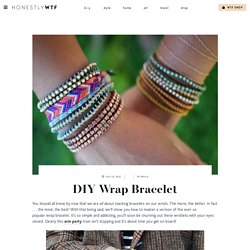
The more, the better. In fact . . . the most, the best! With that being said, we’ll show you how to master a version of the ever so popular wrap bracelet. It’s so simple and addicting, you’ll soon be churning out these wristlets with your eyes closed. Clearly this arm party train isn’t stopping and it’s about time you get on board! You’ll need (for a double wrapped bracelet) :* Lengths will vary depending on the size of your wrist (see comments for suggestions). Fold the length of leather cording in half to form a loop. Place the ball chain along the leather cording with the end of the chain meeting the end of the wrap. Continue wrapping while checking it for fit around the wrist. When you have reached the end of the ball chain wrap the linen cording around the leather strands 2-3 more times. Bracelets perles/tresse. Bracelet tresse perlée. Bracelet fine tresse/perles. It’s been awhile since our last bracelet DIY.

I don’t know about you, but our wrists have been begging for another colorful addition for months now. So after playing with some materials that were already on hand, we’ve created a tutorial for a braided bead bracelet, which is a not so distant cousin of the hex nut and wrap bracelet. Because honestly, you can never have too many . . .
You’ll need: Cut the waxed linen cord into a 26″ and 19″ piece. Tie a knot about half an inch down from the loops. Start braiding the strands. Push the bead against the base of the braid, and cross the left strand over the middle. Keep a finger at the base of the braid, holding the beads in their place and keeping the braid tight. Finish the bracelet with another inch of braided cord, measuring it against the wrist. Bracelet écrous. We’re nuts for nuts.

Is there a more versatile and inexpensive DIY component than a hex nut from the hardware store? You can imagine our excitement when we first discovered Philip Crangi’s Giles & Brother Hex Collection. Honestly, nuts braided into jewelry is WTF genius! With a few items that we always seem to have lying around, we tackled the technique and made our own spine-like braided hex nut wrap bracelet. You’ll need:3 strands of cotton butcher’s twine cut into one yard pieces18 small brass hex nutsa bit of dexterity! Gather the 3 strands of twine and tie a knot at the top, leaving about 2 inches of slack. Keep your thumb at the base of the braid, holding the nut in its place. Bracelet noeud en cuir. You will need : - A piece of leather, approx. 22cm x 10cm (approx. 8.7" x 4") - Scissors - Leather glue or super glue - Thread - A snap button 1.

Cut an oval piece of leather, approx. 22cm x 10cm (approx. 8.7" x 4"). You can make it longer or smaller, depending on the size of your wrist. Bracelet escalade. Climbing rope?

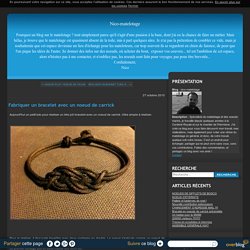
Bracelets en jersey (vieux tee-shirt) Bracelet noeud marin. 27 octobre 2010 3 27 /10 /octobre /2010 22:13.
Bracelet noeud coulant. Forum de discussion.

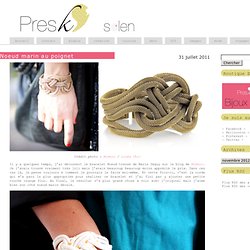
Noeud marin au poignet. 31 juillet 2011.
TUTOS Bracelets porte bonheur. Pondu par Flo le 17 août 2012.
Bracelet tubes dorés. I have very vivid memories of walking into a bead store for the first time, almost 15 years ago, and being overwhelmed by the million and ten ideas that filled my mind. I was immediately hooked on the concept of transforming simple and unexpected elements into something beautiful and wearable. That moment was the catalyst for my eventual path into jewelry design and craft – my higher calling, if you will. Today’s tutorial takes me back to my first foray into jewelry making, where I’ll show you how to make two delightful bracelets using the same basic component.
Get inspired and have fun! For single, adjustable gold tube bracelets, you’ll need: Bracelets anneaux et daim. Bracelet anneaux/macramé. Growing up by the beach in Southern California, the ability to knot a macrame bracelet was practically a right of passage. Although those days are long behind us, we’ve never forgotten the ever-so-simple square knot technique. Bracelets chainettes. All though it could be said that I’m the queen of “more is more,” lately, I have been obsessed with dainty little baubles… especially in the form of delicate chain bracelets. I’ve bought a few here or there, but then it dawned on me – why not make a few, repurposing some old chain necklaces that I no longer wear. They’re incredibly easy to make… I made three – one with a safety pin, another with a gold tube bead, and one with a little star charm. I’m wearing the homemade versions on the right side.
On the left side, my bracelets are Cartier, Gorjana, and Derng. Bracelet chaine/ fils coton. Chain link bracelets, with colorful threads woven through them, have been popping up here and there. We adore Aurèlie Bidermann‘s Do Brazil bracelets and thought it was about time we graduate to the ultimate “grown-up” friendship bracelet. With a curb chain bracelet and some embroidery thread, we’ll teach you how to make your own woven chain bracelet. And one for your bestie too, of course. You’ll need:a curb link braceletembroidery threadtwo bobby pinsa pair of scissors Cut 2 sets of 15 strands of embroidery thread, with each strand measuring four times the length of the bracelet.
Lay the second color (blue) over the first color (coral). Repeat the steps until you reach the end of the bracelet. (top images from here and here, rest of images by Honestly…WTF)