
Textures. Down and dirty screenprinting for under 10$ For this project, we will need some tools and supplies that are easily available, and a few that might require the tiniest bit of searching....
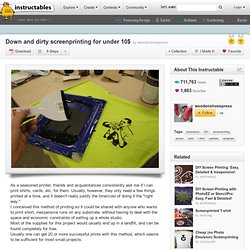
Recycling is key here. Most of the supplies required can be found as trash, including the ink. What isn't direct waste can be recycled from thrift stores or garage sales. Big leaf printing. Here's what we made at the preschool this week.
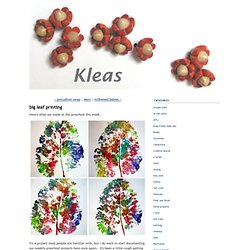
It's a project most people are familiar with, but I do want to start documenting our weekly preschool projects here once again. It's been a little rough getting into our handwork this year...we have sixteen new students and of those only one is four years old...the rest are three. And many, a young three. So we've started out slowly...working with beeswax one day a week, drawing another, last week we practiced using scissors. This week we did leaf printing. I used the lid of my cake pan to hold the paint (acrylics in a variety of colors). Diy clay bangles. I have a bangle obsession...and I have a deep love for polymer clay.

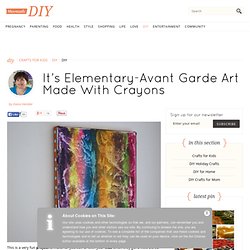
I am definitely keeping the polymer clay section at Michaels in business. I have quite the collection going, which is filling up our kitchen panty pretty quickly. Ian opened the cabinet to get some food goodies last night and told me I should "Probably get organized. " What?!! It's Elementary-Avant Garde Art Made With Crayons. This is a very fun project to make for yourself or with your kids when they get a little bored with reading, writing, and arithmetic and need a creative outlet.
This time of year I always get the urge to buy school supplies. Transferring Ink to Candles. Making personalized candles is easier than you think.
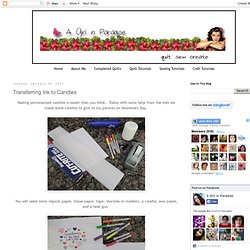
Today with some help from the kids we made some candles to give to my parents on Valentine's Day. You will need some regular paper, tissue paper, tape, sharpies or markers, a candle, wax paper, and a heat gun. First, I taped a piece of tissue paper, about the size of my candle, to a piece of copy paper. Markers will bleed through the tissue paper pretty easily so you will need something to protect your table, and it was easier for the kids to draw on the tissue paper when taped to the "paper". When your little artist is done, remove the tissue paper from the copy paper. Button Monogram.
This is a really COLORFUL & creative way to display your child’s initial.
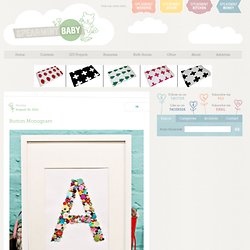
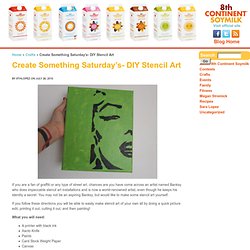
Super easy for sewers & crafters who have lots of extra buttons laying around. Gosh I LOVE buttons… Supplies needed: - Printer (to print out your letter) or a large letter stencil - Scissors - Cardstock (large enough to fit your frame) - Pen or Pencil - Adhesive, Scotch Tape Runner allows you to reposition buttons - Paper Piercer - Buttons and Brads - Frame without glass or shadowbox (this one is from IKEA) Click here for step-by-step directions to the entire project. Create Something Saturday’s- DIY Stencil Art. By 8thlopez on July 26, 2010 If you are a fan of graffiti or any type of street art, chances are you have come across an artist named Banksy who does impeccable stencil art installations and is now a world-renowned artist, even though he keeps his identity a secret.
Scrapbooking. You knew i was going to make one. They are all over pinterest....
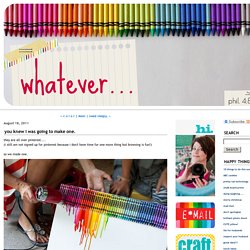
(i still am not signed up for pinterest because i don't have time for one more thing but browsing is fun!) So we made one. i took a box of 64 crayons and took out the blacks and browns.i used another small box and doubled up on the good colors i liked and hot glued them to the top of our canvas. then we turned our blow dryer to hot on high. not long after you set the hair dryer by the crayons they get shiny and then the wax starts to melt! And it dries really quickly too. seriously. The Technique Zone: Acrylic Paint Transfer. Supplies needed: Acrylic dabbers, photocopy of an image, water spritzer bottle, paintbrush, card stock, craft sheet and heat tool (optional) Take the lid off the dabbers and brush the paint onto the card stock, ensure you get a good coverage Take your photocopied image ( remember that you will get a reverse of the image, so don't use bold words), flip it over and place it in the acrylic.

Lightly press it down making sure it's smooth and not wrinkled Leave to air dry for at least 15 minutes and then if you wish give it a blast with the heat tool Only move onto this step when you are sure your paint is completely dryTake your water filled spritzer bottle, spray the back of the paper no more than two squirts, you don't want it too wet Next start to rub the paper very gently with your finger. Koikoikoi.com - Visual Arts Magazine, graphic design, illustration, photography, interviews, inspiration, tutorials. Since 1999, Zac began collecting junk found around often in the trash, then glued to a wooden substrate to form an image an image – in the case, portraits.
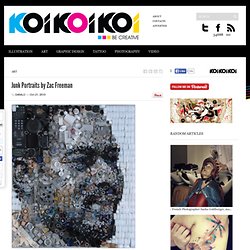
His artworks are made by assembling on a large-scale (the pieces average about 28 “by 35″) and when viewed up close looks like a series of small objects stuck meaningless, but when seen from far away are impressive portraits. > zacfreemanart.com.