
Tutorials - Charcoal Eye Tutorial. 40 Free Tutorials on Advanced Drawing Techniques. Canadian Realist Artist, Melissa Schatzmann » Drawing Classes. 7 Advanced Drawing Tips for Creating Photo-Realistic Drawings in Pencil and Graphite. "Profiles in Black and White" is my on-going series of drawings observing various forms in profile.
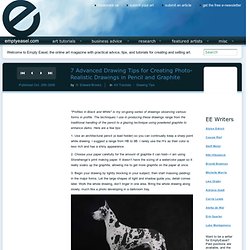
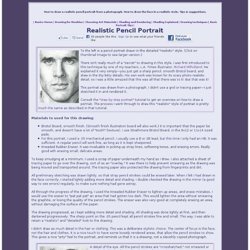
The techniques I use in producing these drawings range from the traditional handling of the pencil to a glazing technique using powdered graphite to enhance darks. Here are a few tips: 1. Use an architectural pencil (a lead holder) so you can continually keep a sharp point while drawing. I suggest a range from HB to 9B. 2. 3. Great Dane, black tie, graphite on print-making paper. 4. 5. 6. After the third layer, apply a light workable fixative and let the drawing rest for a couple of days. Boxer in a Box, graphite on print-making paper. 7. At this point I put the drawing away for a week or so and work on something else. I hope this post has been helpful—good luck! For more drawings and tips from H. Then check out the related posts below. For today's tutorial I will be demonstrating how to render a finished drawing in graphite. Drawing realistic portrait from a photograph - portrait art tutorial. How to draw the face.
To keep smudging at a minimum, I used a scrap of paper underneath my hand as I drew.
I also attached a sheet of tracing paper to go over the drawing, sort of as an "overlay. " It was there to help prevent smearing as the drawing was being moved and transported around. The tracing paper also protected the drawing from fingerprints and dirt. All preliminary sketching was drawn lightly, so that stray pencil strokes could be erased later. When I felt I had drawn in the face correctly, I started lightly adding more detail and shading.
All through the progress of the drawing, I used the Kneaded Rubber Eraser to lighten up areas, and erase mistakes. The drawing progressed, as I kept adding more detail and shading. I didn't draw as much detail in the hair or clothing. The drawing was completed over the expanse of three days. The actual time it took (in total hours) to complete the drawing isn't as important as the days it took to declare it "completed. " Shameless plug! Portrait-artist.org. Photorealism Tutorial by markcrilley on deviantART. Realistic Pencil Drawing. How to Draw a Marble: Step by Step Realistic Drawing Art Lesson. Free Photorealistic Pencil Drawing Tutorial by Carlos Aleman. Warning: May cause severe headaches!
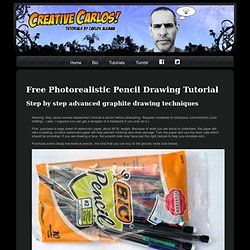
Consult a doctor before attempting. Requires moderate to strenuous concentration (Just kidding! —well, I suppose you can get a whopper of a headache if you over do it.) First, purchase a large sheet of watercolor paper, about 80 lb. weight. Because of what you are about to undertake, the paper will take a beating, so thick watercolor paper will help prevent crinkling and other damage. Purchase some cheap mechanical pencils, the kind that you can buy at the grocery store (see below). As you can see, I'm using 0.7 mm lead. Photorealism evolved from Pop Art in the 1960's. Okay, let's start: The human face is probably the most difficult subject to render accurately. Ideally, work from a very detailed, high resolution photograph with good contrast.
The first stage is the hardest part of the drawing. With an HB (#2) pencil, very lightly scribble the forms that create the illusion of volume. Remember, this is not a classical drawing. Back to shape finding.