
“Rigify Addon” for Blender (PitchiPoy Version) – Tutorial. The rigify addon version by PitchiPoy studio. Create an Animation Walk Cycle in Blender using Rigify. In our latest Blender tutorial from Karan Shah, you'll learn how to generate a character rig using Blender's Rigify add-on, and how to skin the character using weight painting for precise control over mesh deformation.
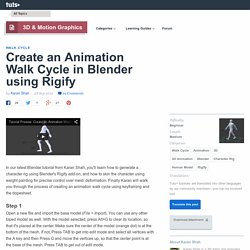
Finally Karan will walk you through the process of creating an animation walk cycle using keyframing and the dopesheet. Open a new file and import the base model (File > Import). You can use any other biped model as well. With the model selected, press Alt+G to clear its location, so that it's placed at the center. Make sure the center of the model (orange dot) is at the bottom of the mesh. Next we will enable the Rigify add-on. Select the Add-on Tab and in the search box type Rigify and check the tick box to enable it. Make sure the 3D cursor is at the center point (bottom) of the mesh.
With the Human Rig selected, go to the Armature Properties and in the Display Panel, check X-Ray. With the Meta-Rig selected, press TAB to enter into edit mode. Foot Rig without Action Constraints. Introduction I have attempted to replicate the functionality of Ludwig’s Foot Rig, but without using the action constraint.
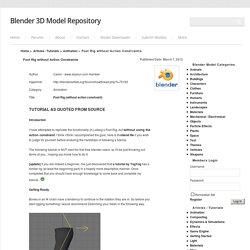
I think I think I accomplished the goal, here is theblend file if you wish to judge for yourself, before enduring the hardships of following a tutorial. The following tutorial is NOT ment for first time blender users, so I'll be just throwing out terms at you... hoping you know how to do it. [update] If you are indeed a beginner, I've just discovered that a tutorial by YogYog has a similar rig (at least the beginning part) in a hopely more descriptive manner.
Once completed that you should have enough knowledge to come back and complete my tutorial.. Getting Ready. Create an Animation Walk Cycle in Blender using Rigify. Tobuslieven. The Basics of IK and FK Rigs. Intro to Rigging in Blender. Foot Rig without Action Constraints. Doc:2.6/Manual/Rigging/Posing/Inverse Kinematics/Spline IK. From BlenderWiki Spline IK is a constraint which aligns a chain of bones along a curve.
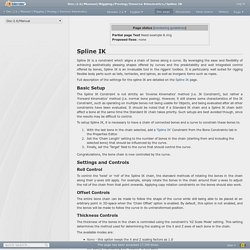
By leveraging the ease and flexibility of achieving aesthetically pleasing shapes offered by curves and the predictability and well integrated control offered by bones, Spline IK is an invaluable tool in the riggers' toolbox. It is particularly well suited for rigging flexible body parts such as tails, tentacles, and spines, as well as inorganic items such as ropes. Full description of the settings for the spline IK are detailed on the Spline IK page. Basic Setup The Spline IK Constraint is not strictly an 'Inverse Kinematics' method (i.e. To setup Spline IK, it is necessary to have a chain of connected bones and a curve to constrain these bones to. Doc:2.6/Manual/Rigging/Armatures/Editing/Properties. From BlenderWiki In this page, you will learn how to edit and control most of the properties for Blender bones – For editing bones in an armature, you should read the previous page first!
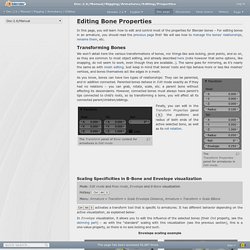
We will see how to manage the bones' relationships, rename them, etc. Transforming Bones We won’t detail here the various transformations of bones, nor things like axis locking, pivot points, and so on, as they are common to most object editing, and already described here (note however that some options, like snapping, do not seem to work, even though they are available…). Blender 3D: Noob to Pro/Advanced Tutorials/Advanced Animation/Guided tour/Armature/edit. Now you've got your armature, but it's not much use until you add some more bones to it.
Think about your body for a moment -- you've got this thing you call a 'skeleton', which for our purposes corresponds more or less to an armature object. Your skeleton consists of a number of bones (about 206, to be precise), but generally these are not independent from each other. If you move your femur (the bit of your leg between your pelvis and your knee) then conveniently the rest of your leg moves with it. In that example, the tibia/fibula would probably be counted as one bone, with the femur as their 'parent' bone. In this way, you build up a hierarchy of bones, making animation much simpler. Creating an Advanced Face Rig. In this course we will be creating an advanced facial rig for our stylized character, Edward.
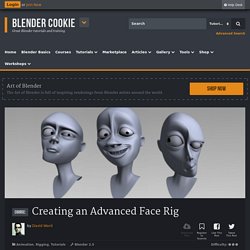
We’ll be making use of shape keys and drivers in order to deform the mesh and controlling them with bones. Having so many bones in the viewport can make things appear cluttered. To remedy this, we’ll also be adding custom bone shapes to help make the rig easier for us, and any viewers we show our work to, to understand. In a later lesson, we’ll add a cage mesh with a mesh deform modifier. Blender 3D Tutorial - Rigging, Character Armatures and Skinning (3) by VscorpianC. Blender Tutorial: Basics of Character Rigging. Blender 3D Tutorial - Rigging, Bone Groups & Bone Colors (2)by VscorpianC. Blender 3D Tutorial - Rigging, Character Armatures & Bones Basics (1) by VscorpianC.