
Blender Basics - Introduction for Beginners - Blender Cookie. Blender Animation Fundamentals - Blender Cookie. Character Animation Fundamentals in Blender By Beorn Leonard This training series covers all the fundamentals of Character Animation in Blender.
During this series, you will learn many of the fundamental skills that are essential for all character animators. This series makes use of both simple ball rigs and a complete character to allow you to really focus on what really matters, the animation. Some highlights of this series include fundamental exercises, timing and spacing, working with overlapping motion, animating walk and run cycles for film or games, understanding IK and FK, using the Grease Pencil for animation sketches, and much, much more! Blender Animation Fundamentals - Blender Cookie.
Introduction to Compositing in Blender - Blender Cookie. Introduction to Texturing with Cycles in Blender. Hello and welcome to this introductory tutorial on texturing with Cycles in Blender!
In this Blender tutorial Jonathan Williamson gives you an introduction on setting up your material shaders with textures for Cycles in Blender. What you’ll learn: Through this tutorial you should gain a solid understanding texturing with Cycles in Blender, including how to take existing texture maps (diffuse, spec, bump) and use them in material shaders to create the various surfaces you require for your project. Download IVY Textures - Blender Cookie. In this free texture download we are including 10 Ivy.tgas rendered at 2048×2048 / 32bit for commercial or personal use.
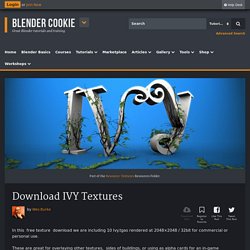
These are great for overlaying other textures, sides of buildings, or using as alpha cards for an in-game environment. Adding some Ivy to a render (Not the poison stuff) can really make it pop, and or add that extra 10% of detail to bring your render to more of a final state. After playing with of these plugins (free for both), it is just darn fun. Creating a Tree in Blender - Blender Cookie. In this tutorial, I’ll show you a good place to get free reference images (imageafter.com/), then we go into Gimp and create a seamless texture for our tree bark.
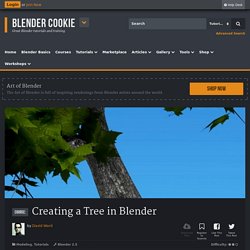
Popping over to Blender, we begin the process of building a base tree shape by using curves and manipulating them to form the correct shape of the tree. After that, we convert the curves into a mesh, add UV seams, then attach the branches to the trunk by merging corresponding vertices together. Creating a Glowing Stripes Effect. Hey guys, this was one of the free tutorials featured with our 2010 Christmas present.
This year we wanted to also make sure the contents were out in the public to allow others to enjoy which may have missed the original download post. In this special Holiday Blender 2.5 tutorial we go about recreating the infamous glowing stripes effect from Tron. Decimating Sculpts with MeshLab. Using the Asset Sketcher Blender Add-on. Asset Sketcher is an incredibly useful Blender add-on, developed by Andreas Esau, that provides a more user-friendly way to populate environment scenes in Blender.
Essentially, Asset Sketcher allows you to use a brush tool to place object instances directly in to the 3D view. This “painting” works particularly well for populating any scene with a lot of props, such as a game environment. The asset painting (or sketching) works by adding objects to a library list and then brushing across a designated canvas in the 3D View to place instances of the asset. It even includes pressure sensitivity for tablet users. See the full feature set on the product page. Non-Destructive Modeling with Shape Keys in Blender. Modeling with Cloth Simulation in Blender. With all the features included and being added to Blender, sometimes it can be easy to overlook the practicality of the built-in cloth dynamics features.

As an artist I usually default to sculpting for fabric creation, but since I’ve started using Blender the cloth simulator has proven its worth over and over. It can save you a ton of time to simulate your fabric into shape rather than modeling it traditionally. Creating Mist in Blender and Cycles with Z Depth. When you’re creating expanse environments that are believable, one of the things you need take into account is the saturation of far away objects.
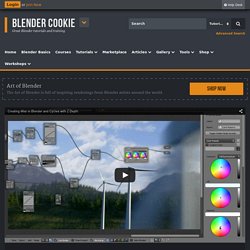
As things get farther and farther away, they appear less saturated, almost like they’re covered in a slight mist. In order to create believable CG this is a very important detail to consider, particularly when creating your environments, as it greatly adds to the realism of your scene. In this tutorial I’ll show you how to create an accurate, anti-aliased Z-pass with Cycles that can then be used to create this mist-like effect. Creating a Shoe in Blender - Blender Cookie. Addon: Mesh Lint. Spell Check for Your Meshes Mesh Lint’s slogan says it best: “It’s like spell check for your meshes!”
Keeping your models’ topology clean and free of errors is a necessary polish for your modeling skill set. This means your models will behave better in a production pipeline, friendlier when exporting and importing into other 3D applications, and generally higher quality. Lions and Tigers and Triangles, OH MY! Customizing Your Startup File in Blender. Have Blender your way As an open source application, Blender is naturally very customizable.

Of course like most programs, we can modify User Preferences, save render presets, build custom UI themes, and save layout presets. But beyond User Preferences, Blender allows us to customize our the startup scene. With the startup.blend file we have incredible freedom to tailor Blender so it launches with our exact specifications.