
Negozi fotografia analogica. Negozi di materiale fotografico (pellicole, carte, chimici)
Www.antichetecnichefotografiche.it - Old photographic processes. Antiche tecniche fotografiche Platinum, Palladium and Alternative DIY & OLD Photographic Processes - Visit our catalogue for Kits, Tools and Equipment.

8 Awesome YouTube Tutorials Every Photographer Should See. Jimmy Mcintyre is a travel photographer, educator, and 500px ISO contributor.
His photos have been published in local and national magazines, including the BBC. His online courses on digital blending and post-processing can be found on his official website. The Internet is awash in photography tutorials, some of which can truly revolutionize your photography. Sometimes we may come across a single tip or technique which we find no use for, until a few months down the line when we unexpectedly come across a challenge in our photography, and voila!
This technique comes to mind and saves the day. In this article I’ve collected some of the best YouTube video tutorials of the last 12 months, and put them in one convenient place. 4 Steps to Less Stressful and Easier Photo Editing. A Post By: Simon Ringsmuth Have you ever returned to your computer with a memory card full of photos and become overwhelmed at the idea of going through all of them?
The thought of sorting and analyzing so many pictures can seem so daunting it’s sometimes hard to even know where to start! Often we find ourselves copying the contents of our cameras to our computers and letting our precious memories collect digital dust, though we promise ourselves we will get around to organizing them – someday. Modern technology has made this task easier, with various software and cloud-based services even promising to find your best photos for you. And while these digital assistants certainly have merit, I like to take a different approach to dealing with all the images I capture.
The following tips will help you streamline your photography workflow and make the task of sifting through your images not only easier, but a lot more enjoyable too. Step 1: Get rid of bad photos. SM2 - M. Masking by the Numbers. © 2004, Glenn E.

Mitchell II, Ph.D. The Light’s Right Studio Have you ever wanted to make an adjustment to an image but limit the effect to just the highlights or the shadows in an image? Photoshop pros know they can press the Option-Command-~ sequence (Alt-Ctrl-~ for Windows users) and Photoshop will grab the highlights in an image and make them into a selection. Invert that selection, and the shadows are selected. Photoshop uses a very broad definition of highlights: one that reaches well down into the middle tones.
The Coliseum in Rome on a dreary day in March. Ever take a photograph on a rainy, dreary day? How to use the Contrast Checker Technique to Give Your Images More Punch. I am about to reveal a technique that will have your images looking awesome in seconds every time you use it.

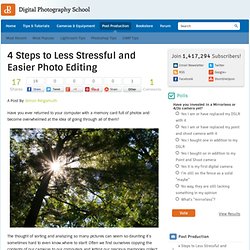
I am even going to share the Photoshop Action with you so you can edit in lazy mode, I mean efficiency mode! Before I bare all, I need to give you some background information, and I am pretty sure you have been in the exact same position at some point in your photography hobby or career. Not long ago, early 2010, I was horrible at photo editing. I was literally tossing my camera in a box and packing it away. My problem was that I was extremely frustrated with the quality of my images. Image Stacking for Landscape Photography Part One. Just four individually focused exposures were needed to create this image.
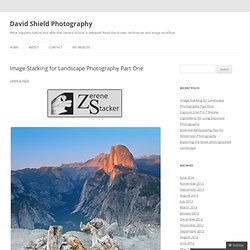
Typically used during post-processing of macro photography, Zerene image stacking software processes multiple images taken of a single composition to create a completely in-focus output image. Being a Landscape Photographer, I was curious if this concept would work for the type of images I capture. After using Zerene focus stacking software, I am now convinced that I am on to a really good thing, and in part one of my review I will explain why Zerene Stacker can be an invaluable tool for much more than just macro photography. I have added “Part One” to this review title simply because I have used the software to process just a couple of images so far. I intend to photograph and process more images using Zerene Stacker, which will allow me to fully illustrate the software’s limitless potential, in this field.
The Home Screen where you begin by adding files (images) to the current project. Leggi argomento - Rivelatore Tri-x 400 - Lezioni di fotografia. Overview of the M System. Last updated on January 29, 2014 -> Click here instead for large (1,688x1,200 pixel) complete Leica family tree <- Fully illustrated guide to film and digital Leica M bodies covering 60 years!
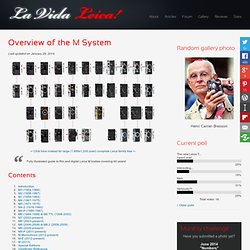
The Leica M system as we know it has been in existence since 1954 when the first model, the M3 was introduced. Since its introduction, little seems to have changed on the surface - but there are many subtle differences. The M3 turned the 35mm camera industry on end with several groundbreaking features for the time including the bayonet lens mount (which is still in use today) and a viewfinder with multiple, automatically changing framelines with parallax correction that was bright and clear. The Ultimate Guide to the Dodge & Burn Technique on Fstoppers by Julia Kuzmenko McKim. If you have not yet read my 3-part article on the Dodge & Burn technique, make sure to take it out!
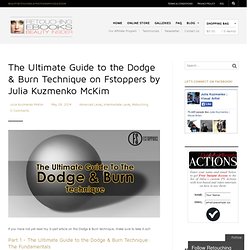
Part 1 - The Ultimate Guide to the Dodge & Burn Technique: The Fundamentals. Discussing [C.O.] Pre-esposizione in stampa. Esempio concreto. in Fotografia analogica - Italia. The Ultimate Guide to the Dodge & Burn Technique – Part 1: The Fundamentals. The Ultimate Guide to the Dodge & Burn Technique – Part 1: The Fundamentals Dodge & Burn (D&B) is a technique that came to us from the darkroom days when luminosity values in a photo could be only manipulated by the duration of the exposure of the light sensitive photographic paper.
And while there’s so much that have already been published about it, I hope we can still shed some light on the aspects of it that are usually not mentioned in retouching tutorials. Wikipedia: Dodging and burning are terms that come from analog photography, it is a technique used during the printing process to manipulate the exposure of a selected area(s) on a photographic print, deviating from the rest of the image’s exposure. Dodging – lightening, burning - darkening. Tutorial di fotografia digitale e analogica. Corsifotoanalogica.it. The Online Darkroom. By Omar Ozenir Child labour is one of Turkey’s long-standing social problems. At least 6% of Turkey’s children between the age of 6-17 work in the industry - at an average of 50 hours a week! There are many reasons that force children to work under the harshest of conditions. For example, part of the public actually encourages the learning of a craft at an early age.
Www.viewcamera.com/documents/VC_Getting_Started.pdf. Italian Film Photography. New enlarger arrives on the scene - welcome Durst 606. As some of the readers may still remember (after all the updates about counters and benches, and closets, and flooring, etc.) this bus will indeed contain a functional darkroom. After careful consideration a decision was made to have one enlarger set up for printing smaller formats and another one for larger formats (as well as prints larger than 16x20). We have plenty of Saunders LPL 4x5 enlargers to serve as the 'larger-enlarger', but only a few days ago I found this beautiful vintage Durst 606.
I have to admit I'm rather impressed by this old Italian design. It is both very functional and extremely weird. The light come from a bulb positioned in the rear and goes through a condenser before being reflected down a mirror. 1 roll of film, 1 week, 24 moments. How to Teach Your Kids Photography. Retouching Guidelines & Considerations. The general term “Retouching” can be categorized under the following subject-specific areas of Portrait, Editorial, Commercial, Beauty and Creative Retouching. Each of these areas possesses its own assembly of considerations around what “retouching” is when editing the image in question. In other words, the decisions and actions one undertakes when editing in the area of “Portrait” will be different from those undertaken when editing an image in “Beauty”. Gli ingranditori. Meopta Magnifax II – Le prime prove. Dal 1996 la prima rivista italiana di fotografia sul web.
Stampa bianconero fine art: come trasferire una immagine digitale su carta all’argento. Per la prima volta una tecnica inedita ed unica che permette l’impossibile. Tutorial: stampare con ingranditore fotografico in Tipster in Magazine - Lomography. Leggi argomento - Risorse On-Line. DIY Photography - Hacking Photography - one Picture at a time.
Softboxes and a cheap alternative to them. Bianco e Nero: sviluppo in camera oscura. Ciao a tutti. Bel thread. Leggi argomento - Cosa serve per sviluppare un rullino bianco e nero a casa. NatureScapes.Net - The Resource for Nature Photographers. Still life lightpainting. (russian version of this post) It's simple technique, but very time consuming. At first, i place black (or dark) background behing the scene, put a camera on tripod and set to manual mode with settings: iso at minimum (80), aperture to max number (8 in my case) for wider DOF and set exposure time to 5-10 seconds (i turn off light, make a test shot with flashlight and adjust exposure time, if it too low or too high).
When i done with camera settings, i start continuous serie of shots, turn off the light and start to lit the scene with LED flashlight from different angles and distances, changing the lighting when i hear shutter sound from camera (Canon Powershot A650 with CHDK firmware writes RAW shot in 5-6 seconds, so i have enough time to move flashlight where i want). At first, i don't move flashlight during exposure time, taking static lighted scene, and when i got enough shots, i move flashlight while shooting, trying to get some nice light effects.
Then, i sort all of them. "Super-zoomer" optical addon for moon shots. (russian version of this post) I found interesting article: Труба Кеплера - макроконвертер и фоторужье в одном флаконе (unfortunately, available only in russian language - it may be feeded to google translate service) and trying to do something similar with lens from old camera. Here is first, quick assembly of two external lens (after test shots i slightly improved this construction: do firm lens placement, better align them and add black tube between two lens). Both lenses made in USSR for film camera Zenit, which was very popular in Soviet days. Lens (A) - Jupiter 21M, big and heavy telephoto lens, firstly introduced in 1957. My technique for snowflakes shooting. This article on other languages: Фотографирование снежинок (russian version), Chinese version translated by Hung Li. My main hobby is taking closeup snowflake pictures.
Real snow crystals are amazing objects for macro photography, thanks to their beauty, uniqueness and unlimited diversity. Even after eight winters of regular photo sessions, seeing thousands of snowflakes in all their details, i do not get tired to admire new crystals with amazing form or an incredible inner pattern. Some people think that snowflake photography is a complex matter, and requires expensive equipment, but in fact it can be inexpensive, very interesting and quite easy, after some practice.
Learn photography, connect with your camera. Welcome to VCSM. Introduction to Rodinal B&W film developer - Daniel Hewes Photography. If you're new here, you may want to subscribe to my RSS feed. Pellicole Fotografiche, Diapositive Bianco e Nero e Colorepag.1. Leggi argomento - Scansione negativi, perchè? Cinzia_Baglivi ha scritto:...Se imposto una risoluzione inferiore, tipo 4800 dpi (che sono sicuramente sempre molti), mi viene un'immagine di 3,34x2,23 cm di dimensione (e quindi inservibile per ogni tipo di stampa, suppongo), e 4800 pxl/pollice.Se invece mantengo i 12600 viene un'immagine dalle dimensioni enormi ma con una risuluzione di 72 pxl/pollice.
Gruppo Rodolfo Namias - Antiche tecniche fotografiche. MACCHINE FOTOGRAFICHE E ACC - Negozio Online - Western Photo. BATTERIE - Negozio Online - Western Photo. Discussing Emulsioni liquide in Fotografia analogica - Italia. FTb TLb Service Repair Guide pdf free ebook download from jameskbeard. Analogica.it. KIT. Tutorial e guide per Gimp. Amandas13. The Bastards Book of Photography by Dan Nguyen. Hands On With Your DSLR: Best Camera Tips For The Amateur Photographer From Youtube.
Online Depth of Field Calculator. UserGuide - 400plus - [Guide][English] User Guide for 400plus - A firmware hack for the Canon 400D / XTi digital camera. Le tecniche della Fotografia L'effetto Orton Come realizzare immagini con un'atmosfera eterea e romantica. Playerdue Lighting - Il Corso di Fotografia. Approaches to Composition & Photography with Best Selling Author Scott Kelby.
Backlit Portrait Photography Tips. Playerdue Lighting - Il Corso di Fotografia. Tutorial e guide per Gimp. Photography Tips & Tutorials. Photography and Studio Lighting. 8 Things to Inspire You to Keep Shooting & Sharing Your Photography. Strobist. Tim Tadder: Advertising Photographer. Lighting 101. 16 Photography Project Ideas to keep you shooting every day! 7 Photography Projects to Jumpstart your Creativity.