
DIY Vertical Terrarium Mini Garden Wedding Favors. We’re approaching the end of our DIY wedding favor series, but I guarantee you will love our last picks as much as the first ones.

These vertical terrarium wedding favors make great gifts because they don’t take any room, and are extremely easy to maintain. Who wouldn’t want to bring a little bit of the outdoors to their home or office? – Gravel (can be found at any pet store in the aquarium section) – Air plants, cactus or succulents (you will need a small amount of potting soil if not using air plants) – Moss – spray paint – magnetic metal tins (from here or here, you just need to slap magnetic tape on the back!)
– Dremel tool – painter’s tape – E6000 glue Cover your tins with painter’s tape before you begin spray painting the inside of them. Place acrylic tops back in the metal frame of the caps and glue both pieces. Once your tins are dry from spray paint, remove tape and wash tins with water and soap. The Hipster Home » Blog Archive » How to Make a Tiny Terrarium in a Light Bulb. Ahoy there Hipster Homers!

I’m Julie and I’m the very first guest blogger on this fine site. Today’s project involves breaking stuff, plants, found objects, and miniatures. Fun, right? Let’s get started! We’re going to go through the steps to create your very own little terrarium. Dos and Don’ts: Do use sand or small pebbles; these are good because water drains through them easily. How To: You’ll need a few tools to make a tiny terrarium but nothing complicated to get started. Needle-nose pliersScissorsLong tweezers or chopsticksFlathead screwdriverGlasses or goggles Let’s start with the light bulb. We will be removing the inside parts of the lightbulb. First, remove the metal tip from the bottom of the bulb. Then, when enough of the sides are raised to get a good grip on them, hold one of the sides with your pliers and yank out the metal tip.
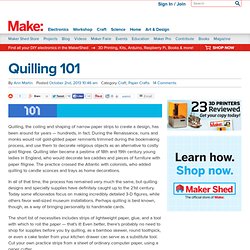
Next remove the black glass. Now you will be able to see the interior parts of the light bulb. Pull out any remaining wires with the pliers. Craft DIY Projects, Patterns, How-tos, Fashion, Recipes @ Craftzine.com - Felting, Sewing, Knitting, Crocheting, Home & More. Quilling, the coiling and shaping of narrow paper strips to create a design, has been around for years — hundreds, in fact.

During the Renaissance, nuns and monks would roll gold-gilded paper remnants trimmed during the bookmaking process, and use them to decorate religious objects as an alternative to costly gold filigree. Quilling later became a pastime of 18th and 19th century young ladies in England, who would decorate tea caddies and pieces of furniture with paper filigree. The practice crossed the Atlantic with colonists, who added quilling to candle sconces and trays as home decorations. In all of that time, the process has remained very much the same, but quilling designs and specialty supplies have definitely caught up to the 21st century. Today some aficionados focus on making incredibly detailed 3-D figures, while others favor wall-sized museum installations. Many arts and crafts stores sell basic tools and packages of multicolor paper strips.
Materials. {origami flower} Yesterday I went to the art store to get some supplies for my “type case project”.

Usually I walk past the overpriced origami paper, but since I had done so so many times already in the past and have been thinking about it every time I enter the store, I decided to go on a splurge and buy it. My hubby and I had a good evening (I just realize how lame that sounds. ;) ) folding origami frogs, cranes, planes.. ..and flowers! A Dozen Dollies... We've got a secret.

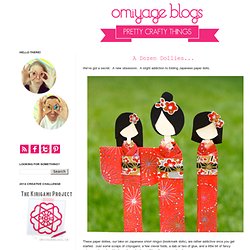
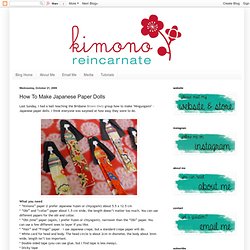
A new obsession. A slight addiction to folding Japanese paper dolls. These paper dollies, our take on Japanese shiori ningyo (bookmark dolls), are rather addictive once you get started. Just some scraps of chiyogami, a few clever folds, a dab or two of glue, and a little bit of fancy scissorwork, and suddenly you've got a bevy of beauties on your hands. How To Make Japanese Paper Dolls. Last Sunday, I had a ball teaching the Brisbane Brown Owls group how to make "Ningyogami" - Japanese paper dolls.

I think everyone was surpised at how easy they were to do. What you need * “Kimono” paper (I prefer Japanese Yuzen or chiyogami) about 5.5 x 12.5 cm * “Obi” and “collar” paper about 1.5 cm wide, the length doesn’t matter too much. You can use different papers for the obi and collar. * “Obi-jime” paper (again, I prefer Yuzen or chiyogami), narrower than the “Obi” paper.
You can use a few different ones to layer if you like. * “Hair” and “Fringe” paper – I use Japanese crepe, but a standard crepe paper will do. * White card for head and body. Fantastic HandmadeBouquet. Gift Ideas for poor creative souls (6) You know how it goes, a friend calls you and invites you to dinner at the last minute.