
3 Tutorials to Help You Get More Out of PowerPoint’s Image Editing. I know it’s hard to believe, but apparently there are many people who don’t like PowerPoint.
Obviously there are a lot of bad presentations created with PowerPoint, but it seems to me the blame rests on the shoulders of the presenter and not the tool. Besides, PowerPoint’s a versatile tool that’s used for more than bad presentations. Personally, I think PowerPoint’s one of the single best multimedia applications. The secret is to look at PowerPoint in a different way. And once you do that you’ll see that it offers an assortment of capabilities. I just returned from the Training 2012 Conference in Atlanta where I presented on some PowerPoint tips and tricks. In Atlanta I was sharing how PowerPoint makes a good image editor. I like this question for a few reasons.
So let’s look at a few ways to create the “stickout” effect in PowerPoint. PowerPoint Tutorial 1 Click here to view tutorial 1. PowerPoint 2010 has a background removal feature. Little Known Ways to Create Your Own Graphics Using PowerPoint. If you follow Sweller’s cognitive load theory, then you understand that the graphics in your elearning course are very important and play a large role in its effectiveness.
However, not having the right graphics is a challenge. If you’re like me, you’re on a limited budget and you just can’t go buy custom graphics whenever you like. That means you’re probably stuck using the standard clip art that comes with PowerPoint. After just a few projects you cycle through all of the good clip art and you’re forced to use the clowns and puppies. While your five-year-old child might like your choice of images, you’ll find that many in your organization are not particularly fond of clowns or puppies.
How Do I Get the Graphics I Need? If you want custom graphics, you can hire someone (although you might want to read this before working with a graphic designer) or you can make them yourself. In this case, I recommend two options: 1) create your own drawings or 2) modify existing clip art. Find Free Clip Art on Microsoft Office Online I really like what Microsoft’s done with the new Office Online.
It’s a much better user experience. There’s a quick screencast below, but here’s a high level overview: Better sorting of media typesSelections of image sizesSee similar images I like the ability to quickly scan the images of similar type. View Tutorial. Create your own graphics and icons for PowerPoint: Part I–Using clip art.
Yes, you can create your own graphics and icons for PowerPoint!
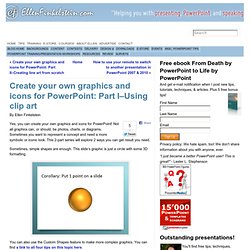
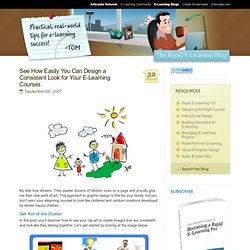
Not all graphics can, or should, be photos, charts, or diagrams. Sometimes you want to represent a concept and need a more symbolic or iconic look. This 2-part series will explore 2 ways you can get result you need. Sometimes, simple shapes are enough. This slide’s graphic is just a circle with some 3D formatting. You can also use the Custom Shapes feature to make more complex graphics. Line art — which includes standard clip art — can provide you with any graphic you need. Insert line art (in this case, clip art) and modify itTurn vector images from other programs into PowerPoint graphics I cover the first method here. Clip art — is it all bad? Welcome to Flickr - Photo Sharing. See How Easily You Can Design a Consistent Look for Your E-Learning Courses.
My kids love stickers.
They plaster dozens of random ones on a page and proudly give me their new work of art. This approach to graphic design is fine for your family, but you don’t want your elearning courses to look like cluttered and random creations developed by sticker-happy children. Get Rid of the Clutter. 3 Tutorials to Help You Get More Out of PowerPoint’s Image Editing.
DryIcons.com - Free Icons and Vector Graphics. VectorFinder. Free Vectors - Free Vector Art, Vector Images & Vector Graphics. Free Icons Web - Icons, Free Icons, Png Icons, Desktop Icons. Paper icons. 15 Interesting Clip Art Styles for Your E-Learning Courses. If you’re like many of us, you don’t have a lot of money to buy stock images or hire a graphics designer.
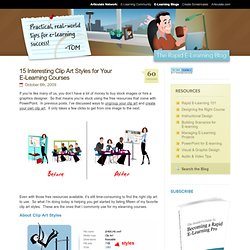
So that means you’re stuck using the free resources that come with PowerPoint. In previous posts, I’ve discussed ways to ungroup your clip art and create your own clip art. It only takes a few clicks to get from one image to the next. Even with those free resources available, it’s still time-consuming to find the right clip art to use. So what I’m doing today is helping you get started by listing fifteen of my favorite clip art styles. About Clip Art Styles As you search, you’ll notice that not all of the clip art belongs to a “style.” I like to find styles that have a lot of variety. In the example below, you can see how images from “style 148” provide characters, various props, and some shapes that I can use in my elearning courses. Tips on Finding the Right Clip Art.