
Laser. Может ли EMC управлять лазерным гравером? - Металлический форум. В развертке от лазера для фокусировки луча на плоскости используется хитрая ф-тета-линза (f-theta-lens) - фактически длинная линза с переменным фокусным расстоянием по длине.
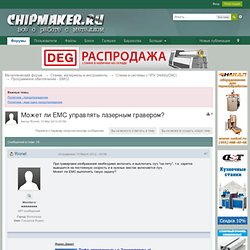
Фотку модуля приложил. Медленно - это не про развертку а про энергетическую характеристику лазера. 350мВт лазер может полимеризовать ~10-15 мм2 фоторезиста за секунду, т.е. для более-менее эффективного экспонирования нужна синхронная работа десятка-двух лучей. Просто ставим модули в ряд и каждый работает по своей зоне.
Скорости развертки получаются порядка единиц метров в минуту. Про метод с CO2 лазером и краской я знаю, но не уверен в его производительности. YF792 - Printhead (Prth, LSU) For Dell Printers. LaserExposer – LaborWiki. „Stable“ gehört nicht zu den möglichen Werten dieses Attributs (experimental, beta, stable, obsolete, unknown).
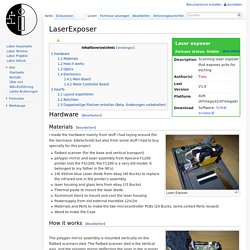
Materials[Bearbeiten] Laser Exposer I made the hardware mainly from stuff I had laying around (for the Germans: Edelschrott) but also from some stuff I had to buy specially for this project. flatbed scanner (for the base and vertical transport) polygon mirror and laser assembly from Kyocera F1200 printer (not the FS1200, the F1200 is a very old model. It belonged to my father in the 90's). 1W 450nm blue Laser diode from ebay (40 Bucks) to replace the infrared one in the printer's assembly. Four-Motor Laser Spirograph. Bouncing a laser beam off a mirror rotating at any angle above 0 degrees will create the illusion of a circle to the human eye.

Combine two rotating mirrors, and complex shapes begin to emerge. With every additional mirror, the perceived image becomes more complex and intricate, with the ability to create some very beautiful and bizarre flowing patterns of light. Most laser spirographs consist of only two mirrors, limiting the complexity of their shapes for the sake of easy construction and bulky size. Драйвер лазера принтера Hewlett Packard LaserJet 5000. Принципиальная схема, принципы функционирования и диагностики. Принтер HP LJ 5000 является достаточно уникальным изделием.
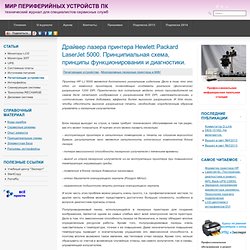
Дело в том, что это один из немногих принтеров, позволяющих создавать реальное (физическое) разрешение 1200 DPI. Практически все остальные модели этого производителя на самом деле печатают изображение с разрешением 600 DPI, «математическим» и «оптическим» путем добиваясь эффекта более высокого разрешения. И для того, чтобы обеспечить высокое разрешение печати, необходимо определенным образом управлять и лазерным излучателем. Блок лазера выходит из строя, а также требует технического обслуживания не так редко, как это может показаться. И причин этого можно назвать несколько: Экспонирование фоторезиста лазером 405 нм полигональным зеркалом - Металлический форум - Страница 4.
NVE (06 February 2013 - 12:05) писал: А краска (либо какое либо, другое покрытие), между тем, испаряется лазером хорошо.
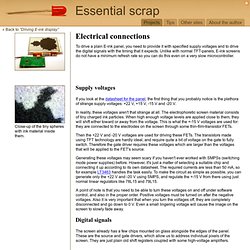
Тем что рекламщики для гравировки используют. Display. Electrical connections – Essential scrap. To drive a plain E-ink panel, you need to provide it with specified supply voltages and to drive the digital signals with the timing that it expects.
Connecting an iPad retina LCD to a PC. Update: please read this post This project was born at the Warsaw Hackerspace, it was funded by my friend Spin, who wanted to use the display in a project of his.
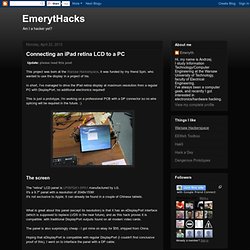
In short, I've managed to drive the iPad retina display at maximum resolution from a regular PC with DisplayPort, no additional electronics required! This is just a prototype, I'm working on a professional PCB with a DP connector so no wire splicing will be required in the future. :) The screen. HomeAutomation/EmbeddedSoftware/AVR/module/act_lcd_eg2401 at master · Cougar/HomeAutomation. WebSVN - HomeAutomation - Rev 1275 - /trunk/EmbeddedSoftware/AVR/module/act_lcd_eg2401/ Low res monochrome Hitachi LCD driver - Papilio One - Gadget Factory Forum. A friend of mine found a junked Hitachi LCD and gave it to me to see if I could get it going.
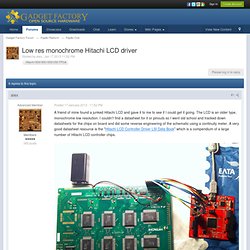
The LCD is an older type, monochrome low resolution. I couldn't find a datasheet for it or pinouts so I went old school and tracked down datasheets for the chips on board and did some reverse engineering of the schematic using a continuity meter. A very good datasheet resource is the "Hitachi LCD Controller Driver LSI Data Book" which is a compendium of a large number of Hitachi LCD controller chips. According to the datasheet, the large chips on board are six HD61200 column shifters (IC3,4,5 and IC 6,7,8) and two HD61203 row shifters (IC 1,2). Low res monochrome Hitachi LCD driver - Epson EG2401 - Papilio Platform - Articles - Articles - Gadget Factory Forum. I've just done something similar with an old Epson EG2401 display.
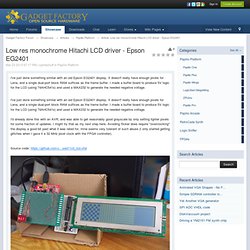
It doesn't really have enough pixels for Lena, and a single dual-port block RAM suffices as the frame buffer. I made a buffer board to produce 5V logic for the LCD (using 74AHC541s) and used a MAX232 to generate the needed negative voltage. I'd already done this with an AVR, and was able to get reasonably good grayscale by only setting lighter pixels for some fraction of updates. I might try that as my next step here. Просмотр темы - Печать РЅР° фоторезисте лазерной разверткой. Здравствуйте форумчане!

Build a Laser 3D Printer - Stereolithography at Home : Y Axis. A couple of notes before you begin. The bearing blocks come with a piece of plastic where the rail goes, this holds the bearings in place. Do not take it out. When putting the bearing block on the rail just push the plastic piece out with the rail. If you have to take the block off the rail push the rail out with the piece of plastic lining it up the way it came. Some of the pictures have bearings for support on the end of the Acme rods, I found that they were not needed due to the short length of the rod. If the assembly order doesn't work right or you have questions about anything let me know and I will modify the instructable to include the changes. Please use laser safety goggles for 405nm lasers. Cut all the parts on the mill. Drill holes in the stepper mount flanges and the edge of the Acme nut block. 3D принтер. Просмотр темы - Доступная высокоточная стереолитография.