
How to Make a Paper Flower Backdrop: Let's Finish It! And here we are, at the final part of our How to Make a Giant Paper Flower Backdrop tutorial.

In case you missed it, learn how to make all the other flowers for this backdrop in Part One and Part Two. Today we'll learn how to make the last flower, what I call the Rolled Cone Flower. As before, you'll need more of that roll of paper, scissors, and a glue gun. Tape is handy for this one, too, but not necessary. This is what I mean by Rolled Cone Flower: These are incredibly easy, and you can make them very large. First, cut your petals. Roll each petal into a cone, and secure with tape or hot glue. Arrange the cones so that they form a circle, with the points meeting in the middle. Make a fringe flower center, if desired, and glue to the center of the flower. The only other element on the backdrop were the leaves. The instructions for these are pretty darn obvious. You've done the grunt work--now let's see it all come together into a thing of beauty.
Daydream in Color » {Freebie Friday} Mini Cocktail Umbrellas. The rain has decided to come full fledged this week in the Pacific Northwest and it had me thinking about my Daydream In Umbrellas post last week.

I thought it’d be fun to make mini umbrellas to garnish our drinks, desserts, and even our house as we start to pretend we’re somewhere tropical. My friend Emily and I joke about how she always does winter crafts in the Spring/Summer and now I’m totally pulling the opposite of a summer craft in the Autumn/Winter. But! I promise I’ll show you how to make something really cute next week with these so that they can be timely for Autumn. Supplies: TemplateColored or patterned paperPrinterScissorsScoring tool (bone folder, tip of an empty pen, or a toothpick/skewer)RulerAdhesiveToothpicks/StrawsGlue gunSelf healing mat or old catalog/magazine to work on Directions: Daydream-In-Color-Blank-Umbrella-Template This week we’ve: Do you like the rain?
Some Kind of Wonderful on the Behance Network. Daydream in Color » {Freebie Friday} Raindrop Pattern Paper & Umbrella Mobile Tutorial. As promised, I’m here today to give you a little tutorial on how to incorporate those little cocktail umbrellas from a couple Freebie Fridays ago into a seasonally appropriate mobile.

I also thought I’d throw in some raindrop patterned paper inspired by my Daydreams In Umbrellas post in case you want to make some other craft or to wrap gifts and top it with a little umbrella! Supplies: Card stock (in cloud and raindrop colors)Mini cocktail umbrellas you’ve made in the past Freebie FridayMicrofilament or thread or yarnEmbroidery hoopGlue gunPaper adhesiveScissorsPencilTape Directions: Fold your card stock in half.Draw your clouds and raindrops.
Raindrop Pattern Paper. Origami umbrella. Call me Martha!! Crafty / paper star tutorial. Crafty Home Decor / DIY Mirrors and Christmas Tree Lights. Photo 1 of 32: Toy Story Midway Mania Carnival / Birthday "Toy Story Midway Mania" Crafty: Snowflake Ornaments and a Challenge Update. Coffee filters!
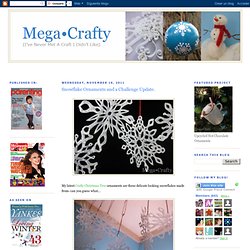
But they've been stiffened to make them more rigid and ornament like. And as an added bonus the fabric stiffening medium I used gave the filters a semi-translucent icy look. As you probably already know I love to craft with coffee filters. (As demonstrated by this post, this post, this post, this post, and this post) Not only are they cheap but they're so versatile. And at only a dollar for pack of 200, they were definitely on my list of materials for the tree. Now you've probably seen more than one tutorial on how to cut snowflakes from coffee filters so I'm just going to give you a brief overview of those steps. Step One: First smooth the filter out so it's flat.
Step Two: Use a craft knife to cut the folded filter. I made some cuts along the edges and inside the middle to get a really detailed and delicate looking flake. After you're done cutting unfold to reveal your beautiful flake. Next it's time to stiffen the filters up with fabric medium. Cascading Garden Pom Poms! Great Wedding or Party Idea! So I've been searching of ways to start doing crafts for budget weddings and fell in love with the idea of the very popular can't-get-enough-of-POM POMS.
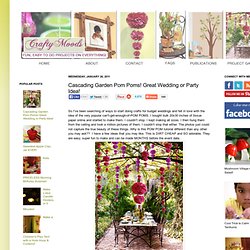
I bought bulk 20x30 inches of tissue paper online and started to make them. I couldn't stop. I kept making all sizes. I then hung them from the ceiling and took a million pictures of them.