background preloader

For me

Facebook Twitter

Welcome to oliver + s > lazy days skirt free pattern. August is meant for relaxing and hanging out on the porch. 
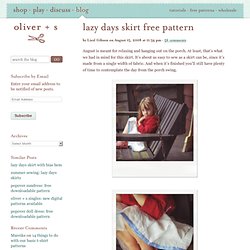
At least, that’s what we had in mind for this skirt. It’s about as easy to sew as a skirt can be, since it’s made from a single width of fabric. And when it’s finished you’ll still have plenty of time to contemplate the day from the porch swing. We’ve been testing it on several little girls, and it’s perfect for dog walks too. With a simple elastic waistband, it’s also comfortable, which is a crucial element for hanging out during the most relaxed month of the year. But our favorite part is the ribbon at the hem. Download and print your free instructions for the Lazy Days Skirt here. And then go enjoy the rest of your summer. Labels: lazy days skirt, patterns, sewing. A Traditional Chinese Pants Pattern!

This pattern really attracted me right away - not so much because of the final shape of the pants, but because of the simplicity of the pattern. It is put together from two rectangles and an elastic waist band. Nothing else! See here: (Don't worry about figuring this out yet, I will explain it later in this post!) Maybe you have already seen my circle jacket or the one I made out of a simple rectangle - yes, I am fascinated by turning simple geometric shapes into garments.

The final pant shape is similar to harem pants. The pattern is put together from two identical rectangles like this one: This rectangle will make up one pant leg and half of the crotch/hip part. This rectangle is actually made up of three parts (indicated by the vertical dashes). Line A-C = 95 cm (37,5''), this is the total pant leg length from the waist band down.

No seam allowances included! Now you see that the more you overlap the pieces, the lower the crotch gets, but also the smaller the hip opening. Corvus tristis: Science, Craft and an Odd Bird. I finished my part of this ensemble yesterday morning, wore it to a party that night, and got generally good feedback. 
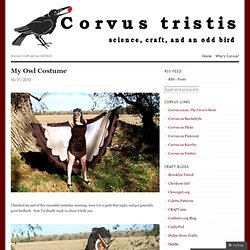
Now I’m finally ready so share it with you. The major components I made include the dress, the wings, and a feather headdress. Then, of course, there’s the absolutely gorgeous Sundries and Plunder mask I won from a Grosgrain giveway, which not only inspired the whole project but is its crowning glory. So where shall we begin? Owl Costume: The Dress The simplest part was the dress, which was sewn off a pattern largely f0llowing the directions. It’s a pretty simple stretchy sheath with a pointed hemline, a gathered halter neck, and a tie back (which is surprisingly efficient at covering bra bands, for a halter neck).

The other modification was to sew two channels up each side seam, then lace a piece of ribbon up one channel and down the other. Look, now it looks like all the women’s halloween costumes in the store! Owl Costume: The Headdress Owls don’t have hair, after all. Embroidery Designs at Urban Threads - Projects. PR&P Tutorials, Week 5 - Fishtail Circle Skirt. I really hope you aren’t going to kill me…but this is probably the one week out of the whole competition where I do not have a complete tutorial. 
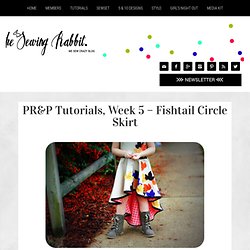
The dress was just so tailored to fit my daughter exactly, that in the time allotted to create the design, I just couldn’t do it all.

But there is hope! I did manage to snap one picture, one VERY HELPFUL picture, to get you on your way to creating this look… That’s right, how to make the circle skirt portion of the dress! Normally a circle skirt’s waist would be directly in the center. For this skirt, the waist is off-kilter. It really is very simple to do this. Then you can finish any way you like! Thanks so much for stopping by, and until next time… Happy Sewing! Jess Jess Abbott the Sewing Rabbit is the founder and creative director behind the me sew crazy blog, as well as SewSet.com, 5 & 10 Designs, GNO Events, and co-editor of STYLO. Latest posts by Jess (see all) Lace Top Tutorial. I love me some lace! 
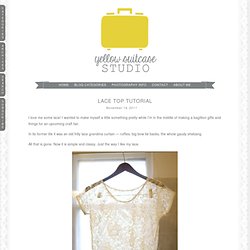
I wanted to make myself a little something pretty while I’m in the middle of making a bagillion gifts and things for an upcoming craft fair. In its former life it was an old frilly lace grandma curtain — ruffles, big bow tie backs, the whole gaudy shebang.

All that is gone. Now it is simple and classy. Just the way I like my lace. Start with some lace! Look for something that’s soft with a non directional pattern. Now I didn’t follow a specific pattern to make this. I laid out my one shirt over two layers of lace and cut a generous rectangle around it. Next fold the two layers of lace in half lengthwise. Fold your shirt in half and lay it on the lace — folded edge on folded edge. Cut around the shirt leaving a generous half inch. You’ll now have two pieces of lace like this. {ha your eyes are probably telling you that it’s way out of focus — it’s not!}

Now take one of the pieces of lace and fold it in half like it was before. Next trim very close to the stitches you made. How it's made. First of all, I was quite overwhelmed by all the lovely comments I got on the yellow hoodie! Thank you so much! Besides that I also got questions about how I made this hoodie. I did not take enough pictures during the making for a complete how-to, but here's some more about the process. As I said, the horizontal seam was inspired by my niece Marie's coat. I emailed her a bit late though, so when she sent me her drawing with measures I had already started to improvise. Marie's coat has a very big hood, I made mine somewhat smaller. My design differs from Marie's drawing, but it helped me understand how a horizontal seam works.

Below shows the way the parts fit together. UPDATE: Get the measurements to draw your own pattern HERE! Folded Miniskirt Tutorial. Difficulty: Intermediate. 
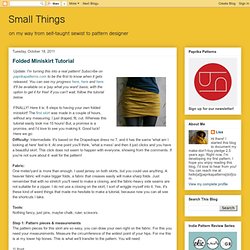
It's based on the Drapedrape dress no 7, and it has the same 'what am I looking at here' feel to it. At one point you'll think, 'what a mess' and then it just clicks and you have a beautiful skirt. This click does not seem to happen with everyone, showing from the comments. If you're not sure about it: wait for the pattern! Fabric: One meter/yard is more than enough. I used jersey on both skirts, but you could use anything. A heavier fabric will make bigger folds, a fabric that creases easily will make sharp folds. Tools: Nothing fancy, just pins, maybe chalk, ruler, scissors.

Step 1: Pattern pieces & measurements The pattern pieces for this skirt are so easy, you can draw your own right on the fabric. 1) front I used my measurements as an example: 100 cm. 2) back The width of the back will then be ([measurement]/2)-10, which is 40 cm for me. 3) lining The lining will have the same width as the front piece (60 for me), but half of the length, which is 33,5. Ladybird Needle Keeper Project and Tutorial. I did not plan to do another tute so quickly, it just sort of happened....and this idea came to me. I used to lose my embroidery needles all the time, I'd put one down to re-thread it, and then get side tracked.

Consequence: another needle down the side of the sofa and a cross husband saying 'That's dangerous, someone could sit on that, etc etc! '. To aid my plight a kind friend sent me a needle keeper which had a magnet stuck on the top. I can't tell you how useful this has been over the years - plus saving me a fortune in new needles. I was racking my brain for a gift to give a stitching friend and this idea popped into my head.

Like most of my ideas it arrived just before I went to sleep, so I spent the next half hour making notes and then couldn't nod off 'cos my head was buzzing! Well, here's my prototype, which I thought I'd share. I created the little ladybird design so she could keep watch over the needles for me. For the magnetised base you'll need: a small piece of mat board* Lush & Plush Trends from Fabric.com: Trendy Faux Leather Handbag. Red Leather. Read that out loud three times fast. (Go ahead... I'll wait) Hard to do isn't it? Now try Red Faux Leather. Much easier, isn't it? Not only is it easier to say, faux leather is much easier to sew with than the real thing. We really enjoyed designing and creating this elegant handbag project out of the faux leather provided by our friends at Fabric.com.

A real leather bag would have the seams glued open, hammered flat and top stitched. Take a read through our tutorial on Sewing With Faux Leather for more details about working with this specialty fabric. Our thanks to Fabric.com for helping us bring this Series to you. The finished size of the bag is approximately 13" wide x 9" high, excluding the handles.

Any Sewing Machine (we recommend the Janome HD3000)Ultra Glide foot - or other Teflon® type foot Create the inside pockets Mark the lining for the pocket and the bottom corners Repeat to make all these same markings on the other 11½" x 17" lining piece. Make the handle tabs.

Summer pants

Rosie’s birthday top. This top was my birthday present to Rosalie. 
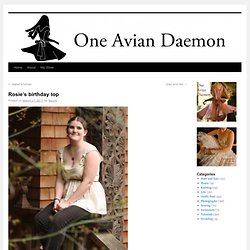
It’s a bit summery for our current weather, but she was nice enough to model it for me outdoors anyway. To make this top I used 1 yard of the dotted fabric, about half a yard of lining fabric, a 9″ zipper, and 33 inches of ribbon (an inch more than enough to go around her ribcage).

The pieces of the pattern are: Cut the straps of the front longer than you need to leave room for tying. It is easy to shorten them once you’ve put the knots in and can measure accurately. The skirt should be a bit bigger than the person wearing it so it hangs away from the body (I made Rosie’s about 8 inches larger than her: 4 in front, 4 in back). To put it together, gather the bodice and its lining at the bust. If I left something out, or you’re wondering what that unlabeled piece on the left of my sketch is (it’s the back of the top), please ask! Sweater vest makeover--with faux fur! Tutorial. I am SO excited about this project and tutorial. I planned and schemed about it for like weeks before I bought the fur and sweater vest.

It's so cool! Fur is in this year, obvs, but I'm not sure I'm ready to do a full-fur thing, so I started with a sweater vest that gets the look. Check out these inspirations. So many options, right?? Anyway, I really wanted to make one of these so I went to JoAnn and bought some nice-ish fake fur. Warning--this is really more of guidelines, or at least just a true-to-the-word tutorial.

Cut out the collar. Also cut out a LINING for the collar--very important to make the whole thing better quality and look good longer. Make the vest fit you. Assemble the collar. Understitch, pulling the lining tight (can't really press fake fur cuz you'll melt it!). Lay your collar down on the vest and take a look. Through the fur layer only, sew right side of the fur to wrong side of the vest along the length of the collar. Try it on! Ta-da!

I feel so stylish with my fur!! Tutorial: Lace Keyhole Top from Polo. This tutorial's pretty short, but I know I always appreciate even the quickest of how-tos! I'm not sure where the inspiration for this top came from...I was actually about to cut it up to make some navy blue ruffles for a different top refashion, but I just couldn't bear to cut up something that already had finished buttonholes. I stood in front of the mirror buttoning and unbuttoning it, trying to figure out what I could do. I only ended up saving one of the buttons, but I think it's an improvement- polo shirts just aren't my style. Here's the "before" pic and another "after. " Keep scrolling down for the tutorial! How to Make a Lace Keyhole Top from a Polo Shirt 1. 2. 3. 4. 5. 6. Tutorial- The "Spiral" Cowl Collar. As promised, here is a tutorial for making a cowl collar that has been "Spiraled" so that it drapes in lovely gentle folds that hide the neckline seam, rather than just "flopping down" in the front.

On a recent garment, I showed you the Spiral Cowl Collar on a drapey Rayon knit fabric...this blue one is made from heavy cotton/lycra knit Velour. There may be other ways to make a Spiral Cowl...this is how I do it... (Click on any Photo to enlarge) Start with any basic knit top garment that has a Jewel neckline, and sew the shoulder seams. You may then choose to lower the Front Neckline a little bit more like I did here. This is not an exact science. Next, cut a cowl collar that measures 12"-20" Long x the Neckline Circumference + Seam Allowance. Then turn the tube right sides out, folding it in half to enclose the seam allowances. Next we will start to "Spiral" the Cowl Collar, by sliding the INNER CB seam and the OUTER CB seam APART by 3"-6" And something like this from the back...

Slouchy Bag Free Pattern {Sewing Tutorial.