
Tutorial: Handmade Covered Buttons. I LUV covered buttons!
Have you noticed a spike in their popularity recently? I have. I'm paying attention over here ya know. So I devised this handy tutorial that avoids the trip to the button store altogether and allows you to make these little babies with stuff from around the house. Let's do it! You will need the following: fabric scrapneedle and threadpolyester batting (not shown)flat plastic (I keep the plastic packaging that comes my way for craft purposes)felt scrapnarrow ribboncircle template or round thingpencil or markerscissorscraft glue. Sewing 101: Drafting. We are continuing the Sewing 101 series.
One of the questions we get asked a lot is about pattern drafting. My favorite finishing technique. I actually have several favorite finishing techniques, but there is one newish-to-me technique that I really love: the applied i-cord.
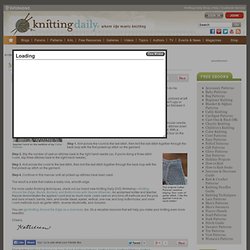
I used this knitting technique to finish off the neckline of my Caftan Pullover, pictured at left. The edging that the pattern called for was four rows of garter stitch, so it wasn't ugly or anything, but I wanted a smoother look. Stumpwork Beetle. I completed the stumpwork beetle yesterday afternoon and, whilst I think I need more practice, I'll share with you how it was done here.

Hope you enjoy and find it at least a little interesting, and maybe even useful too! The kit came with just an oval outline on the fabric. The first thing to do then, was to pad the outline with felt. Travel Volunteer Blog » Brought To You By The Letters R, L and The Colour Red. In most countries, you find that people speaking English as a foreign language make the same mistakes.

It takes a long time for Italians to drop the sing-song of their native tongue; the French will resolutely never pronounce an H; and the Spanish find swap Bs and Vs like footballers swap jerseys. Actually, they’re not alone in this: the Japanese do it too, more subtly, but it’s there. It’s hard to pick out, though, when the R and L issue is so noticeable. Every nation has linguistic foibles like this – ask an average Scotsman to say “murder” and the sound is like hitting a wet hessian sack with a baseball bat: “Muh.
Duh.” How to make a center pull ball. This came about from a thread on knittinghelp.com.

I mentioned how I create a center pull ball of yarn without using a store-bought yarn winder, so I thought I would put together a photo tutorial for those who wanted to see how. Here goes: Start off by putting 6 inches of your yarn into the center of a paper towel tube. I prefer a paper towel tube over a toilet paper tube because the length gives you something substantial to hold on to. Next, hold the yarn against the tube with your thumb. Begin winding the yarn perpendicularly around the tube. Once you have a few wraps established so the yarn is secure on the tube (about 10 wraps) begin winding the yarn around the tube at an angle. Once you have another 10 wraps at an angle, turn the tube 1/4 turn and begin wrapping again at the same angle. How to sew with nice even seam allowances or topstitching. In my classes I find that a lot of people who are new to sewing lose sight of how wide their seam allowance ought to be.
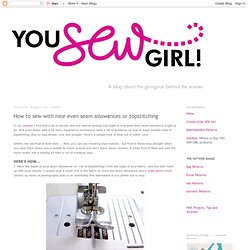
And even those with a bit more experience sometimes need a bit of guidance on how to keep parallel lines of topstitching (like on bag straps) nice and straight. Here's a simple trick to help out in either case.Ahhhh, the old Post-It Note trick.... Well, you can use masking tape instead - but Post-It Notes stay straight when you stick them down, are a doddle to move around and don't leave sticky residue. A small Post-It Note pad also fits more neatly into a sewing kit than a roll of masking tape.HERE'S HOW...1. Mark the depth of your seam allowance (or row of topstitching) from the edge of your fabric, and line that mark up with your needle. Techniques. Adding belt loops is easy - I'll show you how! Sewing Tips – Turning a Tube Right Side Out.
Okay, so I realize that sometimes I gloss over one of the steps in my instructions, figuring everyone understands or has done a certain step before. Whoops, I know that must create confusion. Sorry. So today…….I am going to clarify something from this post. The fabric headbands. In the instructions, I explain that you sew a long piece of fabric together lengthwise with right sides together. Colette Sewing Handbook: Gathering Stitches. We’re going to be highlighting a few tips and tricks from the Colette Sewing Handbook this month!
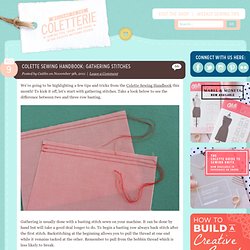
To kick it off, let’s start with gathering stitches. Take a look below to see the difference between two and three row basting. Gathering is usually done with a basting stitch sewn on your machine. It can be done by hand but will take a good deal longer to do. To begin a basting row always back stitch after the first stitch. When there are more rows, the gathers have a chance to be more even and controlled. Two Rows of Basting Two rows of basting offers less control of the gathers.
Three Rows of Basting The three rows of basting has more control and smaller gathers. Monogrammed Woolens. Adding Simple Cargo-style Pockets to Shorts. Sewing 101 with Michele, Loop Closures. It's time for another wonderful Sewing 101 post!

I'm delighted to welcome Michele from Michele Made Me. I twisted her arm into helping this month. She is SO creative, and makes amazing things. Printable thread bobbins... How to Sharpen Your Rotary Cutter Blade. These are my faithful rotary cutters… the 28mm and 45mm.

Sadly, they are as blunt as a hammer ! Everyone has this in their kitchen, right? How To Videos. Easy Tutorial - How to use metal rivets. Ever since Kyoko kindly taught me how to use rivets I have been hooked on them. When you and your sewing machine are already on crappy terms because your bag has a ba-jillion layers (and that's before you've even attached the handles) don't empty your purse into the swear jar; rivet your handles on instead.