background preloader

Recycled sewing

Facebook Twitter

Sweatshirt Refashion TUTORIAL finally!! Remember this Sweatshirt Refashion? Well guess what? I am finally going to do a tutorial. Sa-weet!!! (that's what I'm imagining you are all saying ; ) Materials Needed: -One old used and loved sweatshirt (it could be new or not loved...you will love it after; ); a larger sweater is best to work with. -Fleece or other sweatshirt material for lining -Buttons (the biggest and most awesome you can find) So the sweatshirt I used for this tutorial is a zippered one and a little on the small side. If your doing a regular hoodie, just cut open a little off center. 2. 2b. if working with a larger sweatshirt, take in the sides of the sweatshirts as well. 3. as you can see on the left, the extra sleeve material will taper on one end. 4. 4.5 I forgot to do this step, but i think it would make it look nicer. 5. 7.

(seriously, my arrows look like they're on drugs). 8. Yay your done!!! P.s. The Boys' Faux-Layered Christmas Tee. It's high time for a project for the boys! I'm making it a priority to start coming up with more boy projects. Here's a fun little shirt for Christmas that's festive but also doesn't scream "Christmas shirt". I made my son's in a size up so that it will (hopefully) fit him next year too. What You'll Need: Black Tee (again, I used a size up so it'll fit for two seasons) An old long-sleeved tee (I used an old red maternity tee of mine) Scrap piece of muslin or similar fabric Sewable Heat N Bond Iron On adhesive or spray adhesive (optional but nice) Letter Stencil Black Fabric Pen Green Embroidery Thread and large needle First, take a long-sleeved shirt that fits your subject well and measurement the length from shoulder seam to wristband.

I find it easiest to invert the sleeve with wrong sides together, lining up the seams, and pinning in 2 spots. Pull your sleeves right side out and top stitch if desired. Set aside while we work on the patch. Iron to shirt per adhesive package directions. The Chiquita Dress Tutorial. Isn't it funny how a characteristic in someone can drive you crazy one moment, but be the very thing you love about them the next? 
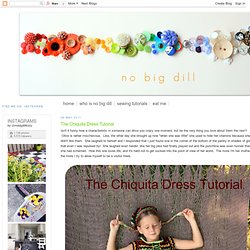
Olive is rather mischievous. Like, the other day she brought up how "when she was little" she used to hide her vitamins because she didn't like them. She laughed to herself and I responded that I just found one in the corner of the bottom of the pantry in shades of green that even I was repulsed by!

She laughed even harder, like her big joke had finally played out and the punchline was even funnier than she had schemed. How this one loves life, and it's hard not to get sucked into the point of view of her world. The more I'm her mother, the more I try to allow myself to be a visitor there. Clover was wearing this yellow dress the other day and a reader wondered if I had done a tutorial on it without her knowing.

For your chiquitas: I used two coordinating knits. Cut a rectangle out of the contrasting knit for the placket. See that look on her face? Tutorial lite: Getting another year of wear out of a top. Disclaimer: This really isn't a tutorial and can probably be filed under 'Well, duh' but I'm sharing it anyway because sometimes the 'Well, duh's pass us by. 
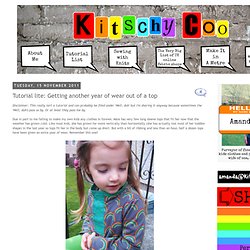
Or at least they pass me by. Due in part to me failing to make my own kids any clothes in forever, Maia has very few long sleeve tops that fit her now that the weather has grown cold. Like most kids, she has grown far more vertically than horizontally (she has actually lost most of her toddler shape) in the last year so tops fit her in the body but come up short.

But with a bit of ribbing and less than an hour, half a dozen tops have been given an extra year of wear. Remember this one? Let's give it another year. Materials:A top that has normal hems (i.e. does not have cuffs already)Ribbing (or jersey works too provided it's not too flimsy). Cut a piece of ribbing that is roughly 5.5" to 6" high and half an inch narrower than your sleeve hem when the ribbing is folded. Cut the sleeve hems off at the stitch line. Same for the hem. MADE: TUTORIAL: Recycled Grocery Totes. Ready to go green? 
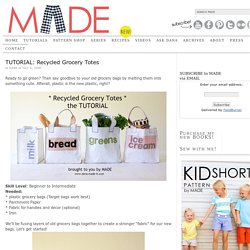
Then say goodbye to your old grocery bags by melting them into something cute. Afterall, plastic is the new plastic, right? Skill Level: Beginner to IntermediateNeeded: * plastic grocery bags (Target bags work best)* Parchment Paper* Fabric for handles and decor (optional)* IronWe’ll be fusing layers of old grocery bags together to create a stronger “fabric” for our new bags.

Let’s get started! 1. I guess Target needs to add #6. I chose to only use the white portion of my bags. Cut the bottom, top and sides off of your bag. Lay the long rectangular sheet flat. This is the tricky part, so I won’t sugar coat it. I found that the best way is to start at the bottom and press the iron up, to get any air bubbles out. When you’re all done, it should look like this, a large sheet of plastic: Continue the process so that you have sheets of this new “fabric” to work with. 2. Cut out your bag pieces using a rotary cutter, cutting mat, and ruler. 3. 4. 5. And….you’re done! Re-purposing. Etsy Russian Team. You can make a beautiful and stylish pendant with your own hands. It's easy if you'll follow this tutorial from Katrinshine You will need: a.. A piece of genuine leather 1/32" to 1/16" thick b..A thick needle or an awl c. Scissors d. 1. 2. 3. 4. 5.

Refashionista - Jen from iCandy Handmade. I hope you guys have been enjoying this Refashionista series as much as I have. 
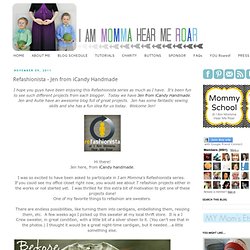
It's been fun to see such different projects from each blogger. Today we have Jen from iCandy Handmade. Jen and Autie have an awesome blog full of great projects. Jen has some fantastic sewing skills and she has a fun idea for us today.

Welcome Jen! Hi there! I was so excited to have been asked to participate in I am Momma's Refashionista series. If you could see my office closet right now, you would see about 7 refashion projects either in the works or not started yet. One of my favorite things to refashion are sweaters. There are endless possibilities, like turning them into cardigans, embellishing them, resizing them, etc. I had some fun wide stretch lace in my stash, and thought of ... stripes! To make this look yourself: Materials: Sweater and lace/trim/ribbon chalk or fabric marker Steam-A-Seam or Heat N Bond Tape Thread to match Hem Tape/Ribbon Repeat for each piece of lace. Thanks so much Jen. PR&P Tutorials, Week 4 - Upcycled Ruffles Dress. Week 4 of Project Run & Play was the Upcycle Challenge, we were tasked to create a look using only things that were thrifted.

NO new fabric. I actually happen to love upcycling, I find that using old clothing to make new items can actually make the finished product look nicer. It can also make the sewing process easier and more fulfilling. Depending on what you are creating, very often upcycling eliminates the need for making hemlines or other finishing touches – and can make your hand sewn garment look professionally made because of the finishing touches you can incorporate from the original garment. Lastly, it brings costs way down, and helps save the environment at the same time! For the Upcycled Ruffle Dress, the main body of fabric I used was an old skirt I found at the local Salvation Army. Initially I wanted to use more of that lacy curtain you see in the photo above…but it just started to look like a giant hair net.

Seriously, it doesn’t take that long. Let me show you how… Re-Purpose Little Girl Jeans. How many other mother's go crazy spending money over and over again on pants that end up looking like this? I'm so tired of it. You can't donate them, and yet you feel guilty for throwing them out. Today I decided to add a little something to these and turn them into new summer pants for Marisol. So I chopped off the torn bottoms. Cut up some sweet flower fabric (that I picked up on clearance this week at Beverly's for $2 a yard). I stitched up the sides and attached it to the bottom. Then I hand-stitched a pretty lace trim (I really need an industrial strength sewing machine). Such a simple way to bring new life to old jeans, and perfect for the weather we are currently experiencing. As seen on: The Mother Huddle This post linked to:

Re-purpose And Save Money During Back To School. If you can re-purpose old clothes for this school year, I highly recommend doing so, think of the money you will save. 
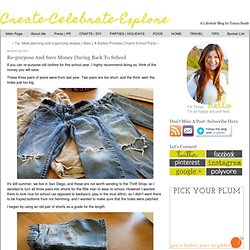
These three pairs of jeans were from last year. Two pairs are too short, and the third, well, the holes just too big. It's still summer, we live in San Diego, and these are not worth sending to the Thrift Shop, so I decided to turn all three pairs into shorts for the little man to wear to school. However I wanted them to look nice for school (as opposed to backyard, play in the mud attire), so I didn't want there to be frayed bottoms from not hemming, and I wanted to make sure that the holes were patched.

I began by using an old pair of shorts as a guide for the length: I tend to just eye-ball things but if you prefer, measure and use a fabric marker to make sure you get your line straight before cutting. As you can see two pairs of shorts still had holes in them but the third didn't, so I tackled that pair first. The second pair I tackled were the tan pair. Puppet play: diana schoenbrun guest post! If you're anything like me, you have any number of stray socks and mittens lying around the house that have sadly lost their mates.

In the new book Puppet Play: 20 Puppet Projects Made with Recycled Mittens, Towels, Socks, and More, author Diana Schoenbrun shows her readers how to make super cute and easy puppets from these and other recycled materials. Since many crafters are interested in the creative process behind a craft book like this, Diana is here at the honeybee blog today to tell us how she came up with the inspiration for her book. PS--if you'd like to try out a couple of sample projects from Puppet Play, including the quirky striped elephant puppet on the book cover, please visit the links below! Crazy Cat PuppetBetty the Elephant Puppet From Diana Schoenbrun: I came up with the idea for Puppet Play a few years ago. I had taught a puppet and playwriting classes for children ages five to seven. Here’s some fun background information about the book. From Teeshirt to Halter Dress : Daily source of DIY craft projects and inspiration, patterns, how-tos | Craftzine.com.

Upcycled Design Lab Blog - Starting Over - More T-shirt Tales and a Tutorial (Basket Weave Upcycled T) So yesterday I accomplished what I was beginning to believe was the impossible!!! Drum-roll please..... I finally finished another t-shirt project!! Amazining?? I know. Thank you. Can you here the music? No? Ok I guess that part is just in my head. Anyway I actually used one whole t-shirt and a good portion of another tee-shirt. As you may already know I was feeling quite discouraged a few days ago as all of my current work in progress was at the I don't know What The Fork to do with it stage . Remember this? OK so it actually looked like this. Well I am happy to report that as with most things persistence does pay off and surprisingly no gin and tonics were even required.

I am learning to be more tuned in to the lessons that can be learned in even the smallest experience in our lives. But it is important to be able to let go of things. Isn't it? We hold on to so many things that hold us back in life. But of course the lesson is, that in the end, I was glad that I did. That's it for now. Refashionista - Kelly from Sewing In No Man's Land. Kelly amazes me with her detailed, over-the-top designs. She is an incredible seamstress and to top it off she's a professional photographer. Even if you don't sew, her blog is too beautiful to pass up. Welcome Kelly! I am so excited to be part of the Refashionista event this year! I love Cheri and her fabulous posts. My family is from Ireland and my Granny and Granddad never left the island.

I wish I had taken the opportunity to learn more from her. What is fantastic about using an old coat is that all the difficult parts are already done for you so the coat comes together incredibly fast! This left me with an extremely professional looking pocket and hardly any effort. The same is true for the center placket. The topstitching from the original coat again makes the shrunken version look much more professional: The original coat had a turned over collar not a hood. Plus hoods show off the super cute lining you put in! Cheers! Thank you so much Kelly. Refashionista - Delia from Delia Creates. Welcome to Day 3 of Refashionista. Today our guest is Delia of Delia Creates. I adore Delia. Her blog feels like entering a comfortable, warm home.

It's full of beautiful ideas, gorgeous pictures, and she has two adorable boys! (She's also got a little girl on the way.) If you haven't been to her blog before you need to check it out. She's awesome. Hi I Am Momma readers! I love re-purposing projects, because you get to take something useless to you and make it useful again...or maybe even something you love. :) Such is the case with some too tight, too short sweaters I had, that I converted to cardigans. I know, I know...this has been done before - a lot, but this is my version of a: With most cardigans you have buttons that line the length of it so you could technically wear it as a blouse if needed.

With these cardigans, because they are starting out as too tight and too short sweaters, there are only two to three buttons that clasp the cardigan partially closed. Materials: Let's begin. 1. Brenna’s book page fabric. I love the look of old book pages. The toasty brown edges and pale centers of the pages pair perfectly with the stark black type. Simple design with such a vintage feel, but so fragile and brittle. To fix their fragility, I coated the paper with silicone.

This technique preserves the fragile pages, making them flexible, waterproof and durable with a feel similar to oilcloth. CLICK HERE for the full how-to after the jump! Materials paper of choice (old book pages, decorative paper, newspaper, etc.)household silicone sealer (must say “silicone” on the package)scrap piece of cardboard to use as a small spreaderscrap newspaper to protect work surfacesewing machinescissorsspray adhesivescrap fabriclarge piece of paper (at least 15 x 21)piece of heavy poster board or chipboard with dimensions larger than above Instructions For all projects except writing pad: 1. 2. 3.

For the tiny notebook: 1. 2. 3. 4. For the envelope: 1. 2. 3. For the writing pad: 1. 2. 3. 3. 4. 5. Make Iron-On Plastic Bag Clothing Decals. Tutorial - make a boy vest with mitten pockets.