
Tutorial: Tissue Box Photo Hearts. Of late, through no decision of my own and just in time for Valentine's Day, I've learned in detail how the heart works.
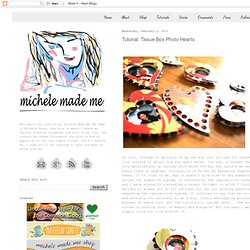
You see, Lo bought the boy a very detailed pop-up anatomy book which the boy now insists we read to him every night at bedtime. Circulation is by far my favourite chapter. It makes sense. It is clear to me. And it doesn't give rise to any awkward questions, unlike the digestive system, or God-forbid, the reproductive system. Should I get to today's heart craft then? Tutorial: Tissue Box Photo Hearts You will need: Two different (and empty) tissue boxes Scrap of black construction paperStyrofoam trayHole punchExacto knifePencilPVA (white) glue, and glue for foam crafts is also very usefulPhotos (Note: these will be cut up) 1. Tiny Polaroid magnets in Crafts for decorating and home decor. Polaroid magnets in Crafts for decorating and home decor. Polaroid format, despite having so many years, is very used in decoration.

With a white magnetic sheet (you can find them here and here), a pencil, a cutter and a ruler, we will create these fantastic recreations of Polaroids to place the photos that you like more. The measures for a real Polaroid are 8,8 cm wide and 10,7 cm high. Draw a rectangle in the black side of the sheet and cut it. The above and side margin is 0,6 cm and the bottom is 2,2 cm, so draw another rectangle inside and hewn with the cutter. We already have a Polaroid frame ready for use it on magnetic surfaces. Turn Photos into a 3-D Tunnel Book! What do moles, Fantastic Mr.
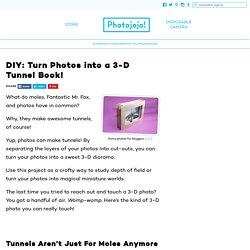
Fox, and photos have in common? Why, they make awesome tunnels, of course! Yup, photos can make tunnels! By separating the layers of your photos into cut-outs, you can turn your photos into a sweet 3-D diorama. Use this project as a crafty way to study depth of field or turn your photos into magical miniature worlds. The last time you tried to reach out and touch a 3-D photo? Tunnels Aren’t Just For Moles Anymore Take your 2D photos into another dimension without any need for 3D glasses with this crafty DIY. By using and playing with the three, basic compositional spaces–the foreground, the middle ground, and the background—you can a cool scene from various, flat pictures that really pops out! And hey, no headlamps, shovels, or fancy glasses used. Your Tunnel-making tools: STEP 1: Lay Out Your ‘Grounds First, you wanna pick out some photos that’ll: A) make a sweet composition, and B) work for a photo tunnel book.
STEP 2: Bordered STEP 3: Print Party STEP 4: Cut ‘em Out. Felt Photo Frame Magnets and Felt Flower Magnets. Felt picture frame fridge magnets (and felt flower fridge magnets) Supplies: Different colors of felt, scissors, glue gun, buttons, needle and thread, plastic, pictures, round magnets First, cut out two identical rectangles of fabric about 2 inches wide and 3 inches long (like a wallet size photograph).
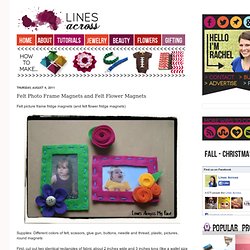
Cut a window in one of the pieces of felt. Cut out a piece of plastic that is a little bit smaller than the rectangle, but a little bit larger than the window. I just used plastic packaging from a toy. Using a hot glue gun, glue the plastic rectangle to the inside of the window. Now sew the two felt rectangles together, making sure that the plastic is on the inside. There are so many different fun ways that you could decorate these frames. Now to make this purple flower, cut out 5 small petals. Glue the ends of the petals together by pinching them into the shape shown below and adding glue in all 3 slots. Now decorate the frames. GO TO COLLAGE! I've been thinking about how to commemorate 2010. It was supposed to be a year of relaxation for me and ended up being the busiest year of my life. A couple of years ago when I was making The Big Ass Book of Crafts I took a photo of my friend Martin and turned it in to a David Hockney-esque Collage for his apartment.
He loved it. This morning, I thought that if I printed out just a fraction of the photos I took this year, I could create a very similar collage. What good are these photos just hanging out in a box on my desk if I can't see them, right? Photo paper Frame with mat board Glue sticks Computer print outs of your images * I work on a MAC, so someone may have to give you some advice on how to do screen savers, but that's how I did this particular project. 1. 2. 3. 4. This is what it will look like on your desk top. 5. 6. From THE BIG ASS BOOK OF CRAFTS.