background preloader

Ubuntu

Facebook Twitter

Linux_Downloads. Note: The package architecture has to match the Linux kernel architecture, that is, if you are running a 64-bit kernel, install the appropriate AMD64 package (it does not matter if you have an Intel or an AMD CPU). Mixed installations (e.g. Debian/Lenny ships an AMD64 kernel with 32-bit packages) are not supported. To install VirtualBox anyway you need to setup a 64-bit chroot environment. The VirtualBox base package binaries are released under the terms of the GPL version 2.

Please choose the appropriate package for your Linux distribution. VirtualBox 6.1.14 for Linux ¶ You might want to compare the checksums to verify the integrity of downloaded packages. SHA256 checksums, MD5 checksums Oracle Linux ¶ Users of Oracle Linux 6 and 7 can use the Oracle Linux yum repository and enable the ol6_developer channel for Oracle Linux 6 or the ol7_developer channel for Oracle Linux 7. Yum install VirtualBox-6.1 to get the latest maintenance release of VirtualBox 6.1.x installed.

The key fingerprint is. 11.10 - Prevent gnome-shell's dash from listing Recent Items. Autohide Top Bar Extension Finally Available For GNOME Shell 3.2 (Bonus: Hamster And Overlay Icons Extensions) WebUpd8 reader KRK has updated the GNOME Shell Autohide Top Bar extension for GNOME Shell 3.2. The extension, initially created by fpmurphy, lets you hide the GNOME Shell top bar by double clicking it. To disable autohiding, double click the top bar again. Here's a video I've recorded a while back demoing GNOME Shell Autohide Top Bar extension - it's an old video, but the updated extension works in the same way: The extension is available in the WebUpd8 GNOME 3 PPA - add the PPA and install it using the commands below: sudo add-apt-repository ppa:webupd8team/gnome3 sudo apt-get update sudo apt-get install gnome-shell-extensions-autohidetopbar If you've installed the original Autohide Top Bar extension, remove it before installing this one!

Once installed, reload GNOME Shell and activate the extension using GNOME Tweak Tool. If toggling autohide on/off doesn't work properly or you just want to change the value, open "extension.js": GNOME Shell Window Overlay Icons. Turn Kubuntu Oneric into Mint 12 by adding Mint Repos? Give Ubuntu a New Look with the ‘Edgebound Desktop’ Want your desktop to look totally different to others?

Meet the ‘Edgebound’ desktop set-up. This marvellous-looking mash-up by DeviantArt user ~techunit, combines elements of Unity-2D and GNOME 3 with the Avant Window Navigator (AWN) into one slick-looking whole. GNOME 3 Classic Session as the ‘desktop’Unity 2D launcher for managing and launching appsAWN ‘wingpanels’ in place of GNOME/Unity panels Getting The Edgebound Desktop To recreate the ‘Edgebound‘ look on your own desktop you’ll need a couple of things: GNOME-ShellThe Edgebound packageConfidence The first item on the above list can be installed in Ubuntu 11.10 by hitting the following button: The ‘Edgebound’ desktop package comprises: Automated installerAWN themeRestore script to ‘undo’ changes made Download the .zip from the link below then extract it into your Home folder.

Download Edgebound Package (.zip) It’s from hereon-in that the last item on the list – confidence – is required. Double-click on the ‘. That’s pretty much it. Notes. Main Page - GNOME Do Wiki. Help | Guavi.com. Installing User guide Installing VPNCheck for Linux is based on the Mono cross-platform .net framework. At www.mono-project.com you can find more information. To start VPNCheck on a linux OS you need to enable mono. On some Linux distros it is enabled by default.

Right click file VPNCheck 1.0 Linux beta.exe and select open with other application. User guide Requirements: Mono .Net framework This program is designed to monitor your VPN connection. Important: Make sure your VPN IP is at the top of the IP list window and your local IP at the bottom. Notice: VPNCheck takes the first three numbers from your Local IP and your PPP/VPN network adapter and compares them by default.

If you have a virtual network adapter i.e "Virtual box" installed then you must disable it. * Autologin option creates file Autologin.sh in the home directory in gnome. . * Once you have configured the tunnel add pon $TUNNEL below #! * You have to add execute permissions on the .sh files in order for them to run. Main window. Add 7z (7-Zip) File Archive Support to Ubuntu. The 7z (7-Zip) archive format offers good compression ratios and is an open source format. This and the favored 7-Zip graphical file archive tool for Windows have popularized the format.

A default Ubuntu installation can’t extract or create 7z files. A package is available in the universe repositories that makes working for these files seamless with Ubuntu’s existing archive tools. Install 7z file archive support from the package p7zip (click the link to install), or by running the command below in your terminal:sudo apt-get install p7zip You can now create 7z archives by right-clicking a file or folder and selecting Create Archive, and selecting the 7z option.

Open a 7z archive by double clicking it. Occasionally I’ll get an E_NOTIMPL error compressing a large number of files using Create Archive. p7zip is easy to use on the command line. To decompress the archive:p7zip -d mystuff.7z I did a quick test of some available compression formats in Ubuntu. Quick Tip: How to Disable IPv6 in Ubuntu For Better Internet Speed ~ Ubuntu Vibes.

For most Ubuntu users, disabling IPv6 can increase the Internet speed on their system if they feel that it is slower than what it used to be on Windows or Mac. Follow the instructions: First check that your Internet connection makes use of IPv4 or not. Go to ip-lookup.net and click on Conversations.

It will tell you if you are using IPv4 or not. If it is using IPv4, we can disable IPv6, otherwise this tutorial will not be applicable.Now we need to add a line to sysctl.conf. Run the follwing command: sudo gedit /etc/sysctl.confAt the end of the text file, add the following line: net.ipv6.conf.all.disable_ipv6 = 1 Restart your computer or reload sysctl.cong by running command: sudo sysctl -p.

WiTopia™ Customer Activation. Home about us products & services WiTopia blog support contact us. [How to] Install ‘Marlin’ File Browser in Ubuntu 11.10. Bored of Nautilus? Tired of Thunar? Desperateto ditch Dolphin? Maybe it’s time to try a new file browser? Marlin is a lightweight file browserbuilt from the ground-up to beresponsive, simply designed and easy to use. It will be the default file browser in the nextreleaseof the elementary project’s operating system ‘Luna’.

Our own Georgi K. is a massive fan of Marlin – and now you can try out its development using a Marlin-only development PPA. Features Amongst its features are: Tabbed browsingMultiple-viewsSingle-click to open (default)Configurable toolbars and interfacePlugin framework Icon view: - List view: - Column view: - Integration Unity quicklist support: - Plugins for Dropbox and UbuntuOne: - Enabling the ‘Contractor‘ plug-in requires ‘Contractor‘ to be installed, and must be enabled in order for Marlin to support ‘unrar’-ing of archives.

SSH, FTP, etc connections: - Modal Dialogs (GNOME-Shell only) Installing Marlin in Ubuntu ppa:marlin-devs/marlin-daily Using Marlin. Best Linux Software. You’ve made the switch from Windows or Mac OS X, and now you’re looking for applications to install. Or maybe you’re a long-time Linux user who’s keeping an eye out for what’s new. Either way, you’ve come to the right place. You’ve already picked a Linux distro and have settled on a desktop environment. Those are the big choices that determine what software you start with and what will run best on your machine. Most of the software below is free and open source.

A few require you to download an installer from a website. Browsers Firefox With the new Quantum update, Mozilla has given people reason to check out Firefox again. 9 Reasons to Switch From Chrome to Firefox 9 Reasons to Switch From Chrome to Firefox The days when Chrome was the best browser are long gone. Chrome/Chromium By some measures, Chrome is now the king of the hill. How to Decide If a Chromebook Is Right For You How to Decide If a Chromebook Is Right For You Is a Chromebook for everyone? Opera Web (Epiphany) Browser QupZilla.

GParted Live on Hard Disk. In addition to writing the GParted Live image to CD and to USB media, the GParted Live image can also be placed on a hard disk drive. The following sections describe how to do this for the GRUB and LILO boot loaders. Contents GParted Live on Hard Disk using GRUB In this example we use the grub boot loader. If you do not have such a partition, you can use gparted to resize an existing partition to free up space and then create another partition to put GParted Live. For more information on grub you can refer to the GNU GRUB web site. GParted Live on Hard Disk using LILO The following instructions can be used to set up the GParted Live image on a hard disk drive using the LILO boot loader. These LILO instructions were adapted from the following forum post. For more information on lilo, see the LILO (boot loader) web site. Music notation for everyone: LilyPond... music notation for everyone.

Bugzilla – Bug 15755 – Some applications do not correctly detect administrative privileges. TICKR - Feed Reader | Help. Help Known issues in last stable version Building from source HOWTO Getting started Full list of parameters Known issues in last stable version (0.6.4) - Segfault when running 'tickr NON_EXISTING_TEXT_FILE' from command line (stupidly because of a missing test.) - No support of HTTPS protocol. - The program implements only HTTP *basic* authentication.

("Workflow" courtesy of xkcd.com.) Building from source HOWTO === To build from source on Linux === Required packages are GTK+ and Libxml2 (development ones.) - Download tickr-0.6.4.tar.gz and extract somewhere in your home dir On Debian / Ubuntu: sudo apt-get install libgtk2.0-dev libxml2-dev . On Fedora: su yum install gtk2-devel libxml2-devel exit . This will install tickr (binary file) in /usr/bin/ and png files (tickr-*.png) in /usr/share/tickr/pixmaps/ (of course the debian package install these files in the same locations.)

You may also copy tickr_url_list in /home/user_name/.tickr/ (it's a sample list of RSS feeds.) . - ctrl+Q to quit. News – Scrolling RSS ticker for your desktop. Solutions Center : Brother Driver for Linux Distributions. Mount a Buffalo Linkstation NAS in Linux. Mount a Buffalo Linkstation NAS Network Attached Storage or NAS for short is basically an external hard disk drive that is connected to the network using a LAN cable rather than a computer via a USB lead. 
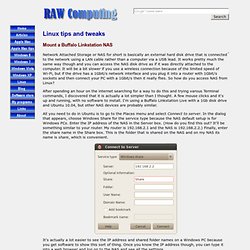
It works pretty much the same way though and you can access the NAS disk drive as if it was directly attached to the computer. It will be a bit slower if you use a wireless connection because of the limited speed of Wi-Fi, but if the drive has a 1Gbit/s network interface and you plug it into a router with 1Gbit/s sockets and then connect your PC with a 1Gbit/s then it really flies.

So how do you access NAS from Linux? After spending an hour on the internet searching for a way to do this and trying varous Terminal commands, I discovered that it is actually a lot simpler than I thought. A few mouse clicks and it's up and running, with no software to install. I'm using a Buffalo Linkstation Live with a 1Gb disk drive and Ubuntu 10.04, but other NAS devices are probably similar. How to Clear and Disable Totem’s recent history in Ubuntu 11.04 Unity. If you’re using the Totem movie player in Ubuntu 11.04 Unity to play movies, you may find that there’s no option in its menu to clear the playing history.

Then what if you don’t want anyone to know you’ve watched? Following are how to temporarily clear totem’s history and permanently stop totem showing history. To clear recent history from totem movie player: Launch Home Folder, press Ctrl+H to show hidden files, then navigate to find out and delete “recently-used.xbel” file under . /local/share/. Or just run this command: rm ~/.local/share/recently-used.xbel && touch ~/.local/share/recently-used.xbel This also clear recent documents for many Gnome 2 based applications. To disable totem from showing up history: Same to older Ubuntu release with Gnome desktop, you can create .gtkrc-2.0 and stop recent documents by adding gtk-recent-files-max-age = 0, use the command: echo gtk-recent-files-max-age=0 >> ~/.gtkrc-2.0. Publisher to PDF Free Online. Namebench-1.3.1-source.tgz - namebench - namebench 1.3.1 source code (requires Python 2.4 - 2.7) - Open-source DNS Benchmark Utility.

Can't use scanner on Brother DCP 7020. Clear/Prevent Recent Documents under Files & Folders in Ubuntu Unity. File Permissions in Ubuntu. This work is licensed under a Creative Commons Attribution-ShareAlike 3.0 Unported License. If you have experience with Linux but are new to UbuntuIf you are new to Linux and UbuntuWhat you may be used toThe need to edit system filesFrequently edited system filesWhy do people recommend the command-line? Making system-wide changes graphicallyWhat does sudo do? Final recommendations If you have experience with Linux but are new to Ubuntu If you're already familiar with Linux and just wonder why Ubuntu/Kubuntu uses sudo instead of root, this page isn't for you.

If you are new to Linux and Ubuntu This page is for people who are new to Linux and Ubuntu/Kubuntu and want to know what the deal is with file permissions. What you may be used to You may also never have installed and configured an operating system before (especially if you bought a computer with Windows preinstalled for you). The need to edit system files Some in the Linux camp will say "you shouldn't have to edit such-and-such a file. "