
jQuery Cover Flow like iTunes. Download source - 150.25 KB Introduction This article aims to show a simple way to reproduce a iTunes-like Cover Flow for our custom DIV in HTML with support of jQuery/jQueryUI libraries.
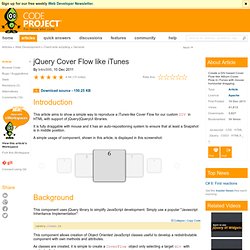
It is fully draggable with mouse and it has an auto-repositioning system to ensure that at least a Snapshot is in middle position. A simple usage of component, shown in this article, is displayed in this screenshot: Background This component uses jQuery library to simplify JavaScript development. Jquery.class.js This component allows creation of Object Oriented JavaScript classes useful to develop a redistributable component with own methods and attributes.
As classes are created, it is simple to create a CoverFlow object only selecting a target div with particular features. Using the Code The HTML target code of this jQuery component is very simple. Jquery.class.js as seen before, is a library that allows us creating Object Oriented Classes and so coverflow.class.js and snapshot.class.js are our two classes. ImageFlow - Finn Rudolph. Панель обложек с 3D эффектом. В данном уроке мы разберемся как создать и использовать компонент jQuery UI для панели обложек CoverFlow на основе $.widget и трансформация CSS3.

Его легко использовать, легко дополнить функционал, он поддерживает событие click, нажатия клавиш и взаимодействие с колесиком мыши. В основу идеи положен эффект iTunes CoverFlow – отличный инструмент для навигации по большим коллекциям изображений (или данных, представленными изображениями). Панель обложек CoverFlow: история реализаций Начало Перед началом работы по созданию эффекта CoverFlow проведем краткий курс истории его создания и использования. Эффект CoverFlow изначально был предложен Andrew Coulter Enright и реализован независимым разработчиком Jonathan del Strother для Mac в 2005.
С тех пор сообщество разработчиков очаровано данным эффектом, однако его реализация является вызовом для мастеров. Если посмотреть на CoverFlow из iTunes (смотри на рисунок выше), то можно отметить его 3D структуру. PHP + GD/ImageMagick (2006-2008) Flash (2007) Cover Flow CSS & jQuery. Tutorial by Matt Doyle | Level: Advanced | Published on 6 May 2011 Categories: Learn how to create an authentic 3D Cover Flow effect in a web browser using CSS and jQuery.

(Requires Safari) If you've used a Mac or iTunes at all, you've probably come across the Cover Flow view. This shows you a series of album covers, photos, or other documents in 3D, allowing you to flip between them by clicking them, dragging a scrollbar, or using the arrow keys. It's a nice effect, but it requires a fair bit of processing power to accomplish. Cross-browser? The code uses quite a few CSS properties of the WebKit browser engine, and currently it only works in Safari on Mac and Windows, and Mobile Safari on iOS (iPhone, iPod touch and iPad).
In this tutorial I'll explain how I created the Cover Flow gallery demo. The basic idea So how can we go about recreating the Cover Flow effect using nothing but CSS and JavaScript? CSS 3D transforms let us position and rotate the slide images in 3D space. We have: Coverflow CSS 3D Transforms. As HTML5 and CSS3 technology grows, WebKit CSS 3D transforms are emerging and allowing web developers to do some great things within the browser.
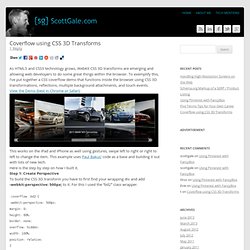
To exemplify this, I’ve put together a CSS coverflow demo that functions inside the browser using CSS 3D transformations, reflections, multiple background attachments, and touch events. View the Demo (best in Chrome or Safari) This works on the iPad and iPhone as well using gestures, swipe left to right or right to left to change the item. This example uses Paul Bakus’ code as a base and building it out with lots of new tech. Here is the step by step on how I built it. Step 1: Create Perspective The perspective gives the illusion of depth on the z axis. Step 2: Apply the CSS 3D Transform Then apply the CSS 3D transform rotation depending on the location of the image:var webTransform = "rotateY("+(side === "right"? When the transform is applied it uses the perspective to calculate how much movement is required. Step 7: Rejoice!