background preloader

Illustrator Adb

Facebook Twitter

Kern.js | fun with webfonts. Kern Type, the kerning game. Illustrator tutorial: create a seamless folk pattern | PeHaa Blog. Illustrator tutorial: create a seamless folk pattern In this tutorial you will learn how to create a seamless pattern composed of simple folk-flavored flowers. In the first part we will create an individual flower. In the second we will focus on constructing a pattern and define a seamless Illustrator pattern swatch.

You can download the source file. This tutorial was prepared with Adobe Illustrator CS4 but the source file is back-saved to CS2. Step 0 We will use five colors for our flowers: white, black, blue, beige and red as well as some brown background color. Part I – Create an individual item of the pattern Step 1 Choose the Polygon Tool (you will find it under the Rectangle Tool in the Tool Panel). Keep your polygon selected and go to Effect > Distort & Transform > Pucker & Bloat… Set the slider value to 70%. (1) Copy Cmd/Ctrl+C the bloated polygon and paste it to front Cmd/Ctrl+F.

Step 2 Choose the Polygon Tool and set the Radius to 33px and the number of sides to 11. Step 3 Step 4. Adobe Illustrator Tutorials to Fuel Your Creative Vector Skills. While Adobe Photoshop is considered the most famous and important application in the bitmap graphics and photo editing. Illustrator is the pioneer in the vector graphic and illustrations. Not only because it is one of the most powerful tools in this field, but also it integrate with other Adobe applications such as Photoshop, Flash, After Effects…etc. However, learning Adobe Illustrator is one of the important steps in the life of each designer.

But there is trick in this learning process that many designers do not notice until they finish their regular Illustrator training either through books, videos or classrooms, which is that Illustrator is depending in most of its work on the tips and trick and how you can twist the tools and workaround the normal steps to create complex vectors and amazing illustrations. Thus, Illustrator tutorials articles are important to teach you these skills. How To Draw Ferb Step By Step Create a Dazzling Aurora Borealis – Screencast Create The Renault Logo. Brands of the World™ | Download vector logos and logotypes. Illustrator. 30 Illustrator Video Tutorials Every Designer Should See. Join the mailing list to have every new post hand delivered to your email inbox.

Every subscriber gets a FREE bundle of 40+ icons, vectors, brushes & textures! 20 Best Illustrator Tutorials.

20 Best Websites For Finding Free Vector Art. About. Scriptographer is a scripting plugin for Adobe Illustrator™. It gives the user the possibility to extend Illustrator’s functionality by the use of the JavaScript language. The user is no longer limited to the same tools that are used by most graphic designers around the globe. Scriptographer allows the creation of mouse controlled drawing-tools, effects that modify existing graphics and scripts that create new ones.

But Scriptographer is also a webpage on which users can exchange scripts and ideas. Scriptographer gives the tool back into the hand of the user and confronts a closed product with the open source philosophy. If that sounds good to you, download it today. Credits: Main Developer, Concept, API Design and Web Development: Jürg Lehni API Documentation, API Design, Testing: Jonathan Puckey Web Design: Urs Lehni & Jürg Lehni Web Application Server: Helma.org Headline Font: Superstudio by Jonathan Hares Project supported by ECAL and funded by HES-SO.

Design Tutorials - Photoshop, Illustrator & InDesign | Computer Arts Magazine. 20 Useful 3D Illustrator Tutorials for Best Practice. Adobe Illustrator is one of the most powerful tools that lets you create vector graphics in both 2D and 3D. Learning about the Illustrator tools is not enough to know how to use these tools in the real life. So, you need to practice and learn the tips and tricks associated with each tool to be able to create amazing vector artwork. Creating 3D in Illustrator can be achieved through two methods. The first one is to mimic the 3D shadows and reflections using the 2D tools, which is very common to create 3D look objects in Illustrator. The 3D tools are another method to create 3D objects based on 2D paths.

This great tools give you the ability to edit the 3D object after applying the 3D setting to it. Illustrator Vector Line Art of Cruise Ship This tutorial aims to show you how to create complex cruise ship in Illustrator using the vector lines and based on a real ship diagrams. How To Create A Realistic Pendrive in Adobe Illustrator Wrap a Ribbon Around a Sphere, Using 3D Revolve. How to Create a Vector Baseball Bat and Ball. In this tutorial, you'll learn how to create a baseball bat and a baseball using Illustrator's 3D tool and blends. We'll utilize 3D art mapping for texture creation and pathfinder tools to create this classic illustration of a bat and ball. Step 1 Open up a new document and select the Ellipse Tool (L). Create a circle and fill it with gray for now and a 1pt black stroke.

Step 2 Create a sickle like shape with the Pen Tool (P) and fill it with a darker gray. Step 3 Reselect the Ellipse Tool (L) and create a shape like in the image below. Step 4 Select the Pencil Tool (N) and start drawing a stitch like shape (A). Step 5 Group the stick (Command + G) and make a duplicate (Option-drag). Step 6 Then select it with the Selection Tool (V) and rotate it 45 degrees. Step 7 Rotate it slightly clockwise. Step 8 Reflect the stitches (Select object then hit O + Option-drag). Step 9 Make a copy of the original circle for the baseball and place it above the stitches. Step 10 Now we have the stitches clipped. Astute Graphics Blog : Tutorials.

Ill tutorials

Patterns. Realistic Tropical Fruits. . for free. About The Author: bobbysandhu Bobby Sandhu is a freelance Traditional and Digital artist. He does vectors, vexels, digital paintings and pencil portraits. On deviantart he has received 5 Daily Deviation features and is acclaimed for his Vector car illustrations.

Check his complete gallery at www.bobbysandhulive.com or visit his Deviant Art account. Create a Set of Shiny Character Eyes. This tutorial will teach you how to create detailed vector eyes that can be used for all sorts of character design projects. The techniques used here are basic and the processes quick and simple, but the result looks great. If you're a beginner, expect to learn a little more about opacity masks, gradients, effects, and handy shortcuts.

If you're a more advanced Illustrator user then we encourage you to experiment a bit with the steps shown here! Enjoy! Final Image Preview Below is the final image we will be working towards. Tutorial Details Program: Illustrator CS4Difficulty: BeginnerEstimated Completion Time: 10 - 20 minutes Step 1 Open a new 800px by 800px document, set to RGB, at 72 dpi. Step 2 With the Ellipse Tool selected, hold Alt + Shift and drag out a circle into the middle of your document. Step 3 Using the Direct Selection Tool (A), move the points using the Nodes and Handles to create a more irregular shape. Step 4 Step 5 Step 6 Step 7 Rotate your ellipse layer to around 45 degrees. Create a Cute Panda Bear Face Icon. Lately, I have been working on some children illustrations, creating some über cute creatures. 
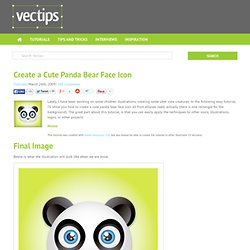
In the following easy tutorial, I’ll show you how to create a cute panda bear face icon all from ellipses (well, actually there is one rectangle for the background). The great part about this tutorial, is that you can easily apply the techniques to other icons, illustrations, logos, or other projects.

Notes This tutorial was created with Adobe Illustrator CS4, but you should be able to create the tutorial in other Illustrator CS versions. Final Image Below is what the illustration will look like when we are done. Step 1 First, create an ellipse with the Ellipse tool (L). Step 2 With the ellipse selected, create a radial gradient from the gradient panel. Step 3 Copy (Command + C) the ellipse and Paste in Front (Command + F).

Step 4 Select the ear shape and change the gradient to a Linear Gradient from the Gradient panel. Step 5 Select the ear shape, Copy (Command + C), and Paste in Front (Command + F). How to Use Illustrator Pathfinder Palette | Illustrator Atoms | Illustrator Tutorials, Tips and Articles. Illustrator offers us great tools to create simple shapes, but how can we merge two shapes into one? Relax, that is why the Pathfinder palette exists. The Pathfinder palette offers us options to create a complex shape from several single shapes. Also, it offers many other shape-manipulation options. This is the Pathfinder palette: Open it by going to Window > Pathfinder, or press (Mac: Shift + Command + F9 / PC: Shift + Control + F9).

The Pathfinder palette is divided into two sections: Shape Modes: Basic shape-interaction options: Unite, Minus Front, Intersect, and Exclude. Note: In order to utilize the Pathfinder options you need to select or group two or more shapes. UNITE: This option will merge two shapes together. Result: DIVIDE: This option separates our overlapping shapes into pieces. Result: Cheers! Download Source Files. Craft a Dramatic Vector Landscape Environment. This tutorial will show the intermediate Adobe Illustrator artist how to make a dramatic landscape environment. 
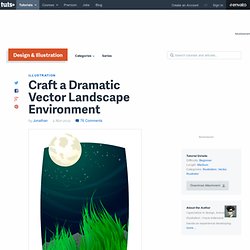
You should have a basic understanding of Adobe Illustrator tools before you begin this tutorial, as the tutorial moves at a rapid pace. Republished Tutorial Every few weeks, we revisit some of our reader's favorite posts from throughout the history of the site. This tutorial was first published in July of 2008. Step 1 Start by drawing a matte that will cover the edges of the artwork. Step 2 Easily make smooth grass using this technique.

You simply click using the Pen Tool, you don't have to switch tools or anything. Step 3 It's better to draw a 3rd point instead of just going from point 1 to point 2 and back to the top (unless you're fairly handy with the Pen Tool). Step 4 Now close the shape by going from point 3 to point 1. Step 5 Fill the grass with a gradient. Step 6 Draw several more grass shapes that are slightly varied. Step 7 Step 8 Select all of your grass shapes.

Step 9 Step 10. Illustrator’s Pen Tool: The Comprehensive Guide. Bézier curve. The basis functions on the range t in [0,1] for cubic Bézier curves: blue: y0 = (1 − t)3, green: y1 = 3(1 − t)2 t, red: y2 = 3(1 − t) t2, and cyan: y3 = t3. A Bézier curve is a parametric curve frequently used in computer graphics and related fields. Generalizations of Bézier curves to higher dimensions are called Bézier surfaces, of which the Bézier triangle is a special case. In vector graphics, Bézier curves are used to model smooth curves that can be scaled indefinitely. "Paths", as they are commonly referred to in image manipulation programs,[note 1] are combinations of linked Bézier curves. Paths are not bound by the limits of rasterized images and are intuitive to modify. Bézier curves are also used in the time domain, particularly in animation and user interface[note 2] design. The mathematical basis for Bézier curves — the Bernstein polynomial — has been known since 1912, but its applicability to graphics was understood half a century later.

Applications[edit] Animation[edit] Let or. How to Create a Cute Piggy Bank in Perspective with Adobe Illustrator. Mar 22 2011 Many people have difficulty in drawing objects in perspective. Most of the time it helps if you have that particular object in front of you, but we still need our imagination.The most important aspects of perspective are size and distance. If you increase the distance between you and the object you are observing, you need to decrease the size of that object. That way you can achieve a nice depth effect in your illustrations. In this post we’ll be learning how to create a cute pink piggy bank in perspective with the help of Adobe Illustrator CS4.

This is how the result will look like: Body of the Piggy Bank First, we’ll start with the body of the piggy bank. Creating the Eyes Now we are going to create the eyes of the Piggy Bank. Rotate the eyes a bit and place them on the Piggy Bank. Let’s continue with the eyes. Repeat that step to create another copy. Change the Fill color of the new shape to light pink: Now we are going to make another copy of the eyes. Creating the Snout. How To Create a Cute and Cuddly Vector Dinosaur in… | Raster Rebels. Auto tweet is a fast way to share content with your followers from an RSS feed.

When an article has been published and added to the RSS feed, it will trigger a process that tweets the new article on your Twitter feed. It is a great way to keep your feed fresh and up-to-date in order to continuously build your following.