
Central Park Swing Coat Free PDF Sewing Pattern. After months of editing and sewing I finally have the Central Park Swing Coat ready for your sewing pleasure!

This little jacket started from a sketch I drew in my little big idea book last year. I started playing around with drafting the pattern months ago, and four samples later I am pretty much in love with it. It is so fun to sew and the possibilities are endless. My favorite part is that it is reversible, which makes it not only super versatile but quick and easy to sew with no seams to finish (no serger needed!). With no button holes or zippers this is a perfect project for beginners too. (tutorial for Ruffle Cuff Pants as shown) As for wearing it, the coat has become a favorite. You could add one big button, or two smaller buttons like shown above for a variation or just keep it simple with an elastic cord to pull over a button.
Catch me after the jump for the pattern and tutorial! Do not let all the pictures and text scare you off, this really is a simple pattern. Supplies: Maternity top to wrap tee. Maternity clothes drive me nuts. They are so very much needed for a 6 months (or a whole year if you are really unlucky), but then, what? Most of my maternity clothes were bought second hand, and I sent a good deal of them away to the thrift shops and pregnant friends.
Still, a couple have lingered and I could really use something new to wear at 10 months post-partum (as I type this, I am, in fact, wearing an unaltered maternity top :O). Here is an idea to make those maternity tops not only wearable after the little mite arrives, but actually quite useful for nursing. Since I have no before picture, you'll have to believe me that until recently, this was a maternity tee shirt: The tee shirt has two front flaps that are attached to double fold bias tape that come around behind and tie at the back. (Truthfully, you could make a wrap tee with any overlarge tee shirt, but you would also have to adjust the shoulders and sleeves for a proper fit. A quick note on sewing knits. Done! Peasant blouse. Something to know: this tutorial has been modified to improve the shape of the garment and the clarity of instructions.

I will continue to update this tute as new possibilites present themselves. If you are revisiting this post, feel free to take or leave any of the changes as you see fit. Please leave a comment if you have a question (or something nice to say - I like that too). Www.craftinessisnotoptional.com/2011/10/lovebird-tunic.html. So I cleaned out Sadie’s shirt drawer the other day and found out that she had outgrown half of them!

That, coupled with cooler weather (hopefully) on the way, spurred me to make this tunic with longish sleeves. (Sadie’s official opinion: “Mom da sleeves are big. But I wike the birds.”) While this top was coming together, I was worried that it would be too busy…and it might be…but it’s growing on me. It’s kind of groovy, actually. It’s fairly simple, but has some interest in added trims, and a pleat in the front.
Of course you can never go wrong with the easy peasy button closure. A. I also added a band around the bottom for fun, and because the pattern I made was a bit short. I guess it makes Sadie feel like she can fly! Well….there are cute birds on the fabric! Here’s some quick notes about how I made it. Click below for the tutorial! You’ll need:fabric (I used a yard for 3T size)thread1/8″ elasticbutton1-2 yards trim if desired Then make the button closure with my easy peasy tutorial. Blouse à manches ballon. Adult tee to child's dress recon.
The pattern I use is a trace from an existing dress.
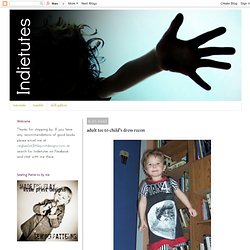
I've been using this nice A-line pattern for most of my tee recons because the shape is so nice. To make a sleeve pattern I traced the shape of the sleeve onto paper and then added some seam allowances and extra at the top for a bit of puff (but not too much with the knit material b/c they end up looking like little football players) so, the doomed tee, fold in half and put the front pattern over it. Then took the name off the sleeve and cut out a the bottom plus a bit for seam allowance. and, here they are: The back was just follow the pattern cut: Sleeves were cut from the most horrible maternity shirt ever. I also cut out the bottom ruffle.
So, all pieced together with the ruffle on.