
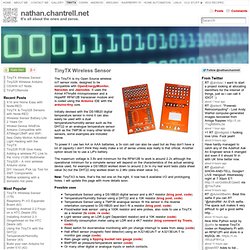
TinyTX3 Wireless Sensor Board. TinyTX3 fitted with a DS18B20 temperature sensor Since I put the files for the first PCB version of my TinyTX wireless sensor node online in June I’ve heard from people around the world who have had their own boards made which is really encouraging, especially as it was my first PCB design and was mainly done just to learn how to use the Eagle CAD design package (I wish I’d seen these great tutorial videos when I started, it would have saved a lot of time).
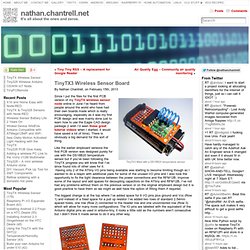
There is obviously a big demand for this sort of thing. Like the earlier stripboard versions the first PCB version was designed purely for use with the DS18B20 temperature sensor but if you’ve been following the TinyTX progress you will know that I’ve since found lots of other uses for it. Front and rear views of the TinyTX3 PCB Pin numbers refer to Arduino pins when using the arduino-tiny core IC test clip attached to ATtiny84 chip. Ikea Oleby Motion Activated Light Hacking with the TinyTX « nathan. Reassembled Oleby Nick was kind enough to send me one of these little Ikea cupboard lights that he had the great idea of adding one of my TinyTX sensors to.
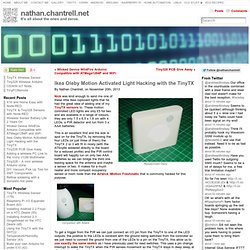
These motion controlled LED lights are only £5 for two and are available in a range of colours, they are only 7.5 x 6.5 x 1.8 cm with 4 LEDs, a PIR detector and run from 3 x AAA batteries. This is an excellent find and the size is spot on for the TinyTX, by removing the four LEDs (or just three of them) the TinyTX 2 or 3 will fit in nicely (with the ATtiny84 soldered directly to the board for a reduced profile) and the PIR control board will happily run on only two AAA batteries so we can bridge the third one leaving space for the antenna and maybe a sensor or two. It makes for a much neater and more compact occupancy sensor or room node than the Airwick iMotion Freshmatic that is commonly hacked for this purpose. Comparison with Airwick Other PIR devices PIR Sensor with Tiny328 running on 2 x AA batteries.
Control RF Mains Plugs using the RFM12Pi. RFM12Pi V2 - OpenEnergyMonitor Wiki. RFM12Pi V2 The RFM12Pi allows the Raspberry Pi to receive wireless data from RFM12B wireless module.
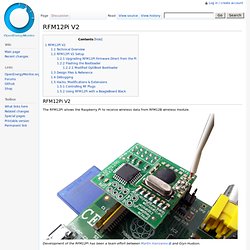
Development of the RFM12Pi has been a team effort between Martin Harizanov and Glyn Hudson. The RFM12Pi V2 consists of an RFM12B wireless module and an ATmega328 microprocessor running OptiBoot serial bootloader (modified for 8mhz internal oscillator) which is Arduino compatible. The ATmega328 runs a slightly modified version of JeeLabs's RF12Demo. Raw wireless packets are passed to the Pi via serial using the Pi's internal UART serial port.
Technical Overview ATmega328 based, has more memory and hardware serial support Runs on the internal 8Mhz oscillator (to save unnecessary components) SMT used, board layout is optimized for pick-and-place assembly Lower profile to fit inside most Raspberry Pi enclosures The new RFM2Pi with ATmega328 allows programming directly from Raspberry Pi using avrdude (..and OptiBoot) RFM12Pi V2 Setup. Using Raspberry Pi as a base station for TinyTX. By Nathan Chantrell, on November 7th, 2012 The guys at OpenEnergyMonitor were kind enough to send me a prototype of their new RFM12Pi board a few weeks ago, this handy little kit allows our favourite low power radio board to be connected to the immensely popular Raspberry Pi.
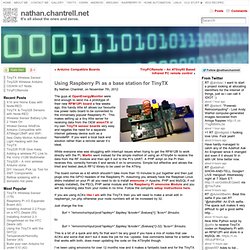
This makes setting up a tiny little server for receiving data from the OEM emonTX or my own TinyTX sensor boards very easy and negates the need for a separate internet gateway device such as a NanodeRF. If you want a local back end solution rather than a remote server it’s ideal. While everyone else was struggling with interrupt issues when trying to get the RFM12B to work directly with the Pi, Martin went instead for the simple method of using an ATtiny84 to receive the data from the RF module and then spit it out to the Pi’s UART. A PHP script on the Pi then receives this, correctly formats it and sends it on to emoncms.
Just change the line: $url = “/emoncms/input/post? To: $url = “/emoncms/input/post? TinyTX Wireless Sensor. The TinyTX is my Open Source wireless IoT sensor node, designed to be compatible with OpenEnergyMonitor, Nanodes and Jeenodes.
It uses the Atmel ATtiny84 microprocessor and a HopeRF RFM12B transceiver module and is coded using the Arduino IDE with the arduino-tiny core. Initially devised with the DS18B20 digital temperature sensor in mind it can also easily be used with a dual temperature/humidity sensor such as the DHT22 or an analogue temperature sensor such as the TMP36 or many other kinds of sensors, some examples are included below. To power it I use two AA or AAA batteries, a 3v coin cell can also be used but as they don’t have a lot of capacity I don’t think they really make a lot of sense unless size really is that critical.
Another option would be to use a LiPo battery. New: TinyTX3 is here, that’s the red one on the right, it now has 6 available I/O and prototyping holes. Possible uses Some examples: For DS18B20 and DHT22 sensors the cheapest I have found by far is eBay. Add: