

Vively Online: A Pretty Free Project - Paper Medallion Wall Hanging. "If you really wanted to, we could go and purchase some of the furniture brand new, you know", said my husband, as he sees me pick up yet another project. It's true. My husband brings in over 90% of the household income, and we have learned how to make do with this arrangement. We've learned to save on somethings, and splurge on others. If we really wanted to, we could put aside money for furniture, home decorations and the "frivolous".
I could annoy myself and everyone else, by saying that I'd rather spend that money on my kid's piano and martial arts lessons, but deep down I know that it's a LIE. * Remodelaholic *: Slipcover Instructions! Part 2 – Chair Facelift. Are you a craigslist-er?
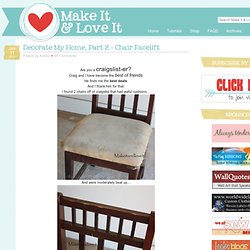
Craig and I have become the best of friends. He finds me the best deals. Clever Yarn Storage « The Neatery. Easy and beautiful, enamel-painted vases. January 11, 2011 | Be Inspired | Projects | The Sweetest | Comments Enamel painted vases – I’m in love!
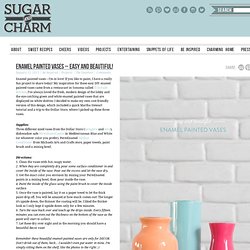
If you like to paint, I have a really fun project to share today! My inspiration for these easy DIY enamel painted vases came from a restaurant in Sonoma called El Dorado Kitchen. I’ve always loved the fresh, modern design of the lobby and the eye-catching green and white enamel painted vases that are displayed on white shelves. I decided to make my own cost-friendly version of this design, which included a quick Martha Stewart tutorial and a trip to the Dollar Store, where I picked up these three vases. Supplies: Three different sized vases from the Dollar Store (here,here and here), dishwasher safe PermEnamel paint in Mediterranean Blue and White (or whatever color you prefer), PermEnamel Surface Conditioner from Michaels Arts and Crafts store, paper towels, paint brush and a mixing bowl.
Directions: 1. 2. 3. 4. 5. 6. 7. Remember these beautiful enamel-painted vases are only for DECOR. DIY Wine Bottle Centerpieces. Closing our DIY Contest is a project sent by Hillary, who made colorful centerpieces using wine bottles.
Love the Pop Art feel of them! Tomorrow I will be opening our official voting ballot, where there will be a recap of all entries. You will be able to cast your vote under tomorrow’s announcement, so keep your eyes peeled for the post. Good luck everyone! Remember first place winner will receive $500 and second place winner a $100 gift certificate to Wendy Mink Jewelry (they just got a brand new site by the way!). {Tutorial} Paper Ranunculus Flower - Free Download! I am SUPER excited about today's post, and not just because I've been working on perfecting it for the past two days, but because i think I have something truly special to share with you guys.
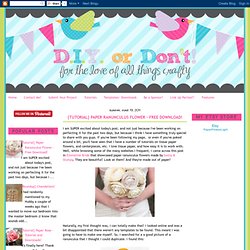
If you've been following my page, or even if you've poked around a bit, you'll have seen that I have a number of tutorials on tissue paper flowers, and centerpieces, etc. I love tissue paper, and how easy it is to work with. Book Mobile.
Finished. Pillow With Rosette Clusters From Felt Furnishings. I haven’t crafted with felt since I was little, but since picking up a copy of Anne Kyrrö Quinn‘s book, Felt Furnishings, I have a whole new universe of respect for the material.
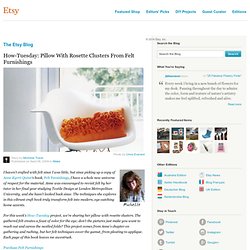
Anne was encouraged to revisit felt by her tutor in her final year studying Textile Design at London Metropolitan University, and she hasn’t looked back since. The techniques she explores in this vibrant craft book truly transform felt into modern, eye-catching home accents. For this week’s How-Tuesday project, we’re sharing her pillow with rosette clusters. The gathered felt creates a feast of color for the eye; don’t the pictures just make you want to reach out and caress the nestled folds?
Sewing 101: making a pouf. Add a burst of color to your room with this crafty pouf!

At 17” wide and 10” deep, it’s large enough to serve as floor seating or a foot stool. (And if you have pets, I have a feeling they may want to make this their new favorite spot!) This project is a little challenging to sew, but it’s not too difficult, so if you’re comfortable with the basics of sewing, give it a try. You can make a colorwheel effect with a range of solid colors, or choose a variety of patterned fabrics for a louder patchwork effect. Medium-weight cottons work well for this design (check out quilting shops for great selections of solids and prints). Sunburst Pillow Tutorial from Guest Anna of Noodlehead. Ohhhhhh, i love me a good pillow!

I especially love me a pillow when it's anna of the addictive & oh, so inspiring blog noodlehead. anna is a pillow addict, a kick ass sewer, a busy mom, and another one of my fave bloggy pals. here's an example of what is usually a regular email from me to anna: Hi anna, You are ahhhmmmmaaaaaaazing!!!!!!!!!!!!
Kojotutorial: flutter heart snuggle pillow. Say YES! to hoboken: DIY: Big Bow Pillow. This is the big bow pillow I made yesterday.
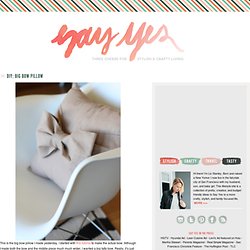
I started with this tutorial to make the actual bow. Although I made both the bow and the middle piece much much wider. I wanted a big fatty bow. Really, it’s just a big tube with a small tube wrapped around it. Super simple. Glass jars with photos in Crafts for babies, kids and adults parties. Kojotutorial: anthropologie inspired knotted bedding part 2 (putting it all together) Part 19 – 3-D Framed Flowers. I had to finish up that 2nd bathroom.
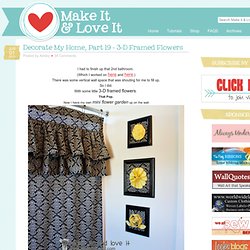
There was some vertical wall space that was shouting for me to fill up. So I did. With some little 3-D framed flowers. That Pop. Now I have my own mini flower garden up on the wall. All 3 are different…… ……..but kinda fun in their own way. Now I just need to draw some water, grab a book, and soak in the tub. Ready to make some yourself? (I used 100% cotton for all fabric used below.) Find some old frames…..any size will do. Then spray paint them the color you’d like and allow them to dry. Then grab the matte of the frame (and the filler cardboard piece if there is one) and cut some coordinating fabric that is slightly bigger than the matte.
Fold the fabric over all four sides and hot glue into place. Then place the fabric covered piece back into the frame and put the back onto the frame. Repeat with all of your frames. …..Now to make the flowers….. This twisted little flower was made just like the flower shown here. This multi-petal flower was made And that’s it. DIY Mother's Day Corsage: Felt Dahlia Flower Brooch - Holidash News. Flower corsage for celebrating mom. Being a mom sometimes isn’t the most glamorous job one can have.
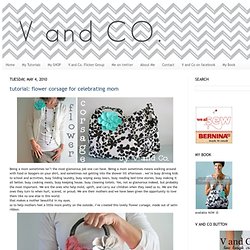
Being a mom sometimes means walking around with food or boogers on your shirt, and sometimes not getting into the shower till afternoon . we’re busy driving kids to school and activities, busy folding laundry, busy wiping away tears, busy reading bed time stories, busy making it all better, busy cooking meals, busy keeping house, busy cleaning toilets. Yes, not so glamorous indeed, but probably the most important. We are the ones who help mold, uplift, and carry our children when they need us to. We are the ones they turn to when hurt, scared, or proud. We are their mothers and we have been given the opportunity to love them like no one else in this world.that makes a mother beautiful in my eyes.so to help mothers feel a little more pretty on the outside, I’ve created this lovely flower corsage, made out of satin ribbon. supplies:one yard of satin ribbon (thicker size)one small circle of feltone pin for the backhot glue.