
DIY Dreamcatcher - Modish. I'm back with the how-to to make my little dreamcatcher from yesterday.
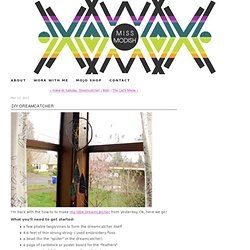
Ok, here we go! What you'll need to get started: a few pliable twigs/vines to form the dreamcatcher itself4-6 feet of thin strong string- I used embroidery flossa bead (for the "spider" in the dreamcatcher) a page of cardstock or poster board for the "feathers"paint, or colorful decorating medium of choice! Scissorscraft glue Step one: start to form your hoop! Step two: start stitching! You'll start to go around in a circle adding stitches on each "round". Step three: make the feathers! Then I cut out general feather shapes from the board. Step four: The last step is to hang your pretty dream bird feathers from your pretty hoop! Then put a thin line of glue on the back side of the stem, over the string you've already wrapped, and wrap the string once more, down to the end of the feather. Have fun, and sweet dreams! Food Face How To. I am so glad some of you are wanting to make your own food face.
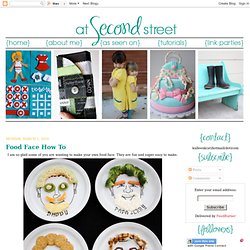
They are fun and super easy to make. What you need: -A white ceramic plate ( I got mine at Walmart for $1.70 each) -A photo of someone -printer -sharpie marker -pencil -ball point pen Her is what I did: First I printed off a picture of the face I wanted to use. Then I traced the main features of the face with a sharpie marker. Next I turned the page over and scribbled over all the lines with my pencil. I flipped the picture back over cut it out and traced over my lines again with a pen. Okay , this picture is really bad. I followed the same process for the names. Next, I went over the pencil markings with the paint pens and colored in a few of the features. Following the Pens instructions, I let the paint dry for 24 hours, then baked them for 35 minutes in a 300 degree oven. Turn Photo Negatives Into Artsy, Personalized Lamps.
Greeneyed.com. 1 January 2012 Lovely monsters, Happy 2012 to you!
We hope that everyone enjoyed a peaceful holiday season and are looking forward to a year of new adventures and memories. With resolutions and forward thinking for the New Year in mind, after much thought, we have decided that we will be moving on from Green Eyed Monster in the coming month. As of February 1st (exactly two years from when we began writing here), we will no longer blog in this space. We have so enjoyed sharing GreenEyed.com with you but have reached stages in our lives where blogging in this capacity is no longer possible or makes sense for us sisters. Thank you for all your support and love, monsters.
Xo Ash & Kimmy 29 December 2011 Looking for something sassy for New Years? 27 December 2011 “Young and Colourful Doe” on your wall, button candy stationary for your letters. xo Kristen See you in 2012, Monsters! Click here to see embedded stop motion merriness! Bringing back an oldie but a goodie: DIY SWEATER WREATHS! A Merry Mishap. We know, we’ve mentioned our love of neon and old school, throwback jewelry in some recent posts, and today we’re at it again.
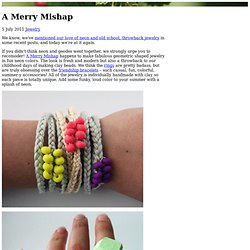
If you didn’t think neon and geodes went together, we strongly urge you to reconsider! A Merry Mishap happens to make fabulous geometric shaped jewelry in fun neon colors. The look is fresh and modern but also a throwback to our childhood days of making clay beads. We think the rings are pretty badass, but are truly obsessing over the friendship bracelets – such casual, fun, colorful, summer-y accessories! All of the jewelry is individually handmade with clay so each piece is totally unique. ENVIABLE PERK: A sophisticated twist on the polymer clay jewelry you remember from childhood. Her blog is also pretty dang fabulous. GIVEAWAY ALERT: A Merry Mishap is giving away a $15 Gift Certificate, good for anything in her shop.