
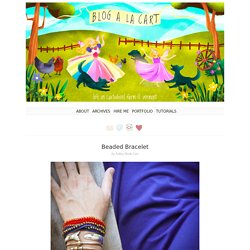
Crochet. Easy Crochet Wrap Bracelet #1. Wrap bracelets are everywhere. I went to three different stores last weekend to buy gifts for friends and there were so many of these extra-long bracelets out there. I'm going to my first ever craft show (I've sold a few items at a show, but this will be my first foray into full out selling) and decided to make a few prototype crochet bracelets. I love the look of these bracelets and so for the next few posts here I will show you what I came up with . Here's the really simple pattern for the Easy Crochet Wrap Bracelet #1 (at the beginning of this post).
Easy Crochet Wrap Bracelet #1 Please note: You can make this pattern for any reason, even to sell. Materials Needed:less than one oz of Crochet Cotton or Nylon in size 3. Super Easy Instructions Prep: Thread your beads onto your thread. 1: Make a foundation chain long enough to wrap around you wrist loosely at least 5 times. 2: Double chain in the first 10 chains of the foundation chain. 3. 4. 5. And you're done! ~Dee. DIY Beaded Bracelet « greeneyed.com. I’m super excited to share this project with you, as it has been over two weeks in the making.
I fussed around with many a mini-crochet needle and embroidery thread, and my house is now littered with bitty seed beads, to arrive at what I think is my favorite and most unique tutorial yet! Woo hoo! Materials: Embroidery thread (I used 6 stranded thread) Crochet hook size 1 (2.75mm) Seed beads Jewelry clasps Needle Scissors Directions: Note: This pattern is for a bracelet that measures 6.5″ at completion. Free crochet pattern « Near Miscellany.
Cutie Fruity Toddler Bracelet or Hair Tie The Cutie Fruity toddler bracelet is stretchy so it's easy for little people to put on and take off. Apparently that's half the fun! I created this for the Summer Solstice challenge in the Color Combination Challenge Facebook group. I've included the pattern here, free on Near Miscellany, for anyone who'd like to make their own! Cutie Fruity Toddler Bracelet Materials: Stretchy ponytail holder the right size to slip on and off a toddler's wrist easily. How to make the Cutie Fruity toddler bracelet. String beads onto the floss in the order you want them to appear in the finished work. Pass the hook through the ponytail holder, yarn over, pull hook back through and go over top of the ponytail holder, yarn over and pull through loop on hook. SC 2, *ch 3, SC 3* repeat all around the ponytail holder, making sure to do enough repeats to allow the band to stretch some, ch 4 and do not turn.
Weave in any loose ends. This heArt of mine.
Crafting. Pearltrees videos. Getting started. How to make a momma bird necklace {guest tutorial} Hello Love Stitched readers!

My name is Sarah I love DIY projects and today I’m going to be sharing with you one of my favorite tutorials, how to make a bird nest necklace.These pretty pendants are easy to make and they also make wonderful gifts.Enjoy! I have been seeing a lot of bird nest jewelry around lately. They are beautiful and I love the trend so I thought I would try making my own.
These turned out to be really easy to make and require just a few simple supplies. . – Jewelry wire (I prefer using a 24 gage because it is easier to manipulate but the 20 gage can work well too with the help of some round nose pliers) – pearls or glass beads – necklace chain – jump ring and a clasp Select the beads you want, string them onto your wire and arrange them as you’d like. then simply wrap the wire around the beads wrap some wire in the space between each bead (I like the look of three loops but you could just do one or two if you prefer) this is what the back looked like. Top 100 Tutorials of 2010. Tutorial: Patchwork Wristlet. Thank you to many of you who requesteda tutorial on this pouch.
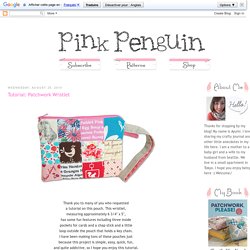
This wristlet,measuring approximately 6 3/4" x 5",has some fun features including three insidepockets for cards and a chap stick and a littleloop outside the pouch that holds a key chain.I have been making tons of these pouches justbecause this project is simple, easy, quick, fun,and quite addictive, so I hope you enjoy this tutorial. We start off with twenty four 2 1/4" squares. (Once again, seam allowance of 1/4" isincluded unless otherwise noted.)Twelve of them will be one side, andthe other twelve go to the back side. We now take the twelve squares that come toone side of the pouch. Then we'll makepatchwork strips of columns. Fun ;) After you have four strips, it's time to press. Pressing seam allowances like this will makeyour finished patchwork piece less bulky andit helps to ensure that each corner of a squarepiece matches with corners of other squares around it.
We'll sew them together.