
Ron is sharing another step by step… « NYC Cake Girl. October 20, 2011 by NYC Design Girl We have been commissioned by Pastry & Baking to do a few “step by step” stories.

This one is really fun celebration cake using “needlework” techniques. Enjoy! Equipment list: measuring tape, parchment paper, pencil, tape, pin, colored sugar paste or Satin Ice Fondant, clay gun/extruder, paint brush, small sharp edged scissor, xacto knife and marzipan 1. 2. 3. Rolled Fondant Icing. Riviera - Couture Cake Company. Sugar flower tutorial. This is one of the simplest flowers you could ever find to make, and should be within the capapabilities of most, whether you are new to the craft or more experienced.

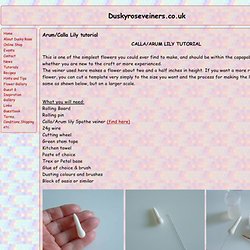
The veiner used here makes a flower about two and a half inches in height. If you want a more realistic sized flower, you can cut a template very simply to the size you want and the process for making the lily will be the same as shown below, but on a larger scale. What you will need: Rolling Board Rolling pin 24g wire Cutting wheel Green stem tape Kitchen towel Paste of choice Trex or Petal base Glue of choice & brush Dusting colours and brushes Block of oasis or similar To make the spadix, take a small piece of paste and roll into the shape shown. Dip the spadix into the neutral coloured polenta or semolina, shake off the excess and leave to dry. Once dry, dust the base of the spadix with lemony or yellow coloured petal dust, and then just a hint of your final dusting colour. Pinch the point of the spathe to create a gentle crease. Tips for Covering a Cake Flawlessly - The Sugar-Coated Chronicle. When I was first teaching myself to work with fondant, I found one of the hardest parts was actually covering the cake and having it look smooth.

I struggled with pleats around the bottom, cracking and tearing fondant and corn starch or powdered sugar spots all over the fondant. I looked at pictures and instructions, watched youtube videos and read forums. While there is a lot of good information out there, I felt like there was a lack of good suggestion all in once place or the videos went by so quickly. I watched adept hands make quick work of covering a cake with no issues and I struggled to figure out what they were doing.
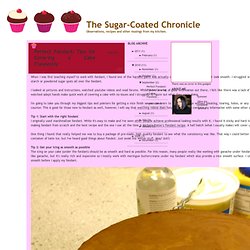
I'm going to take you through my biggest tips and pointers for getting a nice finish so you can learn to cover your cake without pleating, tearing, holes, or any other frustrating issues that have you beating your head against the counter. Tip 1: Start with the right fondant I originally used marshmallow fondant. Then use a fondant smoother to smooth it all down. (2) Lisete Alves / Pinterest.
Cakes, Cupcakes, Cakepops and Cookies. LilaLoa: Icing Consistency. Sometimes people ask my advice. I would say that its against my nature to tell people what to do, but that would be totally lying. I love telling people how they should live their lives, or exercise, or what kind of car to buy. Its just that people don't usually ASK. So as you can imagine, this is a little weird for me. I get a lot of emails from new friends just beginning their journey into the cookie decorating world.
You can forget EVERYTHING you have ever learned about decorating cookies as long as your icing is the right consistency. But, here's the deal. And if you've only just begun discovering you cookies you have another question burning in your head at this very moment. Stir up your icing nice and easy with a knife or a spoon or chopsticks or whatever it is that you choose to stir your icing with. "Draw" a line on the surface with the icing that falls off your stirring utensil of choice.
Here's another visual. Perfect icing FOR ME. I know how thick I like my icing.