
Kinect Hacking using Processing. About Processing from Processing.org: Processing is an open source programming language and environment for people who want to create images, animations, and interactions.
Initially developed to serve as a software sketchbook and to teach fundamentals of computer programming within a visual context, Processing also has evolved into a tool for generating finished professional work. Today, there are tens of thousands of students, artists, designers, researchers, and hobbyists who use Processing for learning, prototyping, and production.
About Kinect The Kinect is a stereo camera (actually triple camera including the IR sensor) that has some pretty sophisticated firmware algorithms that can spit out a wide variety of depth and motion tracking data. About this tutorial "Kinect for Processing" involves configuring a set of libraries that can be compiled with the Processing programming environment to parse and manipulate Kinect data. UPDATED NOTES ON CERTAIN KINECT MODELS! HOWEVER! From Gah! Kinect Physics Tutorial for Processing. KinectSEN - Processing Kinect Resources. For a little effort you can expand the opportunities for using the Kinect three fold by downloading Processing.
Like the Kinect Processing is world wide, like the programs on the main page it is also free, and all these wonderful interactive programs will cost your special needs school setting nothing. Processing is a coding platform designed for artists and graphic designers. It is open source and free and can be downloaded onto PC's or Macs. You then run the Processing program and you can either write your own program or 'sketch' or, and this is where the ease comes in, you can download and open someone else's sketch from the Internet. Lots and lots of the Processing resources are open source and so free. You paint with your hands- the colours change on their own and a key press blanks the screen. Kinect Flow in action in the ICT room! One armed while taking a screenshot view! What it should look like! Yes, there's three of each pupil! See I told you so! Daniel Shiffman. The Microsoft Kinect sensor is a peripheral device (designed for XBox and windows PCs) that functions much like a webcam.
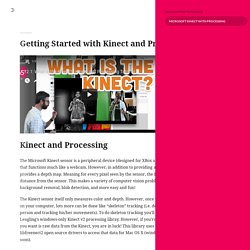
However, in addition to providing an RGB image, it also provides a depth map. Meaning for every pixel seen by the sensor, the Kinect measures distance from the sensor. This makes a variety of computer vision problems like background removal, blob detection, and more easy and fun! The Kinect sensor itself only measures color and depth. However, once that information is on your computer, lots more can be done like “skeleton” tracking (i.e. detecting a model of a person and tracking his/her movements).
What hardware do I need? First you need a “stand-alone” kinect. Standalone Kinect Sensor v1. Some additional notes about different models: Kinect 1414: This is the original kinect and works with the library documented on this page in the Processing 3.0 beta series. SimpleOpenNI I’m ready to get started right now. Identifying People in a Scene with the Kinect. We'll start with the sketch we wrote to draw the depth image from the Kinect in Drawing Depth with the Kinect: import SimpleOpenNI.*; SimpleOpenNI context; void setup(){ // instantiate a new context context = new SimpleOpenNI(this); // enable depth image generation context.enableDepth(); // create a window the size of the scene size(context.depthWidth(), context.depthHeight()); } void draw(){ // update the camera context.update(); // draw depth image image(context.depthImage(),0,0); } The OpenNI library does all the work for us to identify people or other moving objects in a scene.
It does this with the scene analyser which is turned on by adding context.enableScene() to the setup(). The depth image also needs to be enabled in order for the scene to be analysed. Now when running the sketch, the objects in the scene identified as being different from the background will be coloured. We then need to draw the scene image, rather than the depth image, in the draw() function: Full Source.