
Pimp Stitch : Tutorial Monday. If you're anything like me and the other Pimp Stitch girls, you are more than a one trick craft pony.

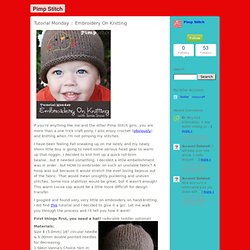
I also enjoy crochet (obviously) and knitting when I'm not pimping my stitches. I have been feeling Fall sneaking up on me lately and my newly shorn little boy is going to need some serious head gear to warm up that noggin. I decided to knit him up a quick roll-brim beanie...but it needed something. I decided a little embellishment was in order...but HOW to embroider on such an unstable fabric? A hoop was out because it would stretch the ever loving bejesus out of the fabric. I googled and found very very little on embroidery on hand-knitting.
First things first, you need a hat! (adorable toddler optional) Materials:Size 8 (5.0mm) 16" circular needle & 5.00mm double pointed needles for decreasing1 Skein Vanna's Choice Yarn in Taupeyarn needle for closing and weaving in ends Size:Toddler ages 1-3years Gauge:6 rows x 4.5 stitches = 1" Directions: (you can use any hat pattern you'd like. Welcome to Sitkum Arts, Embroidery. Sharon b's in a minute ago. I hope you find this needlework dictionary useful and with it able to improve your hand embroidery skills.

To assist those who are new to the craft of hand embroidery I have categorised each stitch as to its degree of difficulty. An icon of a single pair of scissors indicates that the stitch is easy to work and you should not hesitate to try it. If you are new to learning needlework. If you see two scissors, the stitch requires more skill. Three scissors indicate that the stitch needs skill and practice. If you normally have problems following embroidery illustrations the computer can help you.
Contents: top Eyelet Stitch Half Chevron stitch Half cross stitch see cross stitch Heavy Braid chain see Heavy chain Heavy chain Herringbone: Herringbone double version 1see Double Herringbone 1 Herringbone double version 2 see Double Herringbone 2. How To Videos. Stitch School. A couple of weeks ago, Susan showed some very cool embroidered pictures of cottages on her T-Cozy blog.

Knowing that I sell copies of vintage patterns on my website, she emailed to ask if I knew anyone who could take her original picture and make a pattern from it. It was a challenging picture to trace (lots of tiny leaves and flowers) but I told her I'd do it. Yes, it's possible to digitally trace original embroidery but it's not magic—you still have to do all the tracing. It's just done with a mouse instead of a writing instrument and a steady hand and graphic design background doesn't hurt either. The pattern is now for sale and you can head over to her latest blog post for ordering information. A beginning embroiderer may want to practice up on their stitches—about half of the design is cross stitch (that's easy) but the rest uses a variety of other stitches—like chain, outline, French knot, and lazy daisy.
Embroidery basics. Not too long ago, someone asked me for advice on keeping the back side of her embroidery neat and pretty.

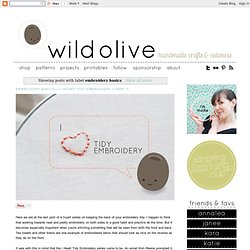
She was going to be stitching some tea towels and wanted the back to look nice. This made me very excited that she was thinking about this. When the back of your work will show, you really get self-conscious about this sort of thing. But I think that tidy embroidery is a good idea all of the time, so I've created a three-part series to focus on this very thing! It's been a while since I asked my friend Olive to help out, but since she loves tidy embroidery, I thought it would be a good idea to invite her along. Calm down, Olive! Now, that's KNOT to say that working without knots is a bad idea. But I've been using a few options for secure stitching that's tidy (and doesn't have much waste). This first one starts with a knot. As you work, use the backs of the stitches to hold down the tail coming off the knot.
And now you've got the security of a knot, but the tail is all tidied up!