
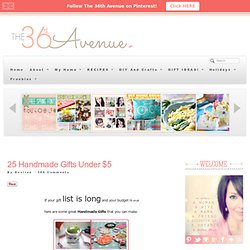
23 super creative repurposed items. 25 Handmade Gifts Under $5. If your gift list is long and your budget is small here are some great Handmade Gifts that you can make.
Keep in mind that handmade items are not just beautiful but special… I love to give them and I love to receive them. In my opinion they are the best! Jersey Knit Bracelet Lovely! This would make a perfect gift for any of your girlfriends. You can choose the colors and recycle t-shirts that you have around the house.
Cheap and cute! Wax Paper Bow Tutorial & Giveaway. Custom Reusable Coffee Cozy. Keep your coffee hot and your hands cool with a simple fabric coffee cozy in your favorite fabrics.

Materials Coffee Cozy Template (download pdf) Two pieces cotton fabric, at least 5-1/2” x 12” each (these will be fabric “A” and fabric “B”) Piece of cotton batting, at least 5-1/2” x 12” Button (we used a 7/8” covered button) Scrap of 1/8” elastic, 2” long Wash-away marking pen or pencil Bamboo skewer or other long, pointed object Coordinating thread Hand needle Pins Scissors Sewing machine Iron Instructions Cut out coffee cozy template. Fold one piece of cotton fabric A in half and place template on top, aligning marked straight edge with folded edge of fabric (fig. 1). Circle Zip Earbud Pouch Tutorial - Dog Under My Desk.
I use a little zippered pouch to carry around my earbuds since they are the fancy microphone ones and I don’t want them to break or get tangled.
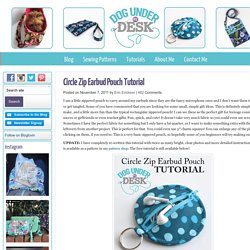
Some of you have commented that you are looking for some small, simple gift ideas. This is definitely simple to make, and a little more fun than the typical rectangular zippered pouch! I can see these as the perfect gift for teenage cousins or nieces or girlfriends or even teacher gifts. Fun, quick, and cute! It doesn’t take very much fabric so you could even use scraps! UPDATE: I have completely re-written this tutorial with twice as many bright, clear photos and more detailed instructions and it is available as a pattern in my pattern shop.
First, download the pattern template HERE. Rice Heat Therapy Bag Tutorial. Edited to answer questions….

I think cooked buckwheat is known as kasha, but you want to get the unroasted kind for freezer bags. I bought buckwheat and flax seed (also raw) in bulk at the natural foods grocery. I poked around a little and didn’t find any warnings or concerns regarding Velcro in the microwave. (I suppose you could use buttons–that would be very cute.) I didn’t find any warnings about essential oil in the microwave either, although I confess that I didn’t look hard. As for the timing in the microwave, I’d start with 1 minute and go up to 3 minutes.
I’m glad so many of you are enjoying the tutorial! Edited again…. Start off with 8–10 drops of essential oil. I think that the weight of the buckwheat is comparable to the rice, so yes, about 2 lbs should do it. » Sewing Tutorials + Patterns » Rice Heat Therapy Bag Tutorial Bags, Gifts « Craft Friday + Gift Certificate Winners November 24 ~ Sachets & Therapy Pillows » Fat Quarter Tote Bag Tutorial. Here's my tutorial for a tote bag using a fat quarter of fabric.

It will use every bit of it, but you do want to make sure everything is squared and true, which may mean you need to trim a little bit here and there to get to those perfect measurements. You MUST know that as I was creating this, I made a grave error in the bottom of the bag shown left. It should look like THIS bag, but I goofed. This tutorial will gloss over that error by using fancy schmancy illustrations rather than photos. I will leave the rest to your imaginations! Materials: Fat quarter of printed fabric* Lining fabric Ruler Iron Pins Sewing Machine *This tutorial will work around the various widths you may encounter with fat quarters: Narrow goods (45" wide) have a width of about 20" to 22" usable. 1. 2. Kate’s notebook lunchbag. Oh i love this time of year. this month’s theme is definitely going to be back to school, because who can help but be at least a little excited about the start of fall and a new year for students everywhere. send your favorite student to school (or work) with this notebook lunchbag!

This is completed in a jiffy and is very inexpensive. much like that pristine first page of a new notebook, the hardest part is deciding what to write on it. have fun! -kate CLICK HERE for the full project after the jump! Materials: 1. striped canvas fabric (1 yard) 2. sewing machine 3. red and cream thread 4. black fabric marker 5. ruler 6. scissors instructions: 1. take your fabric and lay it on a flat surface. measure and cut out a large rectangle that is 34.5 x 33 (the 34.5 should be cut parallel to/along with the stripes, and the 33 should be cut perpendicular/through the stripes). this will be for a bag that is 8.5″ x 11″ (of course!)
6. you now have your bag complete!!