
Making Of 'Story of Time 1981' by Hao Ai Qiang. This work was created to commemorate my childhood; the inspiration was from my living environment.

Although many years have passed since I was a child, the images are still deeply engraved in my mind. At the beginning, I just painted a very simple sketch for the concept, and then in 3D software I created the initial layout of the scene. In order to grasp the overall ambience better, I made a simple lighting setup with only the basic models in the scene (Fig01-02). Fig. 01 Fig. 02 This made it more targeted when adjusting model shapes, details and the layout of the scene (Fig03 - final model). Fig. 03 In this project, almost all of the textures used were from 3DTotal Textures Volumes 1, 5 and 6 R2 (Upgrade) DVDs, which are great texture libraries with the perfect textures for this kind of work. Fig. 04. Making of Starbucks Coffee. 386 Flares Facebook 212 Twitter 26 Pin It Share 86 88 Google+ 24 LinkedIn 38 inShare38 StumbleUpon 0 Reddit 0 386 Flares × Reinaldo Handaya got the Best of The Week award for his 3D recreation of Starbucks Coffee by Kengo Kuma.

Since I liked both the original project and the remake I asked Reinaldo to share his workflow with us and he kindly agreed. Follow him as he describe the process from modeling, through texturing and lighting all the way to an important post-production stage as the base render is far from the end result as you will see. Enjoy! And ask away at the comment section in the end. Sample #2. Tuto: suite HDRI avec une chrome ball. HDRI haute definition. LWF Vray & Low Level Noise. VRay Webinars Pack - Free Samples. Les pass du render element avec VRay frame buffer. VRayDirt Tutorial. Monitor Calibration. ID objet à l'interieur d'un objet transparent. En fait si c'est possible (si j'ai bien compris la demande), pour l'exemple j'ai utilsé vray, une sphere ayant un shader de verre et un léger noise.

Une box dedans et une en dehors de la sphere. Et en affectant au sol un objectID de 1, a la sphere un ObjectID de 2, au aux box un ObjectID de 3, puis en allant dans le render element et en activant la pass de : MultimatteElement, en cochant id : 1, 2, 3 au rendu on obtiens bien la déformation par transparence, qu'on peut ensuite détacher et compositer. V-RAY - Topic d'entraide évolutif. Vray Tutorials. Here is a list of 15 vray tutorials that I think everybody should read.
It covers everything from materials and shaders to illumination and rendering settings. (And yes, I have included 3 of mine tutorials in the list 1) Critical vray settings Without any doubt, this should be the first one on the list. It’s an in-depth analysis of all the critical vray settings that affect your scene one way or the other. It covers topics like irradiance map settings, image sampler, lightcache settings and more. 2) How to create incredibly realistic grass Although you will need a really powerful workstation in order to use the technique shown in this tutorial (especially if you have large areas of grass in your scene), the results are truly amazing. 3) How to create a lampshade material A tutorial that explains how to use the vray2sided material in order to obtain materials like lampshades, curtains, etc.
Vray wet materials tutorial. In this tutorial we will go through the process of creating realistic wet materials.

Although the tutorial is written for max and vray users, the same workflow can be adapted to any software you may use. 1) Analyzing the reference In order to re-create any type of material the first and most important thing is to look at real photos of what you are trying to replicate in your rendering, and really understand what is happening there. For example, take a close look at the photo bellow.
Not only the asphalt is quite reflective because of the layer of water on it, but also the glossiness/specular varies a lot across the image. How to make your own HDRI studio in 3DS Max « Tutorial-z.com. For this tutorial we will be using 3D studio max and VRay but the following principles should apply for any other 3d application and render engine. 1.First of all we have to set up our scene settings.

Use the following settings: 2.Then we have to set up our camera, just rotate the model as you wish and when you think you have found the right angle and perspective press “Ctrl C” on the keyboard, this will automatically create a camera with the exact view of your viewport. 3.Now open the materials rollout (or press “M”). Click on the “get material” button and select “Gradient Ramp”. 4.Make sure you have checked the Environ button and the Mapping is set to “Spherical Environment”, also on the Angle W type 90 . Photoshop Post Work - Online Training. 3D Tutorials for 3Dsmax and Vray users. Free 3dsmax + Vray tutorials, photorealistic rendering. Vray 1.5 dirtmap tutorial - Page 1 - Free Vray Rendering Tutorials for 3dsmax. Chaos Group / Chaos Software official website - home - V-Ray® - award winning, production-ready 3D rendering solutions. Google Traduction. Tutorial. Hello my follwersThis mini-tutorial I have written about how to activate Vray Frame Buffer History toolsVray Frame Buffer (VFB) history is very handy, hidden feature tool of Vray After you use this useful tool, you can easily reach your previously taken renders with just a click To activate this feature, you need to create an environment variable so just follow the steps 1.

Right click computer icon, which is on the desktop, to open properties 2. 3. 4.
Peter Gutrie. Matt gueta. Tutorial / Random object visibility in 3dsmax with MaterialByElement & Opacity. Google Traduction. Evermotion. Untitled. MoonLight. Sold Out. Become a part of VRay community!

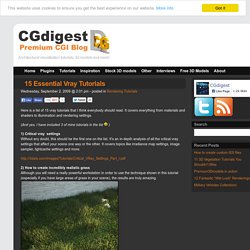
Your Name If you can see this box something is wrong or you are using a screenreader. Do not fill out this field as it's used to prevent unwanted submissions. Comment. Advanced tools for 3d visualization. Google Traduction. Google Traduction. 3ds MAX + VRay Tutorial. 3D Studio Max Tutorial - Vray Fur. 32,767 views | 28-January-2011 | 3D Studio Max Tutorial In this 3D Studio Max Tutorial I want to introduce Vray Fur.
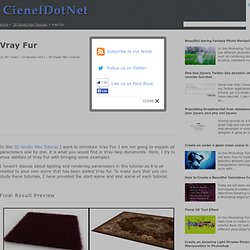
I am not going to explain all parameters one by one. it is what you would find in Vray help documents. StrobFX.com – Mon “Making Of” du Iron Baby. Just finished a very complete and technical Iron Baby Making Of.

The Iron Baby (click here for the original video) was a video that went viral on YouTube last year and that I did with my friend Patrick Boivin who was director and who had the origial idea. It’s targeted towards 3D artists with detailed explanations about using 3DS Max and Vray to obtain photorealistic results but the first video is more accessible for everyone with some “on the set” footages. To see in 1080p HD click the HD links. 3ds Max - Mental Ray & Vray Video Training Modules - Brought to you by MentalBoutMax. Vray Training:
Vray for 3d studio max tutorials. So we loaded a hdri map in the vray reflection environment slot. Hit render and look at the result. The reflections look very strong! Actually the material didn't become more reflective, it just got a complete environment to reflect in so the reflections are simply more prominent now! The material has a medium grey reflection color, which means about 50% reflection strength, this is actually a lot. Next to the reflection color is a small checkbox: "Fresnel reflections". Here's a tutorial for more info about fresnel and other material properties. The Fresnel option depends on the Index Of Refraction of the material. For now, unpress it and change the Fresnel IOR to 1.3. Rendering an exterior at night in 5 simple steps, using vray. In this tutorial I will go through all the steps that we usually do when I’m asked to do an “exterior night-rendering”.
In order to follow it you need to know the basics of 3ds max and vray. 1) Natural light The first step is to choose a background image of a sky. For this tutorial I have used the image bellow: Now put the desired image into the environment slot (3d max’s environment slot, not in vray’s). In the vray settings, check global illumination, select lightcache for secondary bounces, irradiance map for primary (you could also use brute force, but it will take longer to render).
Last but not least go to the vray environment slot and check “GI environment (skylight) override. Vray for 3d Studio Max Tutorials. The Aversis V-ray tutorials are widely known for their in depth explanations while remaining very easy to follow and to understand. They don't sum up a bunch of settings, but instead explain every step along the way, telling you how and why, in human language. V-ray is one of the best renderers you will find to create extremely photorealistic 3D images. It is a render plugin originally for 3D Studio Max, but currently also available for Maya, Rhinoceros 3D, Google Sketchup, Cinema4D and many more. VRay Tutorial - Studio Lighting Explained (3ds Max + V-Ray) V-Ray Tutorial - Studio Lighting (3ds Max)Free 3ds Max + V-Ray Tutorials by CG Artist, Géza Kádas CGIndia Feature In this tutorial i will tell you the method of studio lighting. For the rendering i used Vray 1.5rc3, the latest version of the program.
This famous chair called "Corbusier" was modeled in 3ds max 9. Linear Workflow: a guide. This has been the subject of discussions on many forums over recent years. I realised that there were all sorts of tutorials offering often conflicting information regarding the process. This is not the only way, just my way. I would like to thank my mate Ben Cowell and Phil Shoebottom for offering some clarity on a few points. SO, WHAT IS LINEAR WORKFLOW? (explained without maths, graphs and tables) Google Traduction. Google Traduction. Tutoriel : Bien débuter avec Building Generator. Tutoriaux - ApeiNe - Vray. 3D Total - The cg artists home page.
Tutorial: Creating Realistic Rocks with V-Ray - Part 1. Tutorial by Daniel James Hatton Part 1 of this tutorial shows a way to create very realistic looking rocks that can be rendered far away or for very detailed work. After failing to find a decent tutorial online I decided to start experimenting and I came up with this. I already knew how to make decent looking rock but I needed a way of generating loads quickly for a very rocky landscape.
In Part 2 we are going to distribute those Rocks on a large scale using Vray Mesh Export and the Advanced Painter Plugin. You need. 3ds Max, V-Ray, and Francois Mourlevat’s Asteroids Generator Script and the texture inluded in the scene file which is a modifies version of a texture I got from CG Textures. There is a video that shows the process at the end of the tutorial. Create a Rock using Asteroids Generator Script using the settings below. You can have a mess around with these parameters. Apply a Displacement Modifier to the rock. Apply a Turbosmooth Modifier to the stack. Blur scripts link. VrayProVolume1. Tout pour Vray - Vray - Historique. Making of the Auditorium. I started to build it from some initial blueprints. I couldn't find much info on it except for a very basic-stage simple plan and section.
Thanks to this, I was able to add a few personal details. The whole main structure and individual elements are mirrored by a central axis, so I centered the modeling around just one of the symmetries. Walls, floors, stair-steps and so on... they all are modelled from primitives or extruded splines. VRay Tutorials & Articles.