
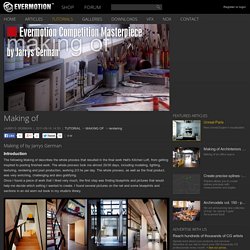
Making of Minimal Loft. Modeling: With the modeling we tried to do something different than what the usual commercial architectural visualization task requires.

The main goal was to create a special atmosphere for the room. After agreeing upon the style I sketched down the proportions of the room. The base model was created from boxes within 3ds Max. Bronte - making of. Theme & Inspiration: I saw this house in one Internet site and I remember looking at it for some time as it grabbed my attention with the fireplace and sofa in an semi-open high ceiling area with the wooden floors.

Unfortunately I didn't bookmark the site or note the name of the house. After some time, I remembered this fireplace and decided to make a 3D version of this house but I haven't got any reference image or the name. So I decided to trust on my memory and build my version of the house. I still don't know the name of the house, where it is or how much it is similar to the original version I once saw. Collecting Reference Images: Collecting reference images is one of the most vital steps in a project. Making of. Introduction The following Making of describes the whole process that resulted in the final work Hell's Kitchen Loft, from getting inspired to posting finished work.
The whole process took me almost 20/30 days, including modeling, lighting, texturing, rendering and post production, working 2/3 hs per day. The whole process, as well as the final product, was very enriching, challenging and also gratifying. Once I found a piece of work that I liked very much, the first step was finding blueprints and pictures that would help me decide which setting I wanted to create. I found several pictures on the net and some blueprints and sections in an old worn out book in my studio's library. This contest provided me with an excuse to try polymodeling for the first time, since I had never used it before. After some days, I managed to create an area inspired by my findings.
Modeling Reference Modeling. Red Vertex Foliage Tutorial. All of the postproduction for this project was done in Adobe Photoshop using various plug-ins: DFT-55mm, Nik Software Color Efex Pro 3.0,Digital Anarchy-Knoll Light Factory and Richard Rosenman DOF-pro 3.0.This is a step by step tutorial of making the post for one of the five frames but a similar method was used for the other four.

This is the pure render right from the render machine, there are no corrections. There are two additional passes with the foreground trees and the grass that will be introduced later in the post production. First thing of all, here is to take all of the color channels from the multimatte elements and literally brake the render into layers for easier color correction. This is a method that we use in every project. Making of Abandoned building. Modeling and rendering tutorial. Introduction Hi, Thanks for Evermotion team for this great site and Thank you to all who gave me feedback and encouragement.

I will try to tell you my Making Of Story for my Bedroom Concept. Making of Kumu, Art Museum of Estonia. I had the chance to visit this building personally 2 years ago.

As a matter of fact I found it out of pure luck just by wandering in the forest in Tallinn. It was 2 years ago as I said and I knew it immediately that I will do my 3d version of this at some point. Spider. Possibly you will expose something new on your own.

Anisotropic shader tutorial using vray 1.5 final SP 1. Now we are going to create steel shader.
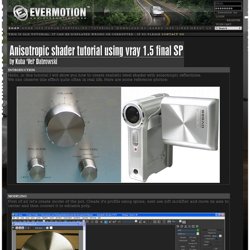
Here are settings for this material. It is quite simple, there is scratch map put in bump slot to achieve subtle brushed metal effect. Use cylindrical uvw mapping on each part of the pot And then convert object to poly. Now we have to create anisotropic shader for the bottom part. Anisotropic material settings: Here are maps used in reflection and normal bump slots: Get full resolution reflect map Get full resolution normal map Very important thing to do is set BRDF to Ward mode. Making Of Hall. 3dsmax: Vray - volume effect. Lets open START SCENE.
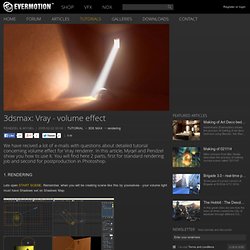
Remember, when you will be creating scene like this by yourselves - your volume light must have Shadows set on Shadows Map. Here you can see volume sets for Direct01 light. To add or create your own volume effect - in Atmosphere section click on Add... button, in Volume Light Parameters click on Pick Light and choose appropriate light. In our scene we have got light and metal ball - light will be reflect from ball and disperse on the walls making caustic effect.
So here you can see sets Caustics in our renderer. Now we decrease Caustic subdivs parameter to 500 - this will speed our preview renders up. In G-Buffor/Color mapping section let set Type as Intenisty exponential and Bright multiplier to 3. And here is our first test render. Now lets increase Caustic subdivs to 1500. And light Multiplier to 10. Well, as you can see it is brighter. Now lets turn Indirect illumination (GI) on. And here you can see our final 3dsmax result.