
Feature Friday- Cut Paper Art. Another way to recycle magazines and create beautiful artwork at the same time, this cut paper art is not only colorful, but very easy to make!
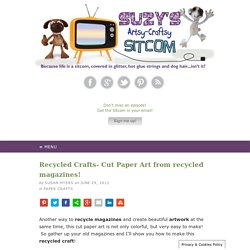
So gather up your old magazines and I’ll show you how to make this recycled craft! About once a month, I meet with my mom, sister and whoever else wants to show up, to create a crafty project together. Each time we meet, a different person is in charge of the “mystery” project. We are only told what supplies to bring and it is always exciting to see what the person in charge has in mind to do. This past week, my sister was in charge and her idea, based upon a few things she had found on Pinterest, was cut paper art using old magazines and construction paper.
For this project we used: Old magazines 8″ x 10″ picture frames black and brown construction paper glue sticks craft blade cutting mat Take the frame apart. Try to use bright colored pages for the best contrast with your dark construction paper. ButterfliesPotted Plant Are you new to the Sitcom?
Home Stories A to Z. Idle Hands Awake. Printables Remember when I said my honeycomb wall decals were the easiest DIY ever?

I was wrong. PRINTABLES are the easiest DIY ever. And today I’ve got my very first just for you: a printable morse code message for your sweetheart. Just in time for Valentine’s Day. The message? I’ve got three pretty versions: gray, marble, and pink—had to get a little pink in there somewhere, it’s Valentine’s Day after all. Download below, then print on a nice thick paper; I used watercolor paper, but you could use any card stock or resumé paper. *Note: The marble version looks best when printed in grayscale. Kates Creative Space. I’ve always loved marbled papers, ever since a trip to Venice as a teenager when I stumbled across a tiny paper shop called Il Papiro that was filled from floor to ceiling with hand-decorated sheets in every hue. Even then (especially then!) , they were way beyond my price range, so I admired them and reluctantly left them behind.
Finally, an unimaginable number of years later, I discovered how to make marbled paper at home. The trick? The cheapest shaving foam you can find. In truth, I am pretty sure that this is not the secret ingredient that Italian marblers have been using since the fifteenth century, but still – it works a treat. Firstly, go shopping for several cans of shaving foam. Fill your tray with spray-can shaving foam. Then using the syringe or pipette, squirt drops of food colouring randomly around the tray. Using a wooden skewer, gently stir and swirl the dye around until it’s mixed loosely together and there are no big pools or stripes of colour. Like this: Like Loading... Let's Get Crafty!
Happy Monday to you.

Like I said on Friday, Big Daddy and I had class this weekend. And it. was. amazing. We are incredibly blessed to belong to a church who fought for 4 years to give their members the opportunity to be taught by professors from Indiana Wesleyan University. If I knew who those peeps were who thought this was a good idea, I’d give them a big hug and a thank you.
School was great and football was great, Go Seahawks! Today I have something special for you to help you achieve some sort of clutter control for all of your home office files. Now, I work from home so my files range from home appliance warranties to non-profit work, to mentoring, to blog bid-ness. I started by going through my files. After I went through all the files and purged the junk, then condensed the others I was left with a very manageable stack of very cute folders I got from Target. The solution? Buy cute wrapping paper and glue it to the outside of the hanging file. Ahhh. You’ll need: Persia Lou. The Craft Alternative. Over at my other site, Designs by Studio C, I shared a file cabinet I built to organize my messy desk and created plans to build one for yourself, so why not give the hanging file folders an update, too?
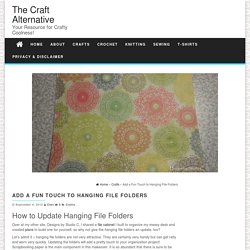
Let’s admit it – hanging file folders are not very attractive. They are certainly very handy but can get ratty and worn very quickly. Updating the folders will add a pretty touch to your organization project! Scrapbooking paper is the main component in this makeover. It is so abundant that there is sure to be something for any decor – including the man cave! Materials: Hanging file foldersScrapbooking paperMod PodgeScissors & rulerCraft knife I had to cut approximately 1/4″ off of the paper to fit the width of my file folders. Score a 1″ fold at the top of each sheet of paper using a scoring tool or a butter knife.
Spread a coat of Mod Podge on the file folder and apply the paper, smoothing out any bubbles. Apply a little Mod Podge to the inside of the folder to allow for the scored fold.