
Tutorial for Fully Lined Tab-Top Drapes. Introducing my how-to for making your own, customized drapes!
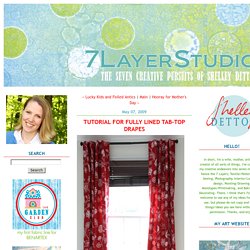
These instructions are for a fully lined, tab-top style, although you could certainly make them without the lining (only recommended if you want a sheer look, or if the fabric you're using is extremely dense and won't let light show through). Sewing your own drapes takes a surprising amount of time (not something to be whipped up in an hour), but it can be significantly cheaper than ordering them, or even less expensive than buying ready-made drapes if the fabric you use is not too expensive. These drapes were made from the fabric of a duvet cover from IKEA (recognize the material?)
Because I had a very limited budget and couldn't afford to go out and drop $15 to $200+/yard for home dec fabric (I made 6 drapes = 18 yards). For $80 I bought two duvet covers and got 4 drapes out of one and 2 out of the other, with half the duvet fabric left over for whatever else I want to use it for. Now it's time for the tabs. Tutorial for Custom Valance With Multiple Variations. Here's a basic How-To for making your own customized valances!
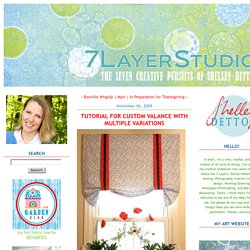
They are non-functional, meaning that they don't draw up and down, which makes them quick, easy and inexpensive. I like to mount these atop windows that are already fitted with blinds so they can hide the top of the blinds and your window will still have coverage flexibility. Start out by measuring your window. Take the width of your window (including trim) and add a total of 4 1/2 inches (which gives 2 extra inches per side, plus 1/4" seam allowance). If you want more fabric on either side of the window, add more inches to this measurement. For valances such as this one, you will also need to cut 2 rectangles of fabric to cover the ends of the valance support. A word about fabric: Heavier-weight home dec fabric works best for these valances.
Now that you have your cutting dimensions, cut one each of both your valance fabric and liner fabric. Now staple the top (the unfinished edge) of the valance onto the stick as shown. Recent Works. As promised, here are photos of some of the paintings I've been working on this past year!
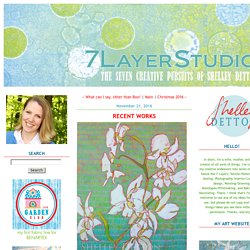
The florals are done with the blind contour process I previously described when I showed you my halloween animal paintings. This is a painting I did especially for our powder room. I haven't shown you any pictures of this room yet, have I? I painted the walls to look like expensive grasscloth. I spent quite a bit of time on that project, there are 4 layers of paint/glazes to give the faux effect. Yes, these paintings are mine too - quite a different style, but mine nonetheless.
This painting (above) is my favorite. This painting is currently in a juried show at the ArtWorks co-op in Richmond, VA. Save. 7 Layer Studio: TUTORIALS. You might be thinking, "Too many buttons....I'm not taking the time to sew all those on!
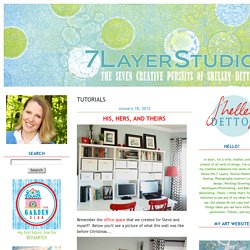
" But wait! I have an exciting new method to secure all those shank buttons, so you'll never be afraid to button-ify a pillow again.... To make this pillow, start by cutting 3 black rectangles: 2 @ 15" x 8.5" and 1 @ 15" x 5". These are the sides and center of the pillow. For the ruffles, cut 2 strips of contrasting fabric (I used cream) @ 3.5" x 35" For the accent trim on ruffles, cut 2 strips of fabric @ 1.5" x 35" NOTE: If you want the accent strip to be wider, cut 2 strips @ 2" x 35". You'll need a piece of stiff, fusible interfacing (I like Pellon Decorbond #809) cut @ 4.5" x 14.5" to stabilize the center panel prior to attaching buttons. Also needed: Lots of fabric-covered buttons with shanks, and 2 strips of ribbon 15" long each....and a hot glue gun. 1) Use 1/4" for all seams in this project. Press seam toward accent fabric. 2) Create gathers in ruffle strip by using basting stitch on machine.
7 Layer Studio.