
100 Things 2 Do. Mirror Inspiration. Organization - Craft Storage - 100 Things 2 Do. We love crafts.At least the girls and I do.It’s something we can play together because I am NOT a Barbie girl.But this is how our crafts are usually stored: As you can see, I’ve tried to “containerize” the mess, but it still ends up looking like this… DAILY.So I’m going to go another route.How about everything stored in one place…. one container…?

Chloë’s stoked! Starting with the million-and-one playdough (Play-Doh) pieces at the bottom (for weight). Crayons, paper and adhesives closer to the top. I love an organized drawer. We put our craft caddy on top so that it’s all in one place, but easy enough to bring down and put on the desk for access while we’re creating. Cross your fingers that this works! Organizing Paint - 100 Things 2 Do. I love to paint.I LOVE to paint.Thought I’d mention it just in case it wasn’t obvious from all the projects on this blog…Every time I go to start a new project, I decide on a colour and then head out to Home Depot or Benjamin Moore and buy another quart (or gallon depending on the project) of paint.I just assume that any leftover paint I have lying around won’t be enough for my new project.Well, that game plan isn’t working for me.
I have cans of paint everywhere. In the basement, in the workshop, in the garage.I had no idea how much of what I had, or even where I kept certain colours.Bad girl! Before and After - Toolbench - 100 Things 2 Do. Great Ideas - 100 Things 2 Do. Don’t you just love it when you come across, or someone shares, a great idea?
I do.I get so excited that I can’t wait to try it out or implement it in some way.Pinterest is usually my go-to source for inspiration, but I don’t search the site…I wouldn’t know what key words to use to find new and interesting ideas, since I don’t know what will strike me until I see it.Here are a few that I’ve come across this last week:Whitney at Shanty 2 Chic did a post recently on her new garage door screen.Sure, screens for the garage door aren’t new… but this one isn’t a flimsy netting that just drops down.
It’s a solid piece with an actual door on it.Take a minute to check out her video on how easy it is to raise and lower. Great Ideas - 100 Things 2 Do. Creating Faux Granite - 100 Things 2 Do. Everyone Should Have a Tool bench - 100 Things 2 Do. I think anyone that crafts, DIY’s, or putters at any hobby should have a toolbench.
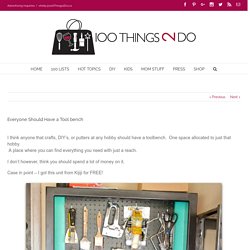
One space allocated to just that hobby. A place where you can find everything you need with just a reach. DIY - Iron Art - 100 Things 2 Do. I saw this photo on Houzz.com: I saw a million and one tutorials on toilet paper roll art on Pinterest.

I had a bare section of wall that I needed to fill.want + need + ability to copy = TP ironwork! I cut paper towel rolls down to 1″ pieces.Folded each piece flat and then glued 4 pieces together like an ‘X’.Make a bunch of ‘X’s’, then glue them altogether. Spray paint in oil-rubbed bronze finish and voila! Painting Blinds and Bathroom Finishing Touch - 100 Things 2 Do. There were two things left undone on the bathroom transformation I showed here and here:1.

I hadn’t done a window treatment and 2. I wanted to add a couple of cute accessories….on a budget.First off – window treatment.This was the original blind: I didn’t even measure – I just put Frog Tape on the blind in three strips and removed the middle strip.SO easy. Then I applied plain ‘ol paint.This blind will not go through the wash well – but since it has a mechanical component on the back that I couldn’t detach, I wouldn’t have been able to wash it anyways.I know this matches the decor because it’s the same Benjamin Moore ‘Peony’ that I used on the Dog Canvases here.Use a thin coat of paint and then layer it on until the space is filled in.A thick layer is more likely to bleed under the tape.
Remove the tape and voila! Window treatment = DONE! Mirror Inspiration - 100 Things 2 Do. You’ve ‘heard’ me mention “Amazing Amy” before right?

She’s the one responsible for my new blog look and logos, she also created grapevine balls, joined us in sandpaper-crayon t-shirts and did these amazing canvas pieces.There isn’t a more accurate word for Amy than “Amazing”.Further proof – look what she created with a garage sale mirror and some vinyl letters: A couple/few layers of spray paint over the mirror and frame… then carefully peel the letters off. The way the light is reflected in the words makes the sentiment that much more inspiring.
Before & After - Built-Ins - 100 Things 2 Do. I’ve completed Step 2 of my family room makeover!

Today I’m showing you the built-ins…Before: I’d painted the backs of the cabinets last year, but the cabinets themselves were a little worse for wear. Not bad from a distance, but not great up close.I call this the “reality shot”. Toys everywhere, cushions off of the sofas, mess and chaos. Truthfully, having the mess in the photo will make the after shots that much more appealing. lolEmpty ’em out and get to work; Perhaps you can see why this is such a big project.The girls continue to play underfoot and the dog and cats like to join in just to make it that much more challenging. Painting Trim - 100 Things 2 Do. A few years ago I had a painting company come to paint my foyer – it’s two storeys so I couldn’t have done it myself – anyways, while they were doing the estimate they asked if I’d like the trim repainted.They told me that patching and painting the trim – even the same colour – really made a huge impact in a room.
At the time I thought they were just trying to up-sell me on something I didn’t really need, so I didn’t get it done.Little did I know how right they were.Step 3 of my family room makeover was to get all of my trim painted and looking fresh and crisp. I was nervous about doing it, but given that the built-ins had been done, the base below it looked disjointed somehow – so I had no choice. Take your putty knife and tuck the top 1/4″ underneath the baseboards and lightly pat down the rest onto the carpet. Do this all the way along making sure that the tape is tucked under – any exposed carpet is likely to end up a different shade.
10 Lesser-Known tips for painting. - 100 Things 2 Do. Given all the painting around here of late, I thought I’d compile a list of my favourite painting tips to share.Add to these the obvious of course; use a drop cloth, clean your supplies right after use etc, etc – but some of these might be lesser-known helpers.

(all tips are based on using latex paints)1. ALWAYS paint in bare feet. This is super-important because it lets you feel when you’ve dropped paint. Even if you are using a drop cloth, drips happen and shoes won’t allow you to feel the paint before walking it through your house.2. Organizing With Shoeboxes - 100 Things 2 Do. Back to school at our house means starting new habits that will carry through the school year.Summer has been pretty lackadaisical around here. The girls stay in their pyjamas until noon if we don’t have anything going on. Chores have long since been forgotten.With just a couple of short weeks left until the public schools resume, I want to implement some new chores for the girls.For everyone actually.One of which is putting their own laundry away.At 6, 8 and 38 this doesn’t seem an unreasonable request?
I think they can handle it.But I’m going to set them up for success (and not failure) by giving them a structure.Back to school shoes = shoeboxes. Shoeboxes = drawer organization! Before: After: Now even if she stuffs her socks and underwear away, at least they will be sectioned so she can easily find them to get dressed the next morning.Madison:
Fabric Bins - 100 Things 2 Do. So I’m still working on the first pair of jeans…They really go a long way eh? Today I thought I’d try to make a little fabric bin with handles.You can use these to store yarn for knitting, or toys that need to be carried up or down stairs – really anything at all. They are particularly nice because they are washable – and being made from denim – extremely durable.This is one pant leg. From it, I cut two rectangles.Then you’ll need two rectangles of interfacing and lining fabric in exactly the same sizes. Iron the interfacing to the denim (which is going to be my outside).The stiffer the interfacing the more stiffly the bin will stand.In hindsight, I think I should have used something stronger, but this one did work.
You’ll need two pieces of fabric for the bottom of the bin.I chose to use the leftover material from the jean leg.Sew, right sides together, the lining, base and then other lining.Repeat for the outside pieces of the bin as well. Before & After: Bathroom shelving makeover - 100 Things 2 Do. Since finishing the girl’s bathroom a few months ago, I’ve been on the lookout for a narrow shelving unit to add to it.The girls are getting to the age where they won’t share their personal items – nail polish, skin cream, even hairbands some days, so I knew eventually they’d need extra storage for all of their “girly” things.I wanted something narrow and light – not a heavy piece or anything too chunky as the bathroom is pretty narrow and doesn’t have a lot of extra space.I was looking for something along these lines:
Craft Studio - 100 Things 2 Do. Do you love looking at photos of other people’s craft studios? The gorgeous organization, cute little jars, rainbows of coloured paper or fabric or yarn. I LOVE those! Home Decor Craft - 100 Things 2 Do. I tried to Google “Why do people like spheres?” And “The effect of spheres on the psyche” and nothing came up – which leads me to believe that 1. no one found it interesting enough to study or 2. Painting Glass Vases - 100 Things 2 Do. Do you have a stash of vases tucked away somewhere collecting dust? You don’t want to throw them out, because they’re glass and seem more important than a recycle bin object – but really, when’s the last time you had flowers to fill all of them?
Whenever I go into HomeSense I always stop at the little white bud vases with the chalky white finish. DIY Jewelry from Washers - 100 Things 2 Do. Bathroom Storage Tower - 100 Things 2 Do. Garage Organization - Easy Garage Shelving - 100 Things 2 Do. Low on space, but high on “stuff” – try this easy garage shelving to increase your storage capacity and organize your space. My garage is my workshop. Marbled Rock Paperweights - crafts for kids - 100 Things 2 Do. The other day I posted the cork coasters that my daughter and her friend made (so cute), but I didn’t post what my other daughter – Miss Chloë – was up to at the same time… The project I did with her and her friends (aged 8, 9 and 11) was creating these beautiful marbled rock paperweights. DIY Jewelry Holder - PVC Pipe Project - 100 Things 2 Do. Build Your Own Crate. I was puttering in the garage on the weekend and wanted to see if I could come up with my own plans to build a crate.
Nothing fancy, just using up bits of wood – but I wanted something more substantial (solid) than the ones you can buy at Home Depot or Michael’s. You can use any wood you like – go cedar for a gorgeous rustic look that you can stain or leave bare. DIY Accordion Folder. With the beginning of back-to-school for my American friends and the looming start-up for my Canadian ones, now seemed like a good time to create an easy organizing solution that you can whip up in no time, and coordinate to your decor… DIY Cat Scratching Post.
When you got your puppy or kitten, did you get/buy a book of coupons for a local pet store? When we got Phoebe a few weeks ago, they gave us a coupon book as a thank you for adopting from our local Humane Society. We had most of the stuff we needed for a new kitten, but I decided to go to PetSmart and pick up a few of the items they were offering – like the free kitten food, free wet food, discounts on treats etc. Marbled Clay Trinket Dish. Painting the Garage Floor. Craft room, craft room storage. DIY Coat Rack. Folding Lap Desk / Breakfast Tray. 100 Things 2 Do.