
Comment marchent les robots. Ez 3D Printed OpenCat by manic-3d-print. How to calibrate your own robot? - STEAM Ottobuilder. OTTO with ARMS by s4snow. Otto DIY+ Arduino Bluetooth robot easy to 3Dprint by cparrapa. Open source STEAM Truly open source nature of Otto allows open STEAM education, we collect feedback from different workshops and schools around the world that are already using Otto DIY in their classroom and depending of the openness of this educational places we organize the lesson material and share as well, some people are teaching electronics connections with Fritzing and the physics behind, other code with MBlock, Scratch, Arduino then collaborative coding with Github, other to create open source APPs in app inventor, other how to customize with arts & crafts, other how to design 3d models with accessories for Otto using openSCAD or TinkerCAD or Fusion 360.
Wikifactory. How to Program a Quadruped Robot with Arduino. KY-022 Infrared Receiver Module - ArduinoModulesInfo. Piccolo, the tiny CNC-bot. Mini 3-Axis CNC v0.29 by MakerBlock. Mini 3-Axis CNC v0.30 by aevictory. PCA9685 16-Channel Servo Driver. Add WiFi to Arduino UNO. I noticed a lot of people are getting interested with this tutorial.
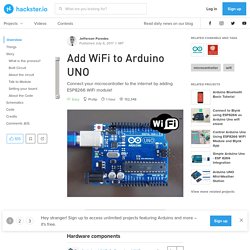
And I also noticed that this is terribly written. So I've added more info and notes a bit. Connect your Arduino to the internet by adding ESP8266 WiFi Module! The ESP8266 Wifi module is a complete WiFi network where you can easily connect as a serving Wi- Fi adapter, wireless internet access interface to any microcontroller based design on its simple connectivity through Serial Communication or UART interface. Adding this module to your Arduino UNO will open you to more and exciting projects. What is the process? There are a lot of ways to use ESP866 for communication. Our ESP8266 will serve as Access Point (AP Mode), meaning it will provide access to Wi-Fi network to other devices (stations) and connects them further to a wired network The process it pretty simple. Built Circuit Connect the pins more described on this Pin table Follow these steps.
About the circuit ESP8266 is strictly powered only to 3.3 V. 1.8" TFT Display Breakout and Shield. Arduino NRF24L01+ Communications – Ben Fraser. Software — Master to single slave device For this example, we’ll be using the optimised TMRh20, which you can download here.
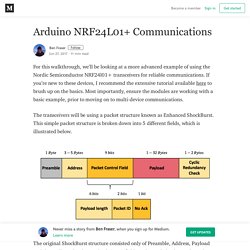
Ensure you remove any old RF24 libraries if you previously had them loaded into your Arduino libraries. The first program will be a simple master-to-one-slave communication using the acknowledge payload feature of the nRF24L01+ radios. We’ll start with the master device program, which will effectively be the controller of communications within our system. The master should send out a generic message with acknowledge payload selected to each slave device. Before we can use the radio transceiver device, we must set our program up to include the required libraries and to configure the device appropriately. // include external libs for nrf24l01+ radio #include <RF24.h> #include <SPI.h> #include <nRF24l01.h>#include <printf.h> Arduino NRF24L01+ Communications – Ben Fraser.
NRF24L01+ Multiceiver Network: 3 Steps. AdWords We use AdWords to deploy digital advertising on sites supported by AdWords.
Ads are based on both AdWords data and behavioral data that we collect while you’re on our sites. The data we collect may include pages you’ve visited, trials you’ve initiated, videos you’ve played, purchases you’ve made, and your IP address or device ID. Interfacing & displaying a custom graphic on an 0.96″ I2C OLED with Arduino – sandhansblog. Arduino Robot Car Wireless Control using HC-05 Bluetooth, NRF24L01 and HC-12 Transceiver Modules. Arduino Wireless Communication - NRF24L01 Tutorial. In this Arduino tutorial we will learn how to make a wireless communication between two Arduino boards using the NRF24L01 transceiver module.
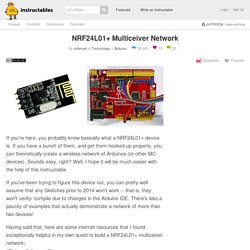
You can watch the following video or read the written tutorial below. Overview For explaining the wireless communication we will make two examples, the first one will be sending a simple “Hello World” message from one Arduino to another, and in the second example we will have a bi-directional communication between the Arduino boards, where using the Joystick at the first Arduino we will control the servo motor at the second Arduino, and vice versa, using the push button at the second Arduino we will control the LED at the first Arduino. NRF24L01 Transceiver Module Let’s take a closer look at the NRF24L01 transceiver module. The module can use 125 different channels which gives a possibility to have a network of 125 independently working modems in one place. Arduino_LED_matrix_sketch/arduino_led_matrix_sketch.ino at master · shaai/Arduino_LED_matrix_sketch. Arduino 32x8 LED Matrix Info Display. The idea I was looking for an easy to read clock for my music room.
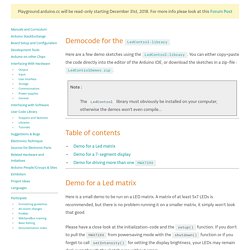
Having just started experimenting with an Arduino I figured I would build one as my second Arduino project with a 4 in 1 8x8 LED matrix I bought a while ago and to add some additional features. It displays the day of the week, month, year, time, temperature and humidity. It loops a couple of times and then enters sleep mode: the display turns off and it powers down to save battery power. An interrupt function is called when the PIR sensors detects motion (the LED in the bottom right will flash briefly to indicate it) and the main loop is active again. The Sketch script can easily be edited to change several settings, like delay times and the numbers of loops, and it can also be expanded with displaying custom texts. I realize an LED matrix, clock, temperature and motion sensors are pretty standard projects for an Arduino. The setup Here is my test setup, check the schematic for details:
Playground - LedControlDemos. Democode for the LedControl-library Here are a few demo sketches using the LedControl-library.
You can either copy+paste the code directly into the editor of the Arduino IDE, or download the sketches in a zip-file : LedControlDemos.zip. Note : The LedControl library must obviously be installed on your computer, otherwise the demos won't even compile... Table of contents. MajicDesigns/MD_MAXPanel: Arduino library to allow a panel of MAX72xx LED matrix modules to be used as a pixel display device. Using the 8x32 LED Matrix. Bluetooth Bluetooth is the easiest and least expensive wireless option.

I added a simple Bluetooth board to the Arduino that controls the display with only three connections, vcc, ground and txd to Rx on the Arduino. 125 music Projects. Arduino Wireless Communication - NRF24L01 Tutorial. Mobile Phone Controlled Robot: 13 Steps. AdWords We use AdWords to deploy digital advertising on sites supported by AdWords.
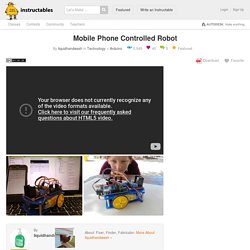
Ads are based on both AdWords data and behavioral data that we collect while you’re on our sites. The data we collect may include pages you’ve visited, trials you’ve initiated, videos you’ve played, purchases you’ve made, and your IP address or device ID. This information may be combined with data that AdWords has collected from you. Free Online Arduino Class. This class will introduce you to the Arduino world.
You'll learn the basics, build your first project, and so much more. Each lesson builds on your skills, infusing new knowledge and techniques along the way. You'll start simple with exercises that demonstrate basic breadboard wiring and coding inputs and outputs. Then you'll level up to soldering and coding addressable NeoPixel LED strip and start planning your own projects with your fun new hobby. Instructables. Arduino Wireless Communication - NRF24L01 Tutorial. Arduino Wireless Communication - NRF24L01 Tutorial. How To Configure and Pair Two HC-05 Bluetooth Modules as Master and Slave. Arduino TFT LCD Touch Screen Tutorial. In this Arduino Tutorial we will learn how to use TFT LCD Touch Screen with Arduino.
You can watch the following video or read the written tutorial below. Overview For this tutorial I composed three examples. The first example is distance measurement using ultrasonic sensor. The output from the sensor, or the distance is printed on the screen and using the touch screen we can select the units, either centimeters or inches. The next example is controlling an RGB LED using these three RGB sliders. The third example is a game. Now we will go through each of these examples and step by step explain the codes behind them. 6 touchscreen Projects. Polar Scanner by lyriarte. Arduino Stepper Motor Control Tutorial with Code and Circuit Diagram. Stepper motors are increasingly taking its position in the world of the electronics.
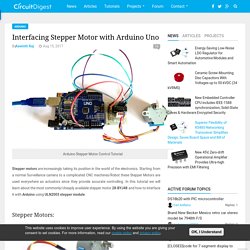
Starting from a normal Surveillance camera to a complicated CNC machines/Robot these Stepper Motors are used everywhere as actuators since they provide accurate controlling. In this tutorial we will learn about the most commonly/cheaply available stepper motor 28-BYJ48 and how to interface it with Arduino using ULN2003 stepper module. Stepper Motors: Let us take a look at this 28-BYJ48 Stepper motor. Okay, so unlike a normal DC motor this one has five wires of all fancy colors coming out of it and why is it so? As you can see the motor has Unipolar 5-lead coil arrangement. Tutorial to Interface OLED 0.91inch 128x32 With Arduino UNO: 7 Steps. AdWords We use AdWords to deploy digital advertising on sites supported by AdWords.
Ads are based on both AdWords data and behavioral data that we collect while you’re on our sites. The data we collect may include pages you’ve visited, trials you’ve initiated, videos you’ve played, purchases you’ve made, and your IP address or device ID. Sound Effects with an Arduino – My Contraption. Arduino to Arduino by Bluetooth. Updated 12.06.2016: Added example 2 In the Connecting 2 Arduinos by Bluetooth using a HC-05 and a HC-06: Pair, Bind, and Link post I explained how to connect a HC-05 to a HC-06 so that when powered they automatically made a connection. Here we look at using that connection to get Arduinos talking over Bluetooth. Before continuing you need to have the Arduinos and BT modules set up as per the previous post. Here I am using 2 HC-05s. One in master mode the other in slave mode. Arduino Wireless Communication - NRF24L01 Tutorial.
Arduino RF Communication Tutorial: 4 Steps. Part 3: Bluetooth communications with 2 Arduino devices, using App Inventor.