
All wrapped up: Double Flap Pouch Tutorial Translation. The last few weeks have been pretty busy.
I've had two weeks of back to base teaching, basically all day lectures. After having a year and a half of clinical placement, it really makes me wonder how we managed to sit still all day during those first years of medical school. It was probably all the more painful because I'm enjoying women's health. I spent the last week before the back to base teaching with an infertility specialist, and it was equal measures amazing and awful because of some of the patient's stories. Women's health has reminded me why I wanted to do medicine in the first place, as cliche as it sounds. Everytime you start a new clinical rotation you always get asked what you want to do, and I always used to say I wanted to do O&G but I'd wait till I saw my first natural birth.
Anyways back to the craft. So before you start a few quick pointers: 2) I can't read Chinese so I wasn't too sure how to use the template. What you'll need Copies of the template. Happy Crafting! Mel. Piped + Pocketed Canvas Tote Bag Tutorial. Try This: Piped + Pocketed Canvas Tote Bag I like tote bags, and I cannot lie.

[How I hope that you got the beat on that right.] Seriously, I am loving myself some bag projects lately. This one is a winner for sure. I've been carrying it around for a couple of weeks, and I assure you that it will fit everything you need. Read on for the full tutorial. Materials: (1) Magnetic Snap ClosureNatural Canvas in the following cuts:(2) 12" x 16" (i.e. canvas front/back panels)(2) 7" x 16" (i.e. canvas side panels)(2) 7" x 11" (i.e. canvas pocket panels)(6) 2" x 22" (i.e. canvas braid strips)Bold Patterned Cotton in the following cuts:(2) 12" x 16" (i.e. lining front/back panels)(2) 7" x 16" (i.e. lining side panels)(2) 7" x 11" (i.e. lining pocket panels)(6) 2" x 22" (i.e. lining braid strips)plus extra for a pocket (optional) One: Using something round like a salad plate as a template, make a concave cut into the top edge of each of the canvas and lining pocket panels. find me elsewhere.
Big Blue Tote. Mini Cosmetics Bag. As promised, here is the result of my new fabrics – a mini cosmetic bag!
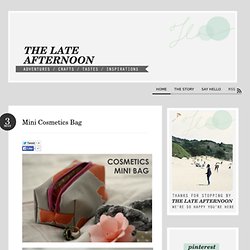
Not only was I excited to actually make something out of my new fabrics, this project also gave me a chance to practice sewing with zippers (something I’ve never done before). I followed this tutorial, but made mine a bit smaller and more rectangular, rather than square shaped. It is always amazing to see how all the pieces (somehow) come together as you sew. Most importantly, I love the end product and think its completely adorable! That, and it was relaxing to be able to start my crazy, monster of a week with a little creativity. Related Posts MINI Variety, mini matchbox cards, Mini Instax Books, castle. Back to School ~ Laptop Bag. Joy from How Joyful brings us this handy and really pretty Laptop Bag tutorial today.
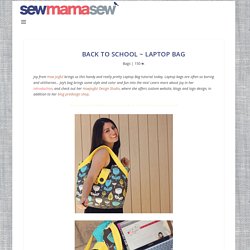
Laptop bags are often so boring and utilitarian… Joy’s bag brings some style and color and fun into the mix! Learn more about Joy in her introduction, and check out her HowJoyful Design Studio, where she offers custom website, blogs and logo design, in addition to her blog predesign shop. To get started you will need: Main/outer fabric – I used home décor weight fabric in two different designs by Jessica JonesLiner fabric – I used 5 fat quarters for all pieces and had leftoversContrasting solid color fabric – I used a home décor weight fabric in yellow1 set of magnetic snaps1 piece of 1½ inches of VelcroLightweight interfacing – I used Pellon 808½ inch thick foam for the bottom of the bag and the sides of the laptop pocket2 big buttons This bag was designed to fit a 13 inch MackbookPro but it has a lot of room so it can fit a 13 inch PC laptop too. 2 pieces of 22×17½ inches of outside fabric.