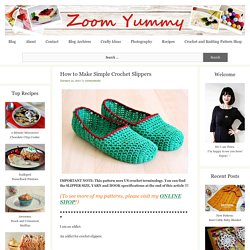

How to Make Simple Crochet Slippers. IMPORTANT NOTE: This pattern uses US crochet terminology.

You can find the SLIPPER SIZE, YARN and HOOK specifications at the end of this article !!! (To see more of my patterns, please visit my ONLINE SHOP!) I am an addict. An addict for crochet slippers. It all began when I saw slippers similar to these somewhere on the internet. I loved them so much I couldn’t get their tempting image out of my head.
All I needed was a pattern. But because I am terribly, terribly impatient, I found creating my own pattern quicker than looking for an official one on the web. And since I’m no crochet guru, the pattern turned out to be really simple. Actually, these slippers might be the simplest slippers in the universe. Or not. But they might. This is what I did… Round 1: 5 ch (chain stitch); join into ring with sl st (slip stitch) Round 2: 3 ch; 7 dc (double crochet stitch) into the center of the ring; join with sl st Round 3: 3 ch; 1 dc into first stitch; 2 dc into each next stitch; join with sl st Row 14: turn (!) Mary Jane Slippers « ohmygoodknits!
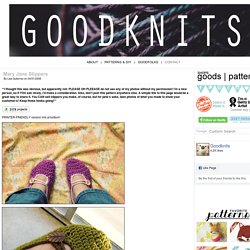
By Lisa Gutierrez on 04/01/2008 **I thought this was obvious, but apparently not: PLEASE OH PLEEASE do not use any of my photos without my permission!

I’m a nice person, so if YOU ask nicely, I’d make a consideration. Also, don’t post this pattern anywhere else. A simple link to this page would be a great way to share it. You CAN sell slippers you make, of course, but for pete’s sake, take photos of what you made to show your customer/s! PRINTER-FRIENDLY version link at bottom! I’ve received many messages via Ravelry about these slippers. Crocheted Mary Jane Slippers (women’s large–9.5-10) Materials: worsted weight yarnH-hook2 buttonstapestry needleyou’ll also need some yarn in a contrasting color. First, start with 8 DC into a circle. See the little tail on bottom? After cinching, slst into the top of the first DC, ch 2.
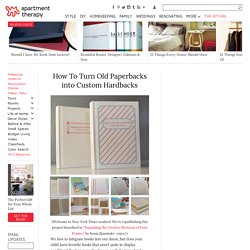
[See THIS POST, if you need more information about the beginning round.] This is what my piece looked like after round 4: Work 2 rounds even (NO INCREASING). Here goes! Creating a PDB. How To Turn Old Paperbacks into Custom Hardbacks. Previous image Next image We love to integrate books into our decor, but does your child have favorite books that aren't quite in display condition?

Beat up paperbacks can easily be turned into custom hardbacks with some scrap cardboard, fabric, a gluestick, and an inkjet printer. Unleash your inner graphic designer with this quick and easy tutorial! Materials: cardboard about 1/3 yard of cotton fabric glue stick tape one sheet of cardstock. Magic Boxes: A Life As Lou Online Class. Due to popular demand, I am doing a tutorial on the Magic Boxes I showed off in some previous posts. To begin, choose your paper. You need six sheets of matching paper (preferably a heavier weight).
Choose one for your outside, budgeting for a contrasting one for your lid, and 4 to create the inside boxes. Cut as follows (all measurement are in inches): Outside: 6 x 11 3/4ths Lid: 8.5 x 8.5 4 inner boxes: 8 x 8 The only challenging part of this project is creating the lid and inside compartments. 1. 2. fold the tips of your paper in so that they meet at the center. Fold in all four sides, and then unfold. 3. This fold gives you the sides of your box. 4. I have also colored four triangles. 5. 6. Do the same thing on the other side. 7.
Repeat this process on your 8 inch and 8.5 inch papers. Now for the outside. 1. 2. To put the boxes in, first adhere one to the very top right corner, making certain that you are flush with the corner of the outside paper.