
3D Text Shatter Effect – Tutorial. I’m going to show you how to make a 3D text shatter effect.

This effect is made in two programs, Cinema 4D and Photoshop.If you haven’t heard of Cinema 4D before it is a relatively easy to use 3d application, it is quite similar to 3dsMax or Maya. I will go pretty in depth with the Cinema 4D part, for all the inexperienced users, so bare with me if I go too slow. Now enough chit chat, let’s jump in. Required Resources In this tutorial we will be using some resources you will want to download before starting: (Optional) Cinema 4d material *NEW* – We just released a font that you can download that creates a similar effect.
Final Image Preview Step 1: Creating the basic text Open up Cinema 4D and make a text object Write “Media Militia” in the text object Now rotate your text object: 90* on the X axis and -90* on the Y axis Create an Extrude NURBS object And drop your text in it Change the object properties of the Extrude NURBS to 0 / 0 / 35 Rename your object “Media Militia” Add 350 to the offset. Using Light and Shade to Bring Text to Life. The best book I've ever read on drawing is one called Drawing on the Right Side of the Brain.
After reading it, I'm still pretty bad at drawing, but I did learn a lot about light and shade. In this tutorial we are going to take some very basic principles of light and shade to make a rather impressive-looking text effect. So before we start the tutorial, here is a little diagram about how light might hit an object. Here we have a square object in the middle with light coming from the top left. You can see that where the light hits the object, a shadow is cast on the other side. We begin the tutorial by drawing a subtle Linear Gradient from dark grey to darker grey. Now we place some text. Next Ctrl-click the text layer and create a new layer above it. Set your foreground color to Black (you can do this by pressing the letter 'D' on your keyboard which restores the defaults).
Now Ctrl-click the text layer again and create a new layer beneath the text layer. Advanced Glow Effects. In this tutorial, we're going to create some really sharp-looking glow effects using a combination of layer styles, the Pen Tool and Color Blending.
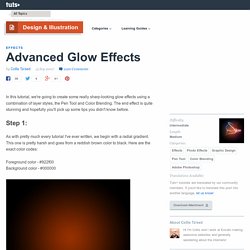
The end effect is quite stunning and hopefully you'll pick up some tips you didn't know before. As with pretty much every tutorial I've ever written, we begin with a radial gradient. This one is pretty harsh and goes from a reddish brown color to black. Here are the exact color codes: Foreground color - #922f00 Background color - #000000 In this tutorial, we actually need a pretty intense center, so what we'll do is duplicate the layer we just made and set the one above to a blending mode of Color Dodge. Now in our glow effect, it helps to have a nice textured background. Then go to Filter > Render > Clouds. Now set the opacity of your layer to Overlay and 30% transparency.
So go to Filter > Sketch > Chrome and use default settings of 4 and 7 for detail and smoothness respectively. In fact all we want to achieve are some nice curves.