

Ideal Crochet Sphere. Whenever I have to crochet a sphere, I always pull out the tried and true method: increase by the same number of stitches each row for a little while, work the rows even for the middle bit, then decrease by the same number of stitches each row until you're finished.
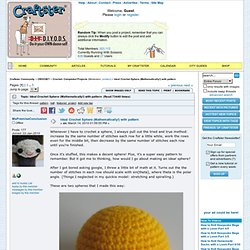
Once it's stuffed, this makes a decent sphere! Plus, it's a super easy pattern to remember. But it got me to thinking, how would I go about making an ideal sphere? After I got bored asking google, I threw a little bit of math at it. Turns out the the number of stitches in each row should scale with sin(theta), where theta is the polar angle. These are two spheres that I made this way: I included the pattern for the 2 spheres at the end of this post. I found it tricky to figure out how to squeeze a weird number of increases into a row where they in no way fit evenly, so let me know how these patterns work out for you if you try these! Also, math is fun! The Patterns: 20 Row Sphere: 26 Row Sphere: Brilliant Crossed Headband. Brilliant Crossed Headband - Free Crochet Pattern Thank you to all those who let me know about the printing problems.

I think the "Print Friendly" code is working again. Not sure what the problem was but it should be working now. Let me know if you still run into issues. And you can still right click and select print. Material: Patons Brilliant, or any other stretchy yarn you may have on hand. Ch 72, join with sl st to first ch being careful not to twist chs. Rnd 1: Ch 1, sc in same ch and in each ch around, join with sl st. Rnd 2: Ch 3 counts as first dc, sk next st, tr in next st, tr in skipped st, *dc in next st, sk next st, tr in next st, tr in skipped st, repeat from * around, join with sl st. Rnd 3: Ch 1, sc in same st and in each st around, join with sl st. Directory of Free, Online Crochet Patterns by Category. Taming the Butterfly. I worked these up over a couple of days.

Hopefully I have worked out all the kinks! These are made to fit about a medium womans size hand. Wrist size about 7 inches with a little room for stretching. I used a G hook and TLC Essentials in medium worsted for the varigated blue version, the lighter set is two strands of baby yarn held together. Right Glove Please feel free to make and do what you wish with the finished product, but please give credit to my site for the pattern. One-Ball-of-Yarn headband. Colorful acrylic yarn from China.
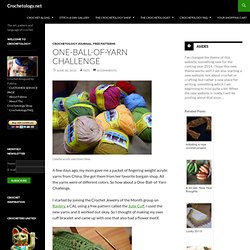
A few days ago, my mom gave me a packet of fingering weight acrylic yarns from China. She got them from her favorite bargain shop. All the yarns were of different colors. So how about a One-Ball-of-Yarn Challenge. I started by joining the Crochet Jewelry of the Month group on Ravlery, a CAL using a free pattern called the Julie Cuff. The Flower Cuff What I wanted was a cuff bracelet that had a bit more contrast in texture but I didn’t want to use more than one color, thus the Irish crochet flower laid on top of a regularly patterned background. Not quite happy with using only a small amount of yarn, I thought of turning the bracelet into a headband. This flower motif headband can be made with just one ball of yarn. It’s quite fun doing projects like these and reviving my fondness for the good old yarn.
The On-Ball-of-Yarn Headband is available as a Free Pattern PDF. Nerdy Amigurumi. Joining Amigurumi. When making amigurumi, you will often need to join an open-ended crocheted piece (e.g. the top of a leg or tail or a muzzle) to a closed crocheted piece (e.g. the body or head).
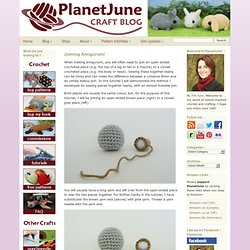
Sewing these together neatly can be tricky and can make the difference between a cohesive finish and an untidy messy join. In this tutorial I will demonstrate the method I developed for sewing pieces together neatly, with an almost invisible join. Both pieces are usually the same colour, but, for the purpose of this tutorial, I will be joining an open-ended brown piece (right) to a closed grey piece (left): You will usually have a long yarn end left over from the open-ended piece to sew the two pieces together. For further clarity in the tutorial, I have substituted the brown yarn end (above) with pink yarn.
Hold the two pieces together in their final position, with the yarn end towards you. Begin the first stitch into the main piece, just outside the place where the two pieces touch: Butterfly Pattern.