
Raspberry Pi - Partager des… - Raspberry Pi :… - Raspberry Pi :… - Raspberry Pi :… - Réception du… - KeepLoGeek. RPi iSCSI Initiator. Back to RPi Guides.
Raspberry Pi iSCSI Initiator Setup This guide is split into two parts, part 1 deals with rebuilding the standard Raspbian/Debian image to include iscsi support so that the pi can access an iscsi target (and function as a target itself if needed, but this guide deals with setting up as an initiator), part 2 then extends on this to enable booting from an iscsi root. For the sake of simplicity we will be performing on-device kernel recompiles, these take 4-6 hours, you can simply perform a cross-compile elsewhere to speed this up if you prefer. This guide assumes a number of things: At least a basic knowledge of iscsi, and that you already have a suitable target setup on your SAN/NAS/wherever.
Using NFS to provide extra disk to a Raspberry PI. As the Raspberry PI uses an SD Card for it’s boot device there are times when you need either more space than is available on that device or a device that’s faster – writing to flash is slow and flash cards do have a limited number of writes that can be made to them.

Now there’s several ways to accomplish this: Use an external USB drive (the common route)Use a network shared drive Using a USB drive is simple and is the faster option but it means it’s dedicated to the PI whilst it’s in use, hence this article on using a network drive – in this instance a directory on another Linux box in the network. Utilisez votre Raspberry Pi avec Open Z-Wave. La librairie Open Source nommée Open Z-Wave présente l’avantage d’être gratuite.
Quelques logiciels l’utilisent tels que Lights Control, aGoControl ou HomeGenie. Nous vous proposons une petite présentation ainsi qu’un test de ces solutions. Matériel requis : Raspberry Pi Tutorial – Connect to WiFi or Create An Encrypted DHCP Enabled Ad-hoc Network as Fallback. In this post I describe how I have configured my Raspberry Pi (RPi) to first attempt to connect to WiFi and if that fails, create and use an ad-hoc network as fallback (in this way I can always reach the RPi via SSH).
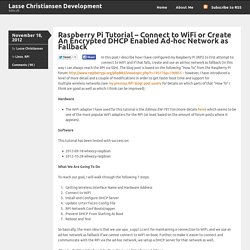
The blog post is based on the following “How To” from the Raspberry Pi forum: – however, I have introduced a level of more detail and a couple of modifications in order to get faster boot time and support for multiple wireless networks (see my previous RPi blogt post suvery for details on which parts of that “How To” I think are good as well as which I think can be improved). Hardware The WiFi adapter I have used for this tutorial is the Edimax EW-7811Un (more details here) which seems to be one of the more popular WiFi adapters for the RPi (at least based on the amount of forum posts where it appears).
Software This tutorial has been tested with success on: Tutorial – Adafruit NFC/RFID on Raspberry Pi #piday #raspberrypi @Raspberry_Pi. August 3, 2012 AT 10:47 am Tutorial – Adafruit NFC/RFID on Raspberry Pi @ The Adafruit Learning System Interested in adding some NFC fun and excitement to your Raspberry Pi?
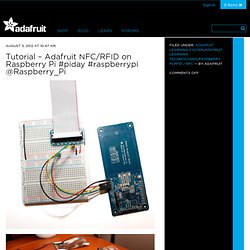
You’re in luck! Tutorial: Créer un serveur web complet sous debian - #1 Apache. Voici un nouveau tutorial qui vous sera sans doute utile si vous venez d'installer la distribution linux Debian (Ou Ubuntu) sur votre serveur.

Introduction Objectif de ce tutorial L'objectif du tutorial est d'obtenir un serveur linux debian permettant d'héberger et de gérer vos sites web PHP / MySQL à distance, uniquement avec un accès SSH. Tutoriel pour débuter avec le Raspberry Pi - Blog benji1000.net. J’ai reçu cette semaine mon Raspberry Pi, et j’ai décidé de faire un petit guide pour ceux qui, comme moi, débutent avec cet engin !
J’espère qu’il sera assez clair, n’hésitez pas si vous avez des questions. Voilà tout d’abord un lien pour commander un Raspberry Pi. Mise à jour de cet article : 10 Janvier 2014 Achats supplémentaires Avant d’utiliser votre Raspberry Pi, il vous faudra : [Tuto] Installer MPD sur Raspberry Pi (distrib Raspbian) Raspberry Pi est une petite carte se comportant comme un PC.
![[Tuto] Installer MPD sur Raspberry Pi (distrib Raspbian)](http://cdn.pearltrees.com/s/pic/th/installer-dematerialisee-47884955)
Elle est vendu 35 USD et nous la transformons ici en lecteur audio réseau avec MPD. Code: Tout sélectionner ssh -l pi <adresse ip> pi est le nom d'utilisateurLa commande pour vérifier si MPD tourne déjà ou non. certaines erreurs viennent de là ps aux | grep mpd. An Unofficial Raspberry Pi Blog: How to Setup Remote Desktop from a Windows Machine to your Raspberry Pi - Step by Step Guide. As I mentioned in the previous post I recently found the need to be able to remote desktop to my Raspberry Pi.
This is a step by step guide on how to set it up. What does this guide help me do? It will let you control your Raspberry Pi from another machine. Meaning that the Raspberry Pi will not need to be connected to a monitor, keyboard or mouse. Before we get started a few clarifications: S Raspberry Pi Lesson 7. Remote Control with VNC @Raspberry_Pi +raspberrypi #piday. December 21, 2012 AT 7:46 pm Adafruit’s Raspberry Pi Lesson 7.
Remote Control with VNC @ The Adafruit Learning System. In this lesson we will explain how to install and use VNC on your raspberry Pi. Blog.anth-o.fr/fichiers/tutos/RaspberryPi-FreeboxV6.pdf.