
EverythingEtsy.com — Etsy Blog. Just a Girl Blog — Interior design ideas on a DIY budget. My Little Lane. . . .that has happened in the last little while!
Let's see, my kids & I kicked it for about two months without their dad/my husband as he moved across the country to start a sah-weet new job and find us some equally sah-weet new digs, my oldest son graduated preschool, I packed up our house, we partied it up with our Idaho pals, visited family & good friends in Utah, survived a hospital stay for my little son, and a hop, skip and a jump across the country to our new home. Not to mention unpack, organize our house and fill the refrigerator with food right in time to see our first derecho and enjoy a few balmy 100 degree days without power!
Driving around a city I am unfamiliar with, I'm remembering quite clearly why I originally named my GPS navigation program Dirty Rhonda. She plays dirty tricks on me; like instead of taking me to WalMart, she takes me to a rough looking section of town and announces proudly that I have arrived at my destination. A Beautiful Mess. I love using cloth napkins to dress up our dinner table, and through the years I've grown even more fond of their sustainability and cost effectiveness.

Though, I'm not sure how cost effective it is if you keep buying more and more cloth napkins each year! This holiday season I thought it would be fun to look at how I could dress up the napkins I already own to give them an extra festive vibe. Check out three simple ways you can give new life to your table linens. And hey! Two of them are even no sew! Ribbon Trimmed Napkin This look is so (no sew) simple! Supplies:-ribbon-heat bond in width of ribbon-cloth napkin (buy mine here)-iron-fabric scissors (not shown above) Step One: Trim pieces of your ribbon to be about 1.5 inches longer than the width of your napkins. Step Two: Fold down the edges of each ribbon segment about 1/4" and iron flat. Step Three: Iron the heat bond to the ribbon (pressing with hot iron for two seconds), then peel off the paper backing. Ducks in a Row. Design, Craft & Inspiration. A Lemon Squeezy Home.
Just me My Soldier and our 4 little chicks. Source So I've been mulling over this post in my head for a while.

And today I want to finally type it out and put it out there. I'm sure I'll get flak for it. And that's okay. Or maybe I won't. Goodbye City Life. A girl and a glue gun. What Happens Next. Be sure to read all the way to the bottom for details on our giveaway!!

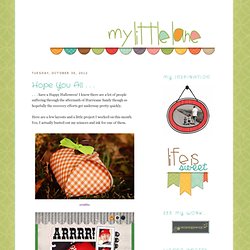
I grew up in a family where St. Patrick's Day was loved and celebrated. Suffice it to say that "When Irish Eyes Are Smiling" and "Oh, Danny Boy" were frequently playing in our house near the middle of March. And we were known to have a old-fashioned singalong of Irish tunes in grammar school, as well... As a result, for me there is still something stirring and special about this day. This year, a slender, glittery Leprechaun Wand seemed a fitting token, diminutive in size but big on sparkle and celebration. So simple... Here is what you will need to make your own Leprechaun Wand: Heart dies and die-cutting machine. I used Spellbinders Classic Scalloped Hearts, the same ones used for the Valentine's Day Heart Wand Tutorial.
Approximately 3" x 5" piece of chipboard. Small amount green glitter of choice. 8" piece of heavy floral wire, very small round dowel, or even a wooden meat skewer. Rhinestone button. Hot glue gun.