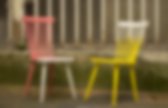
Bright Geometric Patterns. Bright colors are kind of out of my comfort zone!
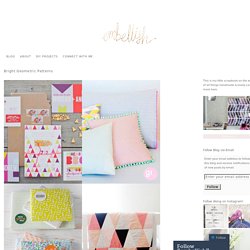
I tend to be drawn more to neutrals, soft or moody colors, in fashion, decorating, and crafting. However, I do sometimes like a pop of bright, unexpected color. The above bright geometric patterns are so fun and great inspiration for future DIYs! *Images via Martha Stewart Weddings, Sokeen, Wolf and Willow, See Kate Sew. The Lovely Drawer. I have A LOT of necklaces!
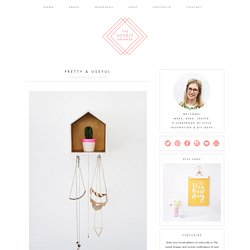
I mean A LOT. They’ve been hanging out in various bowls, trays and dishes around our bedroom, leaving me rooting around like a crazy women in the morning having forgotten which one I put which in. For a while I tried those sticky hooks on the wall next to my mirror but I can safely say folks, they just aint that strong. There came a point where I was beyond sick of sticking them back onto the wall and rooting around on the floor to retrieve the debris. Affordable Home Tip no 3. Today spells the last of this weeks ‘Affordable Home Tips’ in association with Keep Moat.
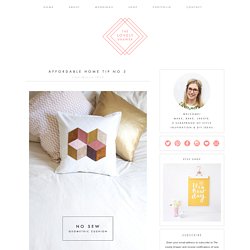
Each day I brought you simple and inexpensive DIY projects to liven up your home, often using things you already have. Today is the simplest of the bunch! This statement cushion doesn’t involve any sewing and can be whipped up in less than an half an hour. If you have any plain cushion covers that need a revamp then this is the DIY for you. There’s even a free printable template to get you started. DIY: Venessa Arizaga inspired Tiered Chain Collar - The Stripe. This project was inspired by a necklace I saw by Venessa Arizaga.
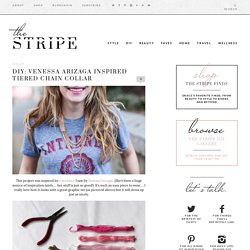
(She’s been a huge source of inspiration lately… her stuff is just so good!) It’s such an easy piece to wear… I really love how it looks with a great graphic tee (as pictured above) but it will dress up just as nicely. Materials: About 7-8 feet of curb chain // Three colors of embroidery floss // Pliers // Two large crimp cord ends // Two jump rings // Large Lobster Clasp // Needle (not pictured) // Sharp Scissors Add a clasp to the other side, and you are done! Top photo by Lydia Hudgens, all other photos by Stripes & Sequins. Twigs Reindeer. Gather materials.
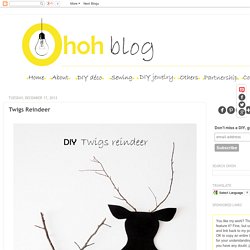
You’ll need a sheet of black cardboard (1mm thick), some twigs, white glue, scissors, a pencil and double-sided tape. Reúna el material. Necesitarán una hoja de cartón negro (1 mm de espesor), algunas ramitas, pegamento blanco, tijeras, un lápiz y cinta adhesiva de doble cara. Vous aurez besoin d'une feuille de carton noir (1 mm d'épaisseur), quelques brindilles, de la colle blanche, une paire de ciseaux, un crayon et du ruban adhésif double-face. You must print the reindeer silhouette and cut it. Debe imprimir la silueta de reno y cortarla. Vous devez imprimer la silhouette de renne et la couper. Cut the the reindeer's silhouette - recorte la silueta - Couper la silhouette On the back, glue two twigs to make reindeer’s antlers.
En la parte posterior, pegan dos ramitas para hacer las astas del reno. Sur le dos, coller deux brindilles pour faire les bois du renne. You can use clothespins to keep the twigs and wait until the glue dries. DIY Geo Lampshade. If you regularly take a look on crafts blogs, you couldn't have miss the geoball vibe!

I saw on a nice french blog (which I unfortunately don't remember the name ...I finally found it) these Geo lampshade. The project was perfect for my bedroom. I followed the Weekday Carnival's tutorial, it's very easy ... except I couldn't remember how to draw a hexagon (is the basis shape for this project). So I've made you a board with the steps to draw a geoball. Si ves regularmente los blogs de manualidades, no pudiste perderte las geoball! Si vous regardez régulièrement sur les blogs, vous n'avez pas pu manquer les geoball! What you must have at this point; glue the triangles on top of each other following arrows. Lo que debe tener ahorita; pega los triángulos unos sobre otros siguiendo las flechas.
Ce que vous devez avoir a ce stade; collez ensuite les triangles les uns sur les autres en suivant les flèches. Et voila!!! I used the white cardboard (0.5 mm) and painted inside with acrylic. DIY wall decoration / Decoracion de pared. This is an easy idea to decorate your wall with wood sticks!
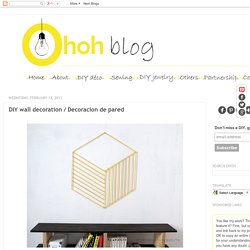
I made an hexagon but I will work with other shape, just give a try! You gonna need 25 sticks (18" length), a drill, needle and threat, and 3 pushpins (to fix it in the wall) Una idea sencilla para decorar una pared con palillos de madera! Hice un hexágono pero lo pueden hace con otras formas, so hay que intentar! Van a necesitar 25 palillos de madera (45 cm), un taladro, una aguja y hilo, y 3 chinchetas (para suspender lo en la pared) Start by making the shape with the sticks and mark the intersections where you must drill a hole to join sticks together.