
Easter Egg Garland » Crafty Endeavor. I made some Easter eggs today out of string, and turned some of them into a garland.
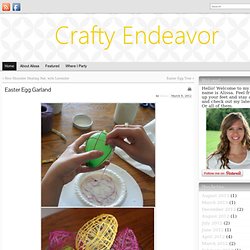
Here’s how I did it! Make a stiffener mixture. I used 1 cup of liquid starch mixed with a half cup of flour, and blended it in a blender. You could double or triple this recipe if you’d like. I did. Next I got some string, I used embroidery floss. Apparently the embroidery floss section of the store is a dangerous place, I grabbed a bunch and couldn’t stop myself. Then you stick your string in a bowl of starch goo, but don’t just plop it in there like I first did. For a little egg, blow up a water balloon and wrap the gooey string around the balloon. One skein of embroidery floss was just enough for one water balloon sized egg.
It’ll take several hours for it to dry. Update: After reading some comments, I think it’s important to mention that you need to fill the water balloons up with air and not water. I stuck a bunch of finished eggs into a trifle bowl and thought it looked swell… And that’s it! Tinted Mason Jars in Rainbow. I love using mason jars for decorating and a seemingly endless supply of craft projects. But rainbow tinted mason jars, just like the vintage ones you can never find anymore? This one might be my favorite project with mason jars yet! Mason Jars Mod Podge in Gloss (buy it here) Food coloring Ramekins to mix colors Newspaper or paper bag Mix food coloring with a T or so of water into individual ramekins. You can do any color combination you like. Add a couple T of mod podge into your mason jar Add one ramekin of color into the jar and stir to incorporate it all together With a bowl underneath, carefully twist the jar around coating the whole inside with the mod podge/food coloring mixture.
Let dry upside down on the paper Do the same with the other colors. Place the jars face down on top of wax paper and a cookie sheet into an oven, set on warm. When they're ready, they'll look clear and the mixture should lose most of its streaks. Felt Ogee Ornament Tutorial. I woke up this morning with an image in my head of a felt snowflake.
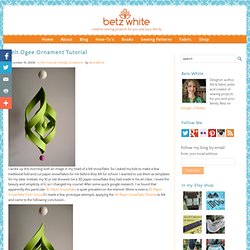
So I asked my kids to make a few traditional fold and cut paper snowflakes for me before they left for school. I wanted to use them as templates for my idea. Instead, my 10 yr old showed me a 3D paper snowflake they had made in his art class. I loved the beauty and simplicity of it, so I changed my course! After some quick google research, I’ve found that apparently this particular 3D Paper Snowflake is quite prevalent on the internet. …it worked! Step 1: Cut one 6″x 6″ square of felt. Step 2: Using a straight edge and an Xacto knife, cut along the first line from the corner to about 1/4″ from the diagonal line.
Repeat until all cuts have been made, keeping the felt intact at each corner on the diagonal line. Step 3: Lift the corners of the center square and hand stitch the ends together with matching thread. Step 4: Turn the piece over and lift the corners of the second square. Button Cowl (Step-by-Step) If you're new here, you may want to subscribe to get updates, freebies and all sorts of goodness .
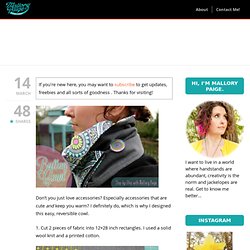
Thanks for visiting! Don’t you just love accessories? Especially accessories that are cute and keep you warm? I definitely do, which is why I designed this easy, reversible cowl. 1. 2. 3. 4. 5. 6. 7. 8. 9. You can wear it with mostly gray showing. Or show off the patterned side. Or wear it with a bit of both showing. I’d love to see pictures of your finished cowl, so send me an email at mallory@mallorypaige.com.