

Faux Pearl Necklace. Jade Beaded Necklace with Ribbon - Martha Stewart Crafts by Material. Acorn Earrings. These earrings for your bridesmaids boast BFF-worthy qualities (they're hip, handmade, and look expensive) -- yet they cost just a few dollars.
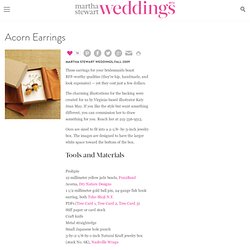
The charming illustrations for the backing were created for us by Virginia-based illustrator Katy Jean May. If you like the style but want something different, you can commission her to draw something for you. Reach her at 215-356-9513. Ours are sized to fit into a 2-1/8- by-3-inch jewelry box. The images are designed to have the larger white space toward the bottom of the box.
Tools and Materials. Simple Projects Week: Necklaces! Just a quick idea today!
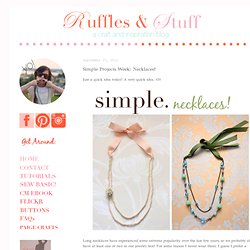
A very quick idea. :O) Long necklaces have experienced some extreme popularity over the last few years, so we probably all have at least one or two in our jewelry box! Easy Button Earrings Tutorial. Did you know...that you can make new earrings with a button and a paperclip?

True story! I've been trying to think of a way for us to make some earrings without having to buy supplies. Buying the beads and all the findings can really add up. :o( Sad. But-oh, what? That still leaves the findings. Clip the top of the paperclip off with wire cutters: Snap off the button shanks: Glue the paperclip to the back of the button. Open the loop at the bottom of your earring hook by bending it outward and hook it onto your paper clip. Country Living Shrinky Dinks Jewelry. I’ve been beyond excited about the new March issue of Country Living magazine coming out this week!
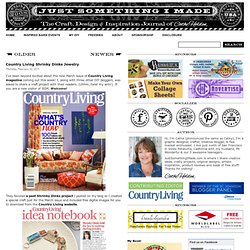
I, along with three other DIY bloggers, was asked to share a craft project with their readers. (Uhhm, twist my arm!) If you are a new visitor of JSIM, Welcome! They favored a past Shrinky Dinks project I posted on my blog so I created a special craft just for the March issue and included free digital images for you to download from the Country Living website. The images are modified scans of vintage flea market ephemera I’ve collected, most of which I’ve shared with you on my blog. Once the images are downloaded , (don’t worry that they look faded, they will burst with color once baked), print to 8 x 10″ Shrinky Dinks sheets made specifically for ink jet printers. Trim out the individual pieces. If creating a linking bracelet, punch two holes- one on each side of the images you want to link. Bake as directed to shrink the images. Finish with a toggle or clasp. An ID card. Share. Amazing Glaze: Pet Tag Memory Pendants & Other Decal Charms.
My Decal Penny Pendants project has become one of the all-time most popular posts on JSIM.
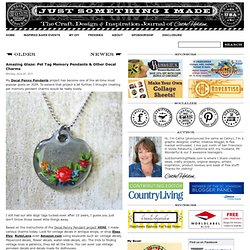
To extend that project a bit further, I thought creating pet memory pendant charms would be really lovely. I still had our late dogs’ tags tucked even after 10 years, I guess you just don’t throw those sweet little things away. Based on the instructions of the Decal Penny Pendant project HERE, I made various charms today. Look for vintage decals in antique shops, or shop Ebay, Etsy, RubyLane even Amazon.com using keywords such as: vintage decals, Meyercord decals, flower decals, water-slide decals, etc.
I keep a tiny salt spoon handy to use with my Amazing Glaze Enameling Resin, which also comes in bulk. And this one in memory of Annie. Joyful braided bracelet tutorial. So I wrote this post 2 weeks ago but I’ve been trying to think of a way to make tutorials easier for me and for you, that’s why I had it on hold.
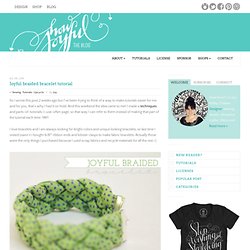
And this weekend the idea came to me! I made a techniques and parts-of-tutorials-I-use-often page, so that way I can refer to them instead of making that part of the tutorial each time. YAY! I love bracelets and I am always looking for bright colors and unique looking bracelets, so last time I visited Joann’s I bought 6/8″ ribbon ends and lobster clasps to make fabric bracelets. Actually those were the only things I purchased because I used scrap fabrics and recycle materials for all the rest =] I also wanted to share that this tutorial is for very light-weight fabrics, since I didn’t have much of it, I could not just roll 4 big pieces and make the braid, instead I made little straps and run pieces of cord on the inside to give them volume. First I cut 2″ wide of my fabric. To learn how to braid with 4 strands you can see the details here.
DIY Entry #36: Toggle Necklace. Happy Thanksgiving everyone! I hope that no matter where you are or whether or not you celebrate the holiday that you are having a wonderful day! Amanda sent us a gorgeous DIY toggle necklace, which would be perfect for a bridesmaid gift! You will need: - chain (14″-16″ depending on how long you prefer) - crystal bead - rings (those tiny metal circles used in jewelry) - wire (for wrapping the bead, but you can also use a ring instead)) - toggle clasp - jewelry pliers Cut the chain in 2 pieces (one that is 1.75″ long and other 15″ long) With the help of pliers, open up the ring and connect the long chain and one piece of the toggle.
Braided Charm Bracelet. Charm friends and family with some customized craftiness!

Photos: kirsten for we heart this Welcome to my July DIY of the month at we heart this!