
82 Clever and Creative Fred & Friends Products. I'm sure you've come across Fred & Friend products before at your local indie store and might not have even known it.

Last weekend I was cruising around town and stopped at an indie store only to find one whole corner of the place dedicated to Fred & Friend products. It was heavenly. I stood there for probably more than a half hour laughing and checking out all their cool stuff. A lot of creativity goes into the making of these products, and I think part of that cleverness is shown in the name of the product and the slogan. It's really a hoot flipping through their catalog and I often find myself posing the question: "How in heavens name did they think of that?
". Which one's your favorite? Disclaimer: the images you're about to view may not be suitable for all audiences. The OH! Conversational paperclips the hot buttered desk accessory! There’s no esc for flies! Bigger, better, louder, cooler who says dusting can’t be fun? We ALL need a foot in the door rude, chewed refrigerator magnets. Belt Sander Belt Messenger/Laptop Bag.
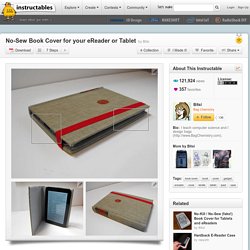
No-Sew Book Cover for your eReader or Tablet. This is the most important and time consuming part of the project.

Seriously. I spent 15 minutes making the cover, and two days picking out the book. Here are things to look for. 1. Right size. 2. 3. 4. I found this cheap book club edition of "Meditations" by Marcus Aurelius that was just perfect. Use an Aluminum Can as a Wi-Fi Extender. My Own Landscape Dreams: "Casinha para o meu celular" Eu gosto de pensar que cada objeto tem a sua “casa”. Acho que tudo fica muito mais fácil quando conseguimos guardar cada objeto em seu próprio cantinho. Para isso, nada melhor do que caixinhas, potinhos ou vidrinhos! E para quem adora um projeto craft, o céu é o limite e todo o trabalho acaba se tornando uma grande diversão, não é verdade?! Mesmo com todo o esforço em colocar cada objeto em seu respectivo lar, meu celular nunca teve um espacinho que ele pudesse chamar de seu, rs!
A cada hora eu o colocava em um lugar diferente. As três coisas que mais me chamaram atenção para esse projeto foram o fato de ser uma ideia totalmente reciclável, ter custo zero, e ver finalmente o meu celular em um lugarzinho só dele! Nós vamos precisar de: → um pote vazio de plástico (pode ser shampoo, sabonete líquido, condicionador, etc); → tesoura; → lixa de unha; → estilete.
Opcionais: → cola para tecido; → viés (tecido, renda, botões, etc) O primeiro passo é observarmos o tamanho do nosso celular. Ipad cover tutorial. We recently bought a new iPad 2 for work and I was floored at the prices of covers…..I just couldn’t bring myself to spend that much. My husband’s friend Walker jokes that his composition notebook is his “low-tech iPad” because it is exactly the same size…..so it gave me an idea.
I would make a cover for our new iPad out of one of the old composition notebooks I had sitting around. Turns out it was pretty easy using the box my iPad came in, some hair elastics and a notebook with the pages removed. Here is how I made an easy, inexpensive iPad cover: Photo 1 & 2: I took a razor blade and cut out the pages…..this composition book was on its last leg so they basically fell out.Photo 3 & 4: I removed the plastic insert from the box that the iPad came in and marked the height of the notebook for reference on the side. Photo 13, 14, 15 & 16: I took 2 black elastic hair bands and sewed each onto one corner at two points using needle and thread.
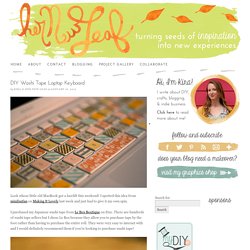
An iPad cover for $2.99. Hey! Look What I Made!: Lace Phone Case. DIY Washi Tape Laptop Keyboard. Look whose little old MacBook got a facelift this weekend!

I spotted this idea from minifanfan on Making It Lovely last week and just had to give it my own spin. I purchased my Japanese washi tape from Le Box Boutique on Etsy. There are hundreds of washi tape sellers but I chose Le Box because they allow you to purchase tape by the foot rather than having to purchase the entire roll. They were very easy to interact with and I would definitely recommend them if you’re looking to purchase washi tape! I chose these ten patterns but only ended up using eight of them on my keyboard.
I first thoroughly cleaned my keyboard with rubbing alcohol to remove any dirt or oil that might keep the tape from sticking. I originally wanted to do all the keys, including the small keys in the top row, but the tape seemed to have a harder time sticking to the small keys. This project was a bit tedious but simple – perfect for a few hours in front of the tv. What do you think? Tagged as: craft, diy, tutorial.