

Diy {bird nest necklace} I have been seeing a lot of bird nest jewelry around lately.
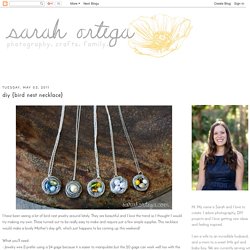
They are beautiful and I love the trend so I thought I would try making my own. These turned out to be really easy to make and require just a few simple supplies. This necklace would make a lovely Mother's day gift, which just happens to be coming up this weekend! What you'll need: - Jewelry wire (I prefer using a 24 gage because it is easier to manipulate but the 20 gage can work well too with the help of some round nose pliers) - pearls or glass beads - necklace chain - jump ring and a clasp Select the beads you want, string them onto your wire and arrange them as you'd like. then simply wrap the wire around the beads wrap some wire in the space between each bead (I like the look of three loops but you could just do one or two if you prefer) this is what the back looked like.
Now attach a jump ring and a clasp to the end of a necklace chain and this is what you end up with :) Mini DIY Round-up. TUTORIAL] Book Page Necklace. I introduced this necklace a while back and sold a couple at the facebook sale, but since my shop is going in a different direction, I've decided to share the tutorial for this necklace.
![TUTORIAL] Book Page Necklace](http://cdn.pearltrees.com/s/pic/th/mandipidy-tutorial-necklace-20547858)
MATERIALS NEEDED: 30" of chain 2 pages from an old book 1 piece of poster board Glue 1 quarter Scissors Varnish Matches Pearls Jump rings Lobster Claps [1] Cut two pieces of chain, 15 1/2, and 18 inches long. [2] Attach the two chains at both ends with small jump rings: [Should look like this] [3] Rip out 2 pages from an old book. . [4] Trace a quarter on the book page: [5] Cut out the tracing: Recycled scraps. I have a large growing pile of fabric scraps.
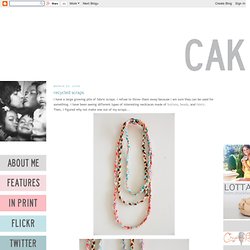
I refuse to throw them away because I am sure they can be used for something. I have been seeing different types of interesting necklaces made of buttons, beads, and fabric. Then, I figured why not make one out of my scraps... I think it made my white shirt a little less boring. This was so quick and easy to make. 1. 2. 3. 4. 5. 6. 7. Joyfolie: DIY Wednesday - Lace Crowns. Yesterday I posted some photos of our Luna shoes and matching clip with the crown above.
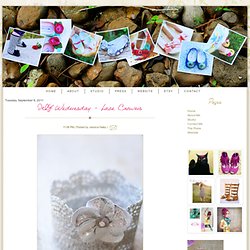
Mia and I made the crown together, and today I will show you the step by step to make your own lace crown. A few notes before I begin the tutorial: this was not my original idea. DIY: Infinity Scarf from Tshirt. Make your own circlescarf. In Need of Some Color. I'm desperate for a little color in my life.
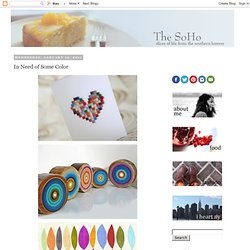
It's gray outside, yesterday it rained ice, something needs to change here. One of these items should do it, or I could just go get a tan on a beach somewhere. I'm okay with either option. [mosaic card; reclaimed wood; abstract print; bird pillow] Bilderrahmen der Extraklasse. Wenn das mal nicht eine goldige Anleitung ist!
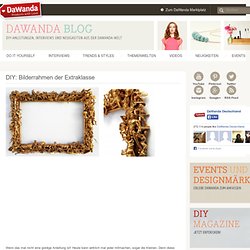
Heute kann wirklich mal jeder mitmachen, sogar die Kleinen. Denn diese DIY bietet die perfekte Gelegenheit, um mal wieder das Spielzeuglager aufzuräumen und Kleinkram zu recyclen. Sucht schonmal die Spielfigursammlung, Ü-Eier etc, zusammen, Carolin vom Shop Caroletta-Kinderzimmerkunst zeigt Euch, wie es geht! Das braucht Ihr: einen alten, gerne auch ollen, Rahmen (von dem sieht man ja am Ende nichts mehr)Kleinkram, am besten Spielfiguren. So gehts: Mit der Heißklebepistole setzt Ihr die Figuren schön dicht auf dicht an den Rahmen.
Jetzt kommt das Spray zum Einsatz. Da hat sich Carolin aber eine tolle Idee einfallen lassen. Möchtest Du uns auch Deine Anleitung schicken? Polymer Clay Tutorials - Handmade Tools. Grab a little container of some sort and go on a treasure hunt!
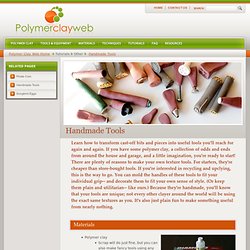
Collect any promising bits and pieces you come across (that you are willing to dedicate to craft-only use). A few good places to start are your kitchen (or office) junk drawer, that little box or jar in the craft room where you put stuff that has no real use (but that you can't bear to throw away), and the jar where you store rancom bits of hardware (or the bottom of your tool box, or wherever else such odds and ends accumulate). Look for (but don't limit yourself to) needles, buttons, screws, nuts, bolts, beads, bead caps, scraps from nonfunctional mechanical objects, gears, paper clips, grommets, washers, pieces of pens, scraps and findings from broken (or out-dated) fashion jewelry, chains, orphan earrings, wires, springs, coins, seashells, and small stones, pebbles, or gravel.
Oven-safe bits and pieces are best. (Think metal and glass.) DIY: Make your own Halloween dinnerware. So now you've seen my interpretation of a Raven themed dinner party, I wanted to show you how I made the dinnerware.
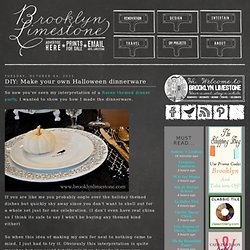
If you are like me you probably oogle over the holiday themed dishes but quickly shy away since you don't want to shell out for a whole set just for one celebration. (I don't even have real china so I think its safe to say I won't be buying any themed kind either) So when this idea of making my own for next to nothing came to mind, I just had to try it. Obviously this interpretation is quite macabre but you could totally mix it up to make it your own - think nursery rhymes for baby showers, holiday song lyrics for christmas, bible passages for easter, dirty doodles for hen nights...
I could go on and on. Start off with plain white plates of your choosing (available cheaply everywhere), a porcelain 150 pen, some blue masking tape and a small stencil (optional). Now on to the little plate. I added the 'nevermore...' under the bird and the hard work was over.